
1. Uvod
The Polaroid PLRTC18 Shutter Release Timer Remote Control is designed to provide precise control over your camera's shutter, enabling advanced photographic techniques such as time-lapse, long exposures, and delayed shots. This device connects directly to your compatible Canon DSLR camera via a dedicated cable, allowing you to program various timing functions with accuracy.

Figure 1.1: User operating the PLRTC18 remote control with a camera on a tripod.
Please read this manual thoroughly to understand the features and proper operation of your new remote control.
2. Sadržaj paketa
- Polaroid PLRTC18 Shutter Release Timer Remote Control
- Camera Connection Cables (2 types for broad compatibility)
- korisnički priručnik
- AAA baterije (2)
3. Postavljanje
3.1. Ugradnja baterije
The PLRTC18 requires two AAA batteries for operation. To install:
- Pronađite poklopac pretinca za baterije na stražnjoj strani daljinskog upravljača.
- Otvorite poklopac u smjeru strelice.
- Insert two AAA batteries, ensuring correct polarity (+/-) as marked inside the compartment.
- Zatvorite poklopac odjeljka za baterije dok se sigurno ne učvrsti na mjestu.

Slika 3.1: Pretinac za baterije s dvije AAA baterije.
Bilješka: To conserve battery life, it is recommended to remove the batteries when the remote control will not be used for an extended period, as there is no dedicated ON/OFF switch.
3.2. Povezivanje s kamerom
The remote control connects to your camera using one of the provided cables. Identify the correct cable for your specific Canon DSLR model.
- Plug one end of the appropriate connection cable into the remote control's port.
- Plug the other end of the cable into your camera's remote control terminal. This is typically a 3-pin or mini headphone jack style port, often located on the side of the camera body.
- Provjerite jesu li obje veze sigurne.

Figure 3.2: Connecting the remote control cable to a Canon camera.
4. Upute za rad
4.1. Kontrole nadview
Familiarize yourself with the buttons and LCD display on the remote control:

Figure 4.1: PLRTC18 Remote Control Layout.
- LCD zaslon: Shows current settings for DELAY, LONG, INTVL (Interval), and N (Number of exposures).
- Gumb SET: Koristi se za ulazak u način podešavanja i potvrdu odabira.
- Tipke sa strelicama (gore/dolje/lijevo/desno): Used to navigate between settings and adjust values.
- TIMER START/STOP Button: Initiates or stops the programmed timer sequence.
- /LOCK Button: Functions as a manual shutter release (half-press for focus, full-press for shutter) and can lock the remote.
4.2. Setting Timer Functions
The remote control allows you to set four primary timing parameters: Delay, Long Exposure, Interval, and Number of Exposures. All settings can be adjusted up to 99 hours, 59 minutes, and 59 seconds in one-second increments.
- Pritisnite tipku SET button to enter the setting mode. The first parameter (DELAY) will begin to flash.
- Koristite Strelica lijevo/desno buttons to navigate between DELAY, LONG, INTVL, and N.
- Koristite Strelica gore / dolje buttons to adjust the values for the selected parameter (hours, minutes, seconds).
- After setting a value, press SET again to move to the next digit or parameter.
- Once all desired parameters are set, press SET until the display stops flashing and returns to standby mode.
4.2.1. DELAY (Self-Timer)
This sets the amount of time before the first exposure sequence begins. Useful for getting into the shot or allowing camera vibrations to settle.
4.2.2. LONG (Exposure Time)
This sets the duration the camera's shutter will remain open for each exposure. Set your camera to Bulb mode for this function to work correctly.
4.2.3. INTVL (Interval Time)
This sets the time between the end of one exposure and the start of the next. Essential for time-lapse photography.
4.2.4. N (Number of Exposures)
This sets the total number of exposures the remote will trigger. Set to "---" for an unlimited number of shots.
4.3. Pokretanje i zaustavljanje timera
Once your desired settings are programmed:
- Pritisnite tipku POKRETANJE/ZAUSTAVLJANJE TAJMERA button to begin the programmed sequence. The LCD will display a countdown or active timer.
- To stop an ongoing sequence, press the POKRETANJE/ZAUSTAVLJANJE TAJMERA ponovno gumb.
4.4. Manual Shutter Release
The remote control can also function as a simple wired shutter release.
- Pritisak do pola: Pritisnite tipku /ZAKLJUČAJ button halfway down to activate your camera's autofocus.
- Cijeli tisak: Pritisnite tipku /ZAKLJUČAJ button fully down to trigger the shutter.
- Locking the Shutter: For continuous shooting or long exposures in Bulb mode (without using the LONG timer function), press the /ZAKLJUČAJ button fully down and slide it forward to lock it in the depressed position. Slide it back to release.
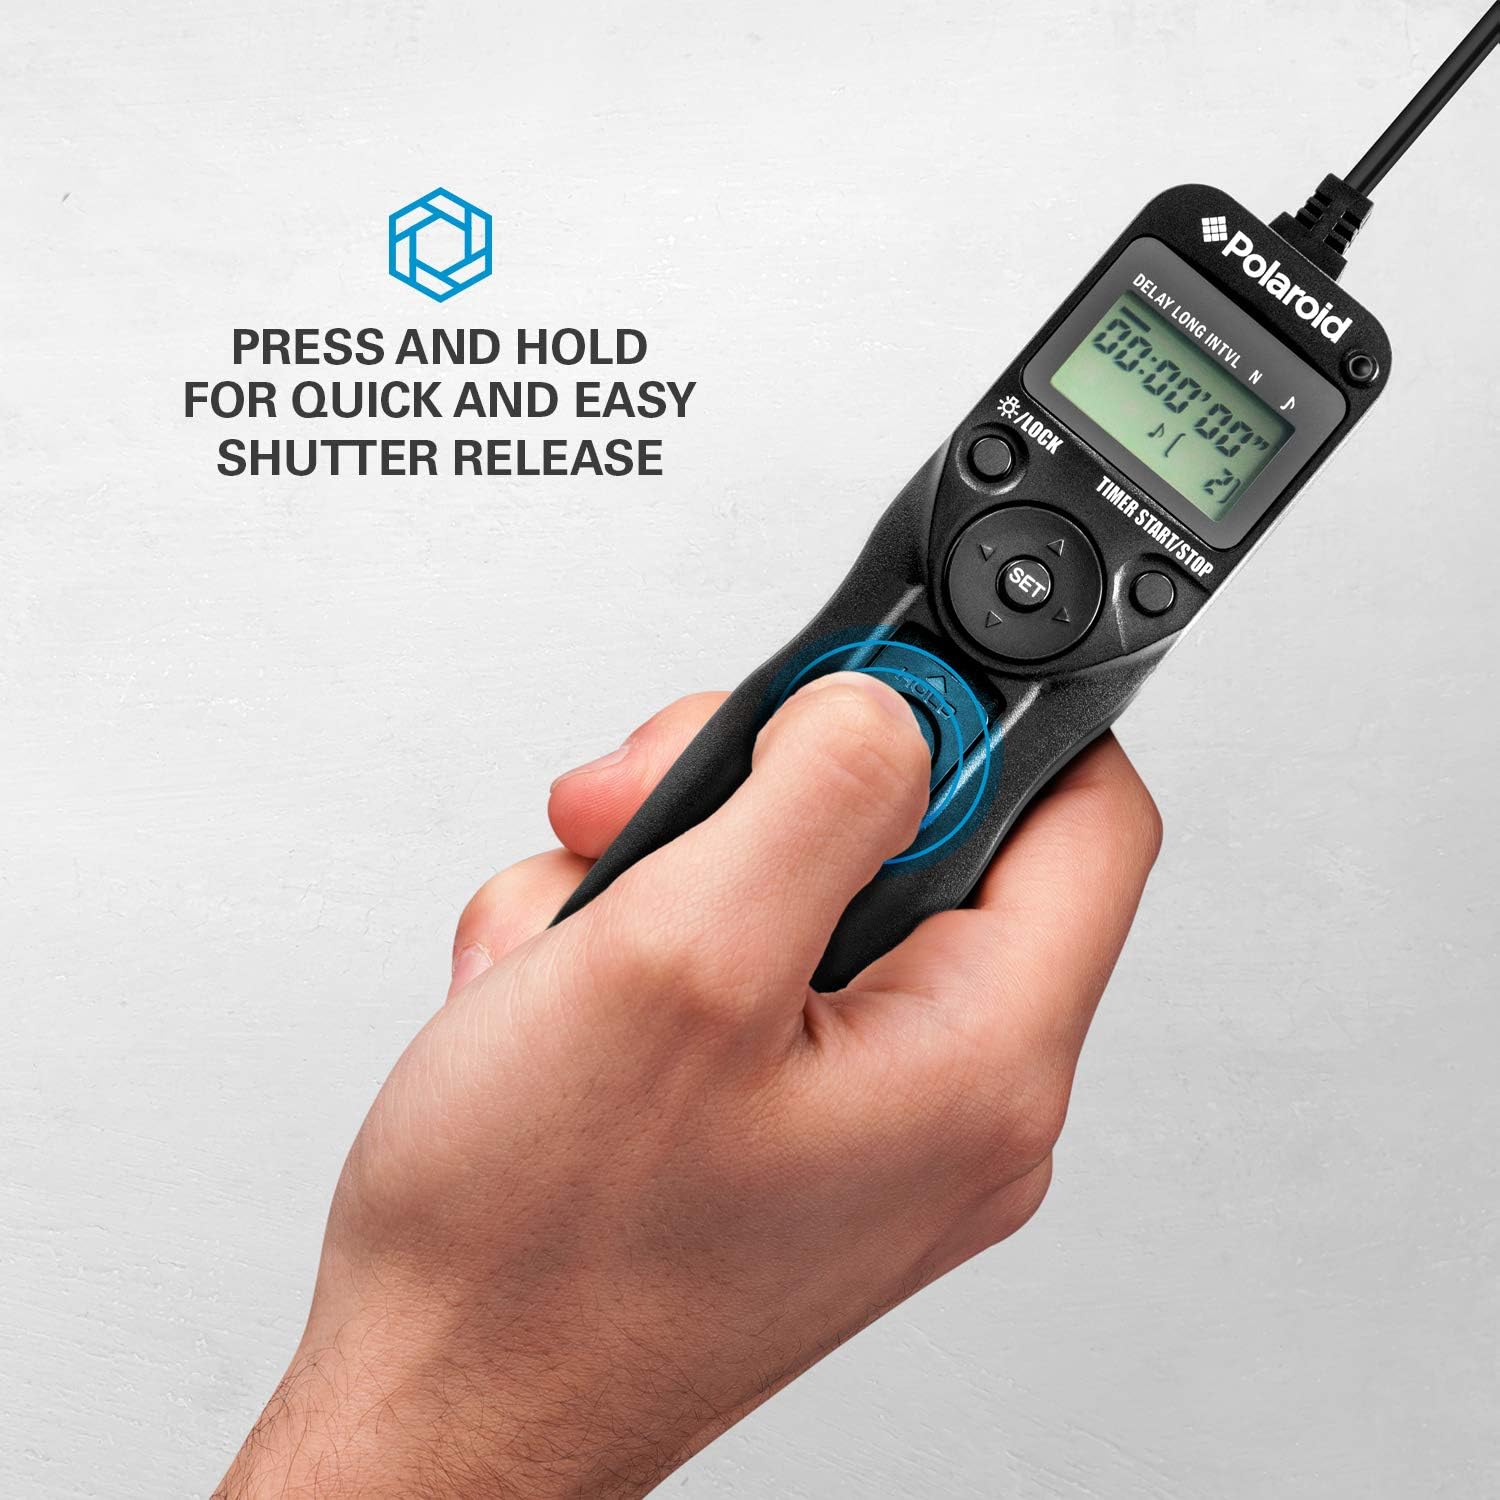
Figure 4.2: Manual shutter release operation.
5. Održavanje
- Čišćenje: Wipe the remote control with a soft, dry cloth. Do not use liquid cleaners or solvents.
- Njega baterije: Remove batteries if the unit will not be used for an extended period to prevent leakage. Replace batteries when the low battery indicator appears on the LCD.
- Skladištenje: Daljinski upravljač čuvajte na hladnom i suhom mjestu, dalje od izravne sunčeve svjetlosti i ekstremnih temperatura.
- Održavanje kabela: Avoid bending or twisting the connection cables excessively to prevent damage.
6. Rješavanje problema
| Problem | Mogući uzrok | Otopina |
|---|---|---|
| Daljinski upravljač se ne uključuje. | Baterije su prazne ili nepravilno postavljene. | Provjerite polaritet baterija. Zamijenite novim AAA baterijama. |
| Camera does not trigger. |
|
|
| Timer sequence does not start. | Settings not confirmed or START button not pressed. | Ensure all settings are confirmed with SET a zatim pritisnite POKRETANJE/ZAUSTAVLJANJE TAJMERA. |
| LCD display is dim or flickering. | Prazna baterija. | Replace AAA batteries. |
7. Specifikacije
- Model: PLRTC18
- Marka: Polaroid
- Povezivost: Ožičeno
- Funkcije mjerača vremena: Delay, Long Exposure, Interval, Number of Exposures
- Postavke odbrojavanja: 1 second to 99 hours, 59 minutes, 59 seconds (in 1-second increments)
- Broj udaraca: 1 to 9999, or unlimited (---)
- Prikaz: LCD s pozadinskim osvjetljenjem
- Izvor napajanja: 2 x AAA baterije
- Boja: Crna
8. Kompatibilnost kamere
The Polaroid PLRTC18 is compatible with a wide range of Canon Digital SLR cameras that utilize a 3-pin or mini headphone jack style remote control terminal. Compatible models include, but are not limited to:
- Canon G10, G11, G12, G16
- Canon EOS Digital Rebel series
- Canon 60D, 70D
- Canon Elan II/IIE, Elan 7/7E
- Canon Rebel Ti /2000/G/GII/X/XS
- Canon IX/IX Lite
- Canon SX50 HS
- Canon EOS Rebel T1i, T2, T2i, T3, T3i, T4i, T5, T5i, T6
- And similar models with compatible shutter release ports.
Please consult your camera's manual to confirm the type of remote control port it uses.
9. Jamstvo i podrška
Za informacije o jamstvu ili tehničku podršku, molimo pogledajte dokumentaciju priloženu uz kupnju ili posjetite službenu web stranicu Polaroida. webstranicu. Sačuvajte dokaz o kupnji za slučaj reklamacije.