
1. Uvod
This manual provides detailed instructions for the installation, operation, and maintenance of your Tiandy TC-NR4008M7-S2 Network Video Recorder (NVR). This NVR is designed for IP surveillance systems, supporting up to 8 channels at 1080P resolution, and features advanced video analysis and smart recording capabilities. It is ONVIF compatible, ensuring broad compatibility with various IP cameras.
Please read this manual thoroughly before using the product to ensure proper and safe operation.
2. Sigurnosne informacije
To prevent electrical hazards and ensure safe operation, observe the following precautions:
- Do not disassemble the equipment yourself. Disassembly and maintenance of the equipment must be carried out by qualified professionals.
- Ensure the NVR is connected to a grounded power source to prevent electric shock.
- Avoid exposing the NVR to moisture, rain, or extreme temperatures.
- Ne blokirajte ventilacijske otvore. Osigurajte dovoljan protok zraka oko uređaja.
- Use only the power adapter supplied with the NVR.
Slika 2.1: Rear panel of the NVR showing various ports and a caution label. The label warns against self-disassembly due to electrical hazard and states that maintenance should be performed by professionals.
3. Proizvod je gotovview
The Tiandy TC-NR4008M7-S2 NVR is a robust solution for managing your IP surveillance cameras. Key features include:
- 8-kanalni ulaz: Supports up to 8 IP camera channels.
- 1080P Resolution: Records video at up to 1080P resolution.
- Skladištenje: Accommodates two 3.5-inch SATA hard drives, each up to 4TB (hard drives not included).
- Video izlazi: HDMI and VGA for local display.
- USB priključci: Two USB ports for mouse and data backup.
- Napredne značajke: Video Analysis and Smart Recording capabilities.
- Povezivost: Ethernet port for network connection.
- Audio & Alarm: Supports audio input/output and alarm functions.
- ONVIF kompatibilnost: Ensures interoperability with ONVIF-compliant IP cameras.
3.1 Prednja ploča

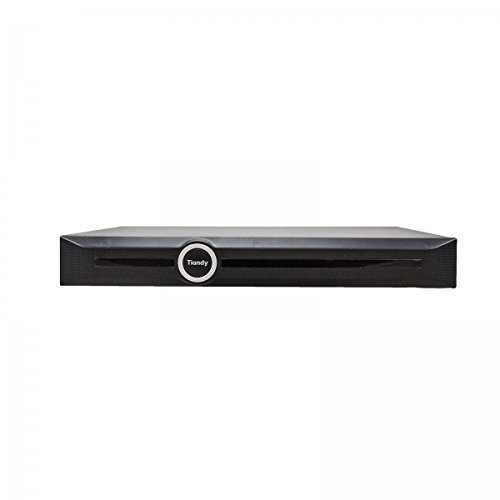
Slika 3.1: Ispred view of the Tiandy TC-NR4008M7-S2 NVR. The front panel typically includes status indicators and the brand logo.
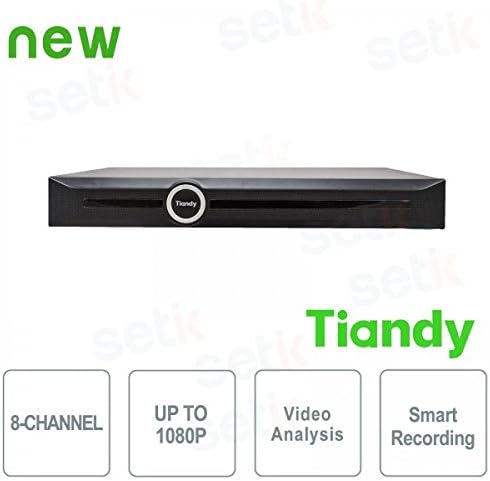
Slika 3.2: Ispred view of the Tiandy NVR with graphical indicators for 8-Channel support, Up to 1080P resolution, Video Analysis, and Smart Recording.
3.2 Stražnja ploča
The rear panel provides all necessary connection ports for the NVR:
- Ulazna snaga: Za spajanje strujnog adaptera.
- Ethernet priključak: RJ45 port for network connection to IP cameras and the internet.
- HDMI izlaz: For connecting to an HDMI monitor or TV.
- VGA izlaz: Za spajanje na VGA monitor.
- USB priključci: Two USB ports for mouse connection and external storage.
- Audio ulaz/izlaz: Za spajanje vanjskih audio uređaja.
- Ulaz/Izlaz alarma: Za spajanje vanjskih alarmnih uređaja.
Slika 3.3: Detailed rear panel of the NVR, illustrating the layout of the power input, Ethernet port, HDMI, VGA, USB ports, audio, and alarm connections.
4. Postavljanje
4.1 Instalacija tvrdog diska
The NVR supports two 3.5-inch SATA hard drives (not included). It is recommended to use surveillance-grade hard drives for optimal performance and reliability. To install:
- Isključite NVR i odspojite sve kablove.
- Remove the NVR's cover by unscrewing the retaining screws.
- Mount the hard drives into the designated bays using the provided screws.
- Connect the SATA data and power cables from the NVR motherboard to the hard drives.
- Vratite poklopac i pričvrstite ga vijcima.
Bilješka: SSDs may not have dedicated mounting slots and might require alternative securing methods if used.
4.2 Početne veze
- Spojite monitor na HDMI ili VGA izlazni priključak NVR-a.
- Connect the included USB mouse to one of the NVR's USB ports.
- Spojite NVR na svoju mrežu pomoću Ethernet kabela.
- Spojite adapter za napajanje na NVR, a zatim na utičnicu.
- Uključite NVR.
4.3 First-Time Configuration
Prilikom prvog pokretanja, NVR će vas voditi kroz početni čarobnjak za postavljanje. To obično uključuje:
- Postavljanje administratorske lozinke.
- Formatting the installed hard drives.
- Network settings configuration (DHCP or static IP).
- Postavke vremena i datuma.
- Adding IP cameras (the NVR should be able to recognize and connect to ONVIF-compatible cameras).
5. Operativni
5.1 Uživo View
After successful setup, you can access the live view of your connected cameras through the NVR's local interface. The live view is designed to be fluid and responsive.
5.2 Konfiguracija snimanja
NVR podržava različite načine snimanja:
- Kontinuirano snimanje: Zapisi 24/7.
- Snimanje detekcije pokreta: Snima samo kada kamere detektiraju kretanje.
- Zakazano snimanje: Records during specific time periods.
- Snimanje alarma: Zapisuje kada se aktivira alarmni događaj.
Access the recording settings through the NVR's menu to configure your preferred recording schedule and modes for each channel.
5.3 Video Analysis and Smart Recording
The NVR includes advanced video analysis features. These can be configured to trigger recordings or alarms based on specific events, such as line crossing, intrusion detection, or object removal. Smart Recording optimizes storage by adjusting recording parameters based on event types.
5.4 Udaljeni pristup (mobilna aplikacija)
The NVR supports remote viewing and management via a mobile application, such as 'Easy Live Plus'. To use the app:
- Download the 'Easy Live Plus' app from your smartphone's app store.
- Registrirajte račun i prijavite se.
- Add your NVR to the app using its serial number or QR code.
Bilješka: While the app provides remote access, some users have reported limitations in its functionality and configuration options compared to the local NVR interface. It is recommended to configure detailed settings directly on the NVR.
6. Održavanje
6.1 Upravljanje tvrdim diskom
Regularly check the status of your hard drives through the NVR's storage management menu. You may need to:
- Format Hard Drives: If you install new drives or encounter recording issues, formatting can resolve problems. This will erase all data on the drive.
- Replace Hard Drives: If a hard drive fails or reaches its end of life, replace it following the installation steps in Section 4.1.
6.2 Ažuriranja softvera
Periodically check the Tiandy official website for firmware updates. Firmware updates can improve performance, add new features, and fix bugs. Follow the instructions provided with the firmware update package carefully.
6.3 Čišćenje
Keep the NVR clean and free from dust. Use a soft, dry cloth to wipe the exterior. Ensure ventilation openings are not obstructed by dust buildup. Do not use liquid cleaners directly on the unit.
7. Rješavanje problema
Ovaj odjeljak obrađuje uobičajene probleme s kojima se možete susresti pri radu s vašim NVR-om.
7.1 Nema video izlaza
- Check if the monitor is properly connected to the HDMI or VGA port.
- Provjerite je li monitor uključen i postavljen na ispravan ulazni izvor.
- Verify that the NVR is powered on and its status indicators are normal.
7.2 Problemi sa snimanjem
- Nema snimaka: Check if hard drives are installed, formatted, and healthy. Verify recording schedules and motion detection settings.
- Postavke se ne spremaju: If settings revert to default, especially after using the mobile app, try configuring settings directly on the NVR's local interface. Ensure the NVR's firmware is up to date.
- Poor Recording Quality: Check camera resolution settings and NVR recording parameters. Ensure sufficient bandwidth for IP cameras.
7.3 Network and Remote Access Problems
- Ensure the Ethernet cable is securely connected to the NVR and your router/switch.
- Verify network settings (IP address, gateway, DNS) on the NVR.
- For remote access, ensure your NVR has internet access and port forwarding (if required by your network setup) is correctly configured on your router.
- If using the mobile app, ensure the app is updated to the latest version.
7.4 NVR se ne uključuje
- Check the power cable connection to the NVR and the power outlet.
- Provjerite radi li adapter za napajanje ispravno.
- Pokušajte s drugom utičnicom.
8. Specifikacije
| Značajka | Specifikacija |
|---|---|
| Broj modela | TC-NR4008M7-S2 |
| Marka | Tiandy |
| Kanali | 8 IP kanali |
| Maksimalna razlučivost | 1080P (puni HD) |
| Podrška za tvrdi disk | 2 x 3.5" SATA HDD, up to 4TB each (8TB total) |
| Video izlazi | 1x HDMI, 1x VGA |
| USB priključci | 2 x USB |
| Mrežno sučelje | 1 x RJ45 Ethernet |
| Audio | Audio In/Out support |
| Alarm | Alarm In/Out support |
| Značajke | Video Analysis, Smart Recording, ONVIF Compatible |
| Težina artikla | 2.8 kg |
| Kompatibilni uređaji | Smartphone (for remote access) |
9. Jamstvo i podrška
For warranty information, please refer to the warranty card included with your product or contact your point of purchase. For technical support, please contact Tiandy customer service or your authorized dealer. Ensure you have your product model number (TC-NR4008M7-S2) and purchase details available when seeking support.