
1. Uvod
This manual provides essential information for the safe and efficient use of your Alienware AW3418DW 34.1-inch Curved Gaming Monitor. This monitor features a WQHD (3440x1440) resolution, a 120Hz refresh rate (overclocked), and NVIDIA G-SYNC technology for an immersive gaming experience. Please read this manual thoroughly before operating the device.
2. Sigurnosne informacije
- Always disconnect the power cable from the wall outlet before cleaning the monitor.
- Ne izlažite monitor kiši ili vlazi kako biste izbjegli opasnost od požara ili strujnog udara.
- Ne otvarajte monitor casing. Unutra nema dijelova koje korisnik može sam servisirati. Za sve servisne radove obratite se kvalificiranom servisnom osoblju.
- Monitor postavite na stabilnu, ravnu površinu kako biste spriječili njegov pad.
- Osigurajte pravilnu ventilaciju oko monitora. Ne blokirajte ventilacijske otvore.
- Koristite samo adapter za napajanje i kabele koji su isporučeni s monitorom.
3. Sadržaj paketa
Provjerite jesu li sve komponente prisutne u paketu:
- Alienware AW3418DW Monitor
- Stalak za monitor (baza i podizač)
- Kabel za napajanje
- DisplayPort kabel
- HDMI kabel
- USB 3.0 upstream kabel
- Dokumentacija (Kratki vodič za postavljanje, Sigurnosne informacije)
4. Postavljanje
4.1 Fizička postavka
Carefully remove the monitor and its components from the packaging. Place the monitor face down on a soft cloth or cushion to prevent scratches.
Pričvršćivanje postolja
- Attach the stand riser to the monitor panel until it clicks into place.
- Attach the stand base to the stand riser and tighten the captive screw.

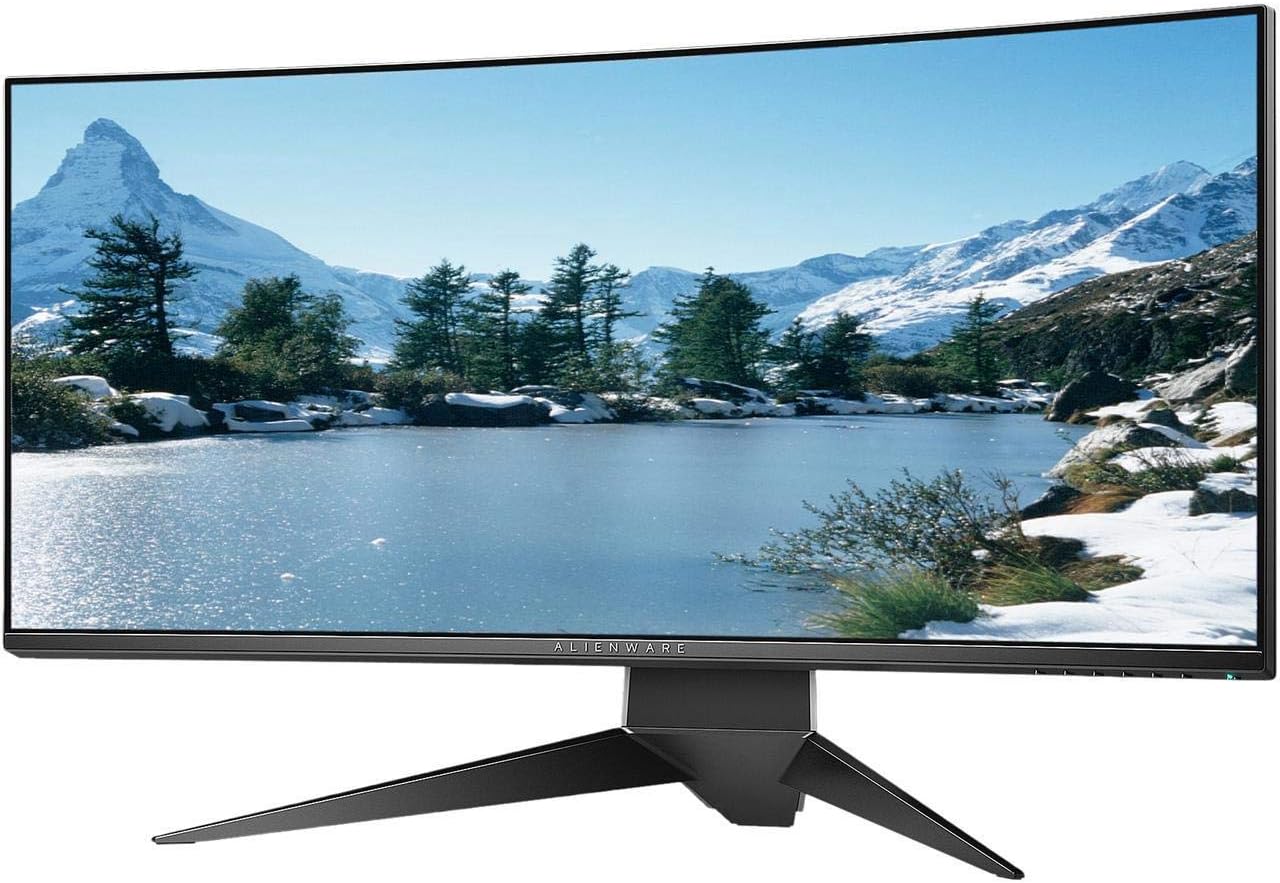
Slika 4.1: Prednja strana view of the Alienware AW3418DW monitor with its stand attached.

Slika 4.2: Bočna strana view of the Alienware AW3418DW monitor with its stand.
Slika 4.3: Stražnji dio view of the Alienware AW3418DW monitor showing the stand and AlienFX lighting.
VESA Montaža
The monitor supports VESA mounting (100 x 100 mm). Remove the stand riser by pressing the release button and then attach the VESA-compatible mount to the monitor using appropriate screws. Ensure the mount can support the monitor's weight of 26.1 pounds (without stand).

Figure 4.4: Monitor dimensions for VESA mount compatibility.
4.2 Spojni kabeli
Spojite potrebne kabele na monitor i računalo.
- Kabel za napajanje: Spojite kabel za napajanje na priključak za napajanje monitora, a zatim na zidnu utičnicu.
- Video kabel: Connect either the DisplayPort cable or the HDMI cable from your computer's graphics card to the corresponding port on the monitor. For optimal performance, especially for 120Hz refresh rate and G-SYNC, use the DisplayPort connection.
- USB kabel za prijenos podataka: Connect the USB 3.0 upstream cable from your computer to the monitor's upstream USB port to enable the monitor's USB hub functionality.
- USB Downstream priključci: Connect your USB devices (e.g., keyboard, mouse, webcam) to the four USB 3.0 downstream ports on the monitor.
5. Upute za rad
5.1 Uključivanje/isključivanje
Pritisnite gumb za uključivanje/isključivanje koji se nalazi na monitoru kako biste ga uključili ili isključili. LED lampica napajanja prikazivat će status monitora.
5.2 Navigacija putem zaslonskog izbornika (OSD)
The On-Screen Display (OSD) menu allows you to adjust various monitor settings. Use the control buttons, typically located on the bottom right or rear of the monitor, to navigate the OSD.
- Pritisnite kontrolni gumb za aktiviranje OSD izbornika.
- Za kretanje kroz opcije izbornika koristite navigacijske tipke (gore/dolje/lijevo/desno).
- Pritisnite gumb za odabir za potvrdu odabira ili ulazak u podizbornik.
- Use the back/exit button to return to the previous menu or exit the OSD.
5.3 Postavke zaslona
Podesite postavke zaslona za optimalno viewing and gaming performance.
- rezolucija: Set your computer's display resolution to 3440x1440 for the native WQHD experience.
- Stopa osvježavanja: The monitor supports up to 120Hz refresh rate (overclocked). Ensure your graphics card drivers are updated and the refresh rate is set in your operating system's display settings or graphics control panel.
- NVIDIA G-SYNC: For tear-free and smooth gameplay, enable G-SYNC in your NVIDIA Control Panel. This feature synchronizes the monitor's refresh rate with your GPU's frame rate.
- Svjetlina/kontrast: Adjust these settings in the OSD menu to suit your environment and preference.
5.4 AlienFX Lighting
Customize the AlienFX lighting zones on your monitor through the OSD menu or Alienware Command Center software (if installed on your PC). You can select colors, effects, and synchronize lighting with other Alienware devices.
5.5 Korištenje USB čvorišta
The monitor acts as a USB 3.0 hub, providing convenient access to four downstream USB ports for connecting peripherals. Ensure the USB upstream cable is connected to your computer for this feature to function.
6. Održavanje
6.1 Čišćenje monitora
- Uvijek isključite monitor iz električne utičnice prije čišćenja.
- Lagano koristite meku krpu koja ne ostavlja dlačice dampvodom ili neabrazivnim sredstvom za čišćenje ekrana.
- Ne prskajte sredstvo za čišćenje direktno na ekran.
- Lagano obrišite zaslon kako biste uklonili prašinu i mrlje.
- Očistite vanjski dio casing mekom, suhom krpom.
6.2 Skladištenje
If storing the monitor for an extended period, disconnect all cables, carefully disassemble the stand (if applicable), and store it in its original packaging in a cool, dry place.
7. Rješavanje problema
Ako naiđete na probleme s monitorom, pogledajte sljedeće uobičajene korake za rješavanje problema:
- Nema zaslona: Ensure all power and video cables are securely connected. Check if the monitor is powered on and the correct input source is selected in the OSD.
- Flickering/Stuttering: Verify that your graphics drivers are up to date. Ensure G-SYNC is properly configured in the NVIDIA Control Panel. Check for interference from other electronic devices.
- Netočna rezolucija/brzina osvježavanja: Adjust the display settings in your operating system or graphics control panel to the native resolution (3440x1440) and desired refresh rate (up to 120Hz).
- Mrtvi pikseli: The Alienware AW3418DW comes with a Premium Panel Guarantee. Refer to the warranty information for details on pixel policy.
- USB priključci ne rade: Ensure the USB 3.0 upstream cable is connected from the monitor to your computer.
8. Specifikacije
| Značajka | Specifikacija |
|---|---|
| Marka | Alienware |
| Broj modela | AW3418DW |
| Veličina zaslona | 34.1 inča |
| Rezolucija | WQHD (3440 x 1440 Pixels) |
| Omjer slike | 21:9 |
| Brzina osvježavanja | 120 Hz (Overclocked) |
| Vrijeme odziva | 4 milisekundi |
| Tehnologija prilagodljive sinkronizacije | NVIDIA G-SYNC |
| Vrsta zaslona | LED IPS |
| Zakrivljenost | 1900R |
| Svjetlina | 300 cd/m² |
| Omjer kontrasta | 1000:1 |
| Viewing kut | 178 stupnja |
| Povezivost | 1x DisplayPort (1.2), 1x HDMI (1.4), 4x USB 3.0 Downstream, 1x USB 3.0 Upstream |
| Težina artikla | 26.1 funti (bez postolja) |
| Vrsta montaže | VESA Compatible (100 x 100 mm) |
9. Jamstvo i podrška
Your Alienware AW3418DW monitor is covered by a 3 Years Limited Hardware Warranty i 3 Years Advance Exchange Service, uključujući a Premium Panel Guarantee. The Premium Panel Guarantee ensures a free panel replacement during the limited hardware warranty period even if only one bright pixel is found.
For technical support, warranty claims, or additional information, please visit the official Alienware or Dell support website. You may also find updated drivers and firmware there.
Mrežna podrška: www.dell.com/support