
1. Uvod
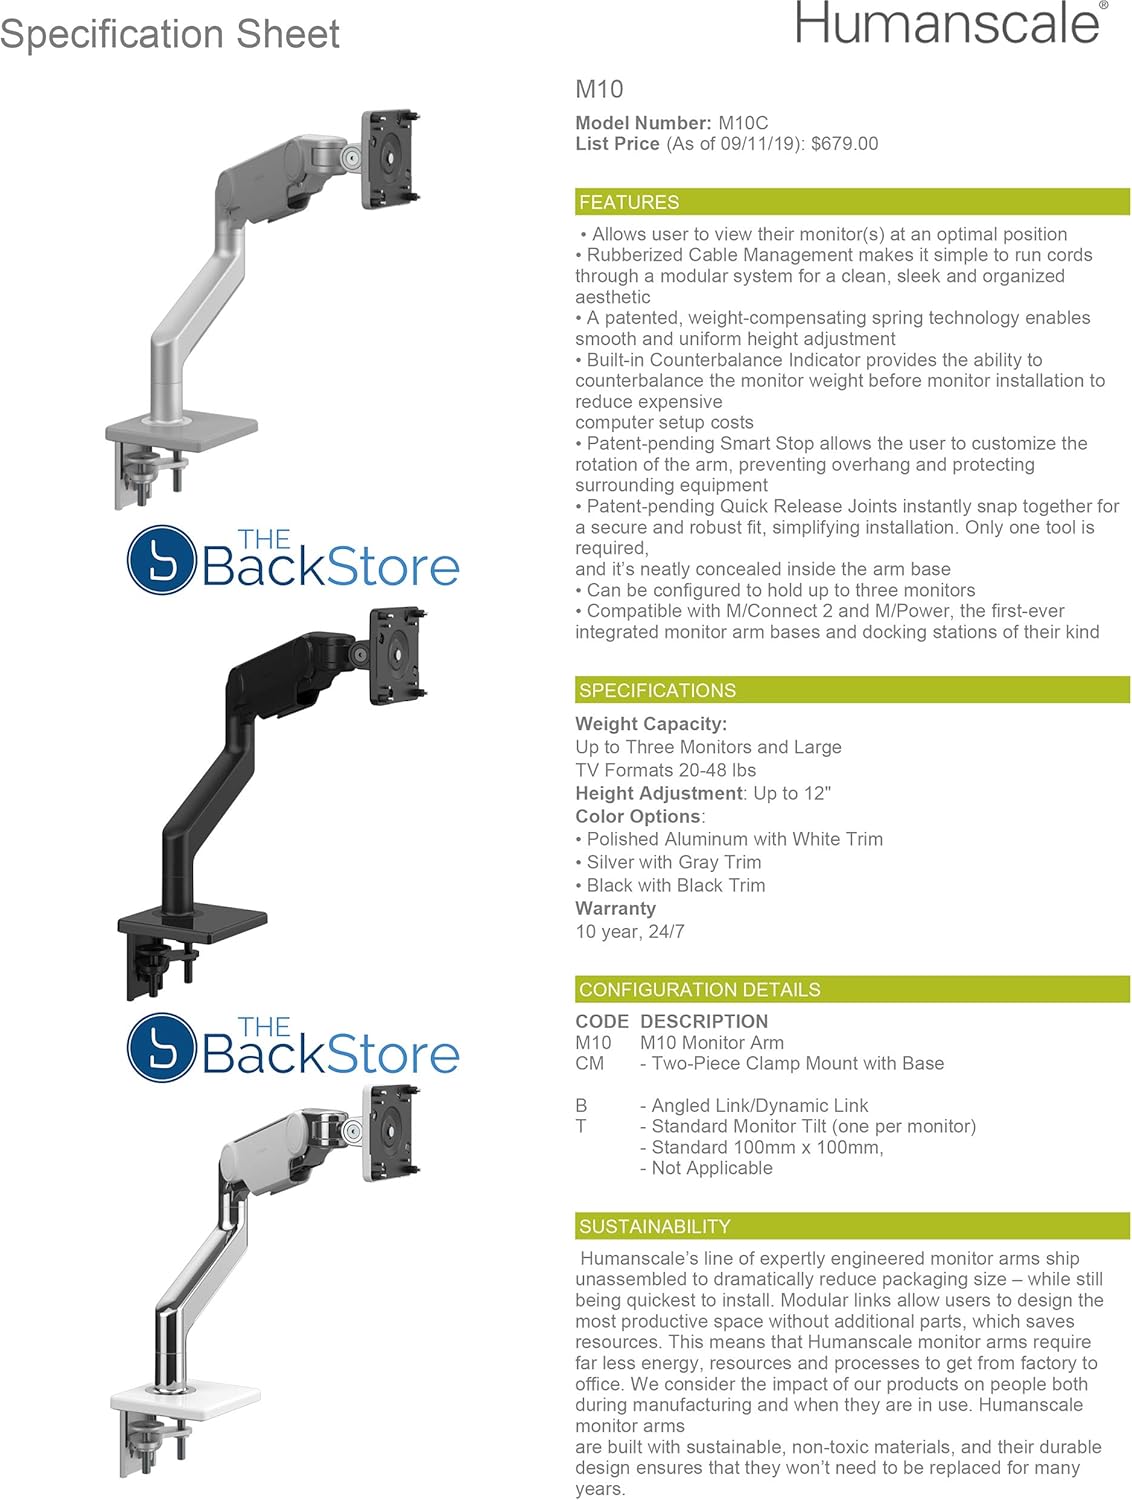
The Humanscale M10 Adjustable Heavy Duty Monitor Arm is engineered to enhance workspace comfort and productivity by providing flexible and ergonomic monitor positioning. This monitor arm supports a healthier working posture, maximizes usable desktop space, and contributes to a clutter-free environment. It features patented Weight-Compensating Spring Technology and Smart Stop functionality for precise control and adaptability.
The M10 is designed for durability and ease of use, capable of supporting up to three monitors or a total weight of 48 pounds. Its modular design with Quick Release joints ensures quick and simple installation.
2. Postavljanje i instalacija
Follow these steps to correctly install your Humanscale M10 Monitor Arm. Ensure all components are present before beginning.
2.1 Raspakiranje i provjera komponenti
Carefully remove all parts from the packaging. Verify that you have the clamp mount, arm links, and VESA plate. Refer to the packing list for a complete inventory.
2.2 Pričvršćivanje Cl-aamp montirati
The M10 monitor arm utilizes a two-piece clamp mount for secure attachment to your desk.
- Postavite clamp mount base on your desk edge.
- Osigurajte clamp to the desk using the tightening screw. Ensure it is firmly attached to prevent movement.

2.3 Assembling the Monitor Arm
The M10 features Quick Release joints for easy assembly.
- Align the first arm link with the clamp mount post and push down until it clicks securely into place.
- Repeat for additional arm links if using a multi-monitor configuration.

2.4 Pričvršćivanje monitora
The M10 arm is compatible with VESA-compliant monitors.
- Attach the VESA plate to the back of your monitor using the provided screws. Ensure a snug fit.
- Carefully lift the monitor and slide the VESA plate onto the monitor arm's mounting head until it locks into place.

2.5 Counterbalance Adjustment
The M10 features a built-in counterbalance indicator to simplify adjustment.
- Once the monitor is attached, use the adjustment tool to turn the counterbalance screw.
- Adjust until the monitor remains stable at any desired height without drifting up or down. The indicator will help confirm proper balance.
2.6 Upravljanje kabelima
Utilize the integrated rubber cable management system to route cables neatly along the arm.
- Open the cable channels along the underside of the arm links.
- Place your monitor and power cables inside the channels.
- Close the channels to secure the cables, maintaining a clean workspace.

3. Upravljanje krakom monitora
The M10 arm offers dynamic adjustability for optimal viewin udobnost.
3.1 Podešavanje visine
Gently raise or lower your monitor to the desired height. The Weight-Compensating Spring Technology ensures smooth and effortless movement.
3.2 Nagib, okretanje i rotacija
Adjust the monitor's tilt (up/down), swivel (left/right), and rotate it from landscape to portrait orientation as needed. The arm's joints allow for fluid movement.

3.3 Smart Stop Functionality
The Smart Stop feature allows you to limit the rotation of each arm joint. This prevents the monitor or arm from overhanging desk edges or colliding with walls or other equipment.
- Locate the Smart Stop mechanism on each joint.
- Adjust the stops to define the desired range of motion for the arm.
4. Održavanje
The Humanscale M10 Monitor Arm is designed for longevity with minimal maintenance.
4.1 Čišćenje
Wipe the arm surfaces with a soft, damp krpom. Izbjegavajte abrazivna sredstva za čišćenje ili otapala koja bi mogla oštetiti završnu obradu.
4.2 Periodične provjere
Periodically check all connections, especially the clamp mount and VESA plate screws, to ensure they remain tight and secure. The self-lubricating precision bearings ensure smooth operation without the need for additional lubrication.
5. Rješavanje problema
If you encounter issues with your M10 monitor arm, refer to the following common solutions.
5.1 Monitor Drifts Up or Down
Izdati: The monitor does not stay in its set vertical position and drifts upwards or downwards.
Otopina: This indicates the counterbalance is not correctly adjusted for your monitor's weight. Re-adjust the counterbalance screw (refer to Section 2.5) until the monitor remains stable at any height. Ensure the monitor arm is not overloaded beyond its 48-pound capacity.
5.2 Arm Joints Are Stiff or Stuck
Izdati: The arm joints are difficult to move or appear stuck, preventing smooth adjustment.
Otopina: While the M10 features self-lubricating bearings, extreme stiffness might indicate an issue with the Smart Stop settings or an internal mechanism. First, check if the Smart Stop feature (Section 3.3) is engaged and limiting movement. If the issue persists, ensure no cables are caught in the joints. If the arm remains stuck after these checks, contact Humanscale support for assistance. Do not force the arm, as this may cause damage.
5.3 Monitor Wobbles
Izdati: The monitor or arm wobbles excessively.
Otopina: Provjerite je li clamp mount is securely tightened to the desk (Section 2.2) and that the VESA plate is firmly attached to both the monitor and the arm (Section 2.4). Ensure your desk surface is stable.
6. Specifikacije
| Marka | Ljudska skala |
| Broj modela | HS-M10-Clamp-Alum |
| Kapacitet težine | Up to 48 pounds (supports up to three monitors) |
| Podešavanje visine | Do 12 inča |
| Dimenzije proizvoda | 6.5 x 8.2 x 12 inča |
| Težina artikla | 20 funti |
| Materijal | Metal |
| Boja | Aluminij |
| Vrsta montaže | Stolna ploča Clamp montirati |
| Vrsta kretanja | Rotiranje, nagib, okretanje, podešavanje visine |
| UPC | 663185749111 |
7. Informacije o jamstvu
The Humanscale M10 Monitor Arm comes with a comprehensive 10-year, 24/7 warranty. This warranty covers defects in materials and workmanship under normal use. For specific terms and conditions, please refer to the official Humanscale warranty documentation or contact customer support.
8. Podrška i dodatni resursi
For further assistance, detailed product information, or to purchase replacement parts, please visit the official Humanscale webweb-mjesto ili se obratite njihovom odjelu za korisničku podršku.
Službeni videozapisi proizvoda:
Video: Općenito gotovoview or installation guide for the M10 monitor arm. This video demonstrates key features and assembly steps.
Video: Detailed instructions on adjusting the M10 monitor arm for optimal ergonomic positioning. This video covers height, tilt, and swivel adjustments.