
Nextbase NBDVR222X
Nextbase 222x Front and Rear Dash Cam User Manual
Model: NBDVR222X
Uvod
This manual provides comprehensive instructions for the installation, operation, and maintenance of your Nextbase 222x Front and Rear Dash Cam. Please read this manual thoroughly before using the device to ensure proper functionality and safety.
The Nextbase 222x is designed to record high-quality video footage of your journeys, offering enhanced security and peace of mind on the road. It features 1080p HD recording, a 140-degree wide viewing angle, and an intelligent parking mode.
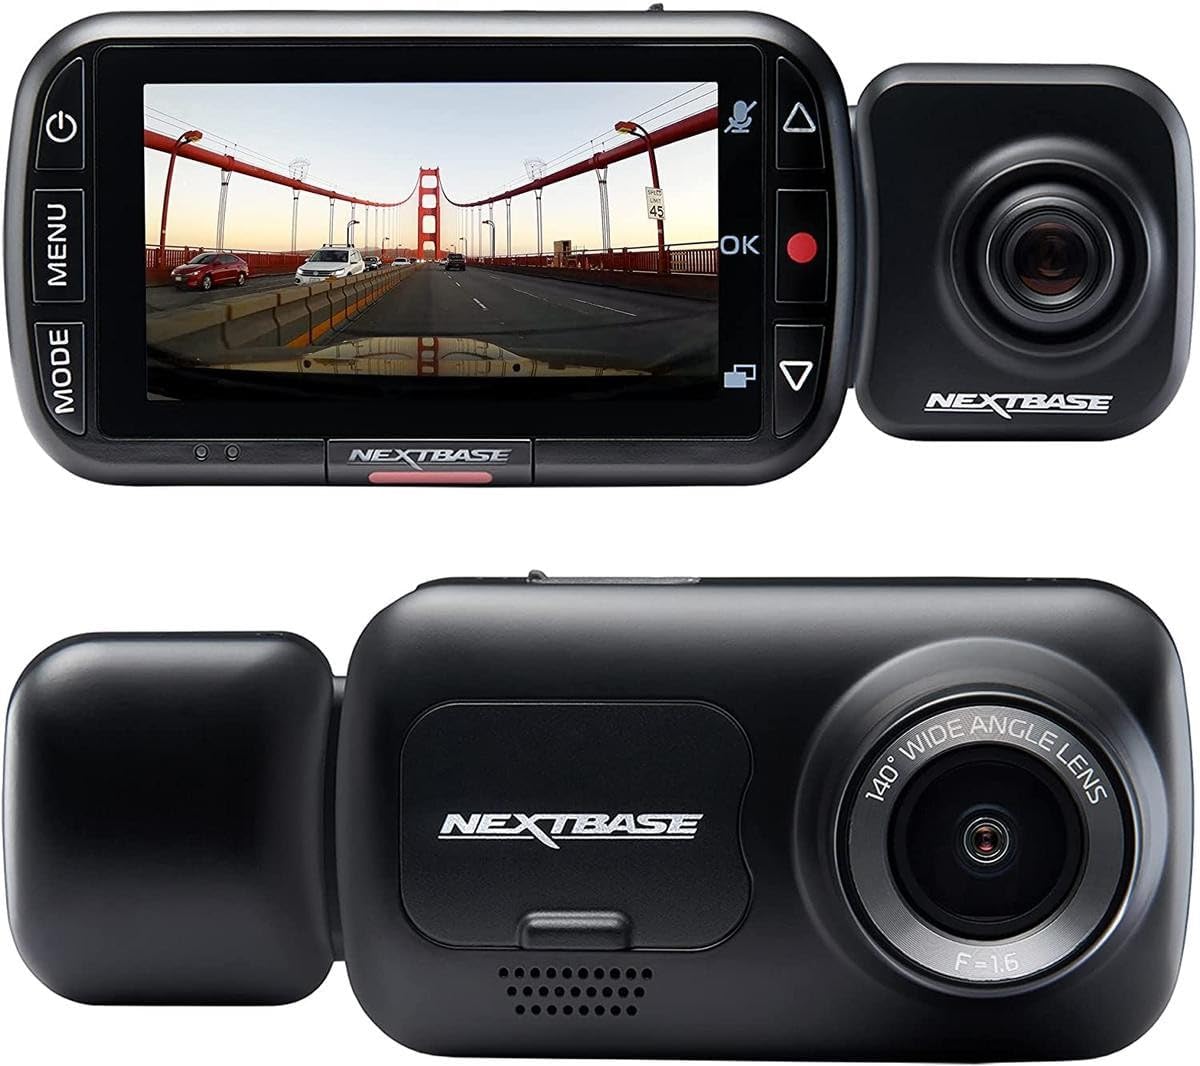
Image: The Nextbase 222x Dash Cam, showcasing its main unit with a display showing a road scene and the detachable rear camera module.
Sadržaj paketa
Prije nego što nastavite s instalacijom, provjerite jesu li svi elementi prisutni u vašem paketu:
- Nextbase 222x Front Dash Cam Unit
- Nextbase Rear Camera Module (if purchased as a bundle)
- Click&Go PRO Powered Car Mount
- Kabel za napajanje (automobilski punjač)
- USB kabel
- Korisnički priručnik (ovaj dokument)
- Adhesive Mount (optional, may be included)
- Suction Cup Mount (optional, may be included)
Note: A MicroSD card is required for operation and is sold separately. For optimal performance, Nextbase recommends using a U3 or V30 rated MicroSD card specifically designed for dash cam use.
Postavljanje i instalacija
1. Umetanje MicroSD kartice
- Provjerite je li kamera za automobil isključena.
- Pronađite utor za MicroSD karticu sa strane kamere za automobil.
- Umetnite MicroSD karticu sa zlatnim kontaktima okrenutim prema prednjoj strani kamere dok ne klikne na mjesto.
- Za uklanjanje, lagano gurnite karticu dok ne klikne, a zatim je otpustite da biste je izbacili.
2. Montaža Dash Cam
The Nextbase 222x uses a Click&Go PRO Powered Car Mount for easy installation and removal.
- Clean the chosen area on your windshield thoroughly. Ensure it is free from dust and grease.
- Attach the Click&Go PRO mount to the windshield. For suction cup mounts, press firmly and flip the lever to secure. For adhesive mounts, peel the protective film and press firmly for 30 seconds.
- Slide the Nextbase 222x Dash Cam onto the Click&Go PRO mount until it clicks securely into place.
- Podesite kut kamere kako biste osigurali jasan view of the road ahead, centered on the horizon.

Image: The Nextbase 222x Dash Cam connected to its magnetic mount, illustrating the ease of attachment.
3. Spajanje na napajanje
- Connect the provided power cable to the Click&Go PRO mount.
- Plug the other end of the power cable into your vehicle's 12V power socket (cigarette lighter socket).
- Route the cable neatly around your windshield and dashboard to avoid obstructing your view ili ometanje upravljanja vožnjom.
4. Ugradnja stražnje kamere (opcionalno)
If you have the Nextbase Rear Camera Module, it easily connects to the main unit.
- Ensure the main dash cam unit is powered off.
- Align the rear camera module with the port on the side of the main dash cam unit.
- Gently push the rear camera module into the port until it is securely connected.
- The rear camera will automatically begin recording when the main unit is powered on.
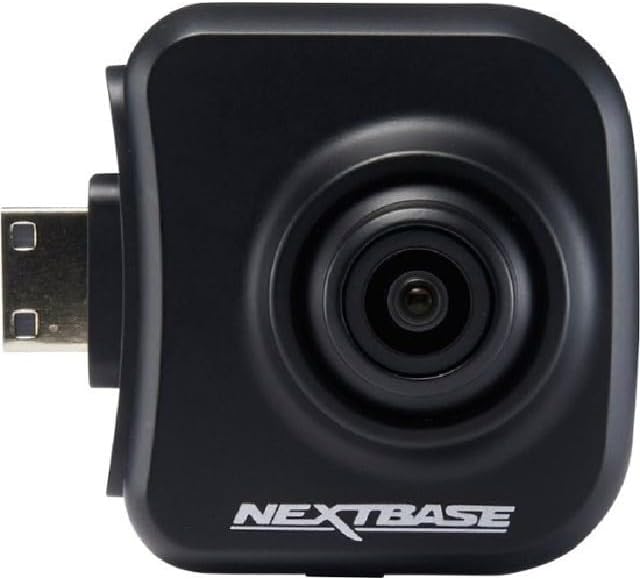
Image: The Nextbase Rear Camera Module, designed to plug directly into the main dash cam unit for dual-view snimanje.
Upute za rad
Uključivanje/isključivanje
- The dash cam will automatically power on and begin recording when your vehicle's ignition is turned on and power is supplied to the 12V socket.
- Automatski će se isključiti ubrzo nakon što se isključi paljenje.
- To manually power on/off, press and hold the Power button (usually located on the side or top of the unit).
Načini snimanja
- Kontinuirano snimanje: The dash cam records in seamless loops, overwriting the oldest unprotected filekada je MicroSD kartica puna.
- G-senzor (snimanje u hitnim slučajevima): In the event of an impact or sudden braking, the built-in G-Sensor will automatically detect the event and protect the current recording segment from being overwritten. This file will be saved in a separate 'Protected' folder on the MicroSD card.
- Intelligent Parking Mode: When your vehicle is parked and the ignition is off, the dash cam will enter parking mode. If any physical movement or impact is detected, it will automatically record for a short period to capture the event.
Navigacija izbornikom
Use the buttons on the dash cam (typically 'Menu', 'Up', 'Down', 'OK') to navigate through settings and playback options on the 2.5" high-resolution IPS screen.

Image: The Nextbase 222x Dash Cam's user interface, showing the screen and control buttons for menu navigation.
Reprodukcija i File Upravljanje
- On-Device Playback: Access the 'Playback' menu on the dash cam to review recorded videos directly on the screen.
- Reprodukcija na računalu: Remove the MicroSD card and insert it into a computer's card reader. Use a compatible media player (e.g., VLC Media Player) to view video files. Nextbase also offers desktop software for enhanced viewing and data analysis.
- File Zaštita: During recording, press the 'Protect' button (often indicated by a key icon) to manually protect the current recording segment from being overwritten.
Održavanje
- Formatiranje MicroSD kartice: It is recommended to format your MicroSD card regularly (e.g., once a month) using the dash cam's menu. This helps maintain card health and prevents data corruption. Formatiranjem će se izbrisati svi podaci na kartici, stoga napravite sigurnosnu kopiju svih važnih files prvim.
- Čišćenje leća: Nježno očistite objektiv kamere mekom krpom koja ne ostavlja dlačice. Izbjegavajte abrazivne materijale ili jake kemikalije.
- Ažuriranja firmvera: Periodically check the Nextbase website for firmware updates. Keeping your dash cam's firmware up-to-date ensures optimal performance and access to new features.
- Razmatranja temperature: Avoid exposing the dash cam to extreme temperatures for prolonged periods. Remove the dash cam from the mount and store it in a cool, dry place when not in use, especially in hot climates.
Rješavanje problema
| Problem | Mogući uzrok | Otopina |
|---|---|---|
| Kamera za automobil se ne uključuje. | No power supply; faulty cable; vehicle's 12V socket issue. | Check power cable connection. Test 12V socket with another device. Try a different power cable if available. |
| Snimanje se zaustavlja ili zamrzava. | MicroSD card issue (slow speed, full, corrupted); firmware issue. | Format the MicroSD card. Try a new, high-speed (U3/V30) MicroSD card. Update firmware. |
| Loša kvaliteta videa. | Dirty lens; incorrect settings; low light conditions. | Clean the lens. Check video resolution settings in the menu. Ensure windshield is clean. |
| G-Sensor too sensitive/not sensitive enough. | Postavka osjetljivosti G-senzora. | Adjust G-Sensor sensitivity in the dash cam settings menu. |
| Rear camera not detected. | Loose connection; faulty rear camera. | Ensure the rear camera module is securely connected to the main unit. Restart the dash cam. |
If you encounter issues not listed here or if the suggested solutions do not resolve the problem, please refer to the official Nextbase support resources.
Tehnički podaci
| Značajka | Detalj |
|---|---|
| Naziv modela | Nextbase 222X Front and Rear Wireless Dash Cam |
| Broj modela | NBDVR222X |
| Rezolucija prednje kamere | 1080p HD at 30fps |
| Rezolucija stražnje kamere | 720p HD (when connected) |
| Viewing kut | 140 stupnja |
| Veličina zaslona | 2.5 inča IPS |
| Vrsta montaže | Click&Go PRO Powered Magnetic Mount |
| Posebne značajke | Intelligent Parking Mode, G-Sensor, Loop Recording, Blind Spot Detection |
| Povezivost | USB |
| Dimenzije (proizvod) | 1.81 x 3.23 x 1.81 inča |
| Težina artikla | 14.1 unci |
| Baterija | 1 litij-ionska baterija (uključena) |
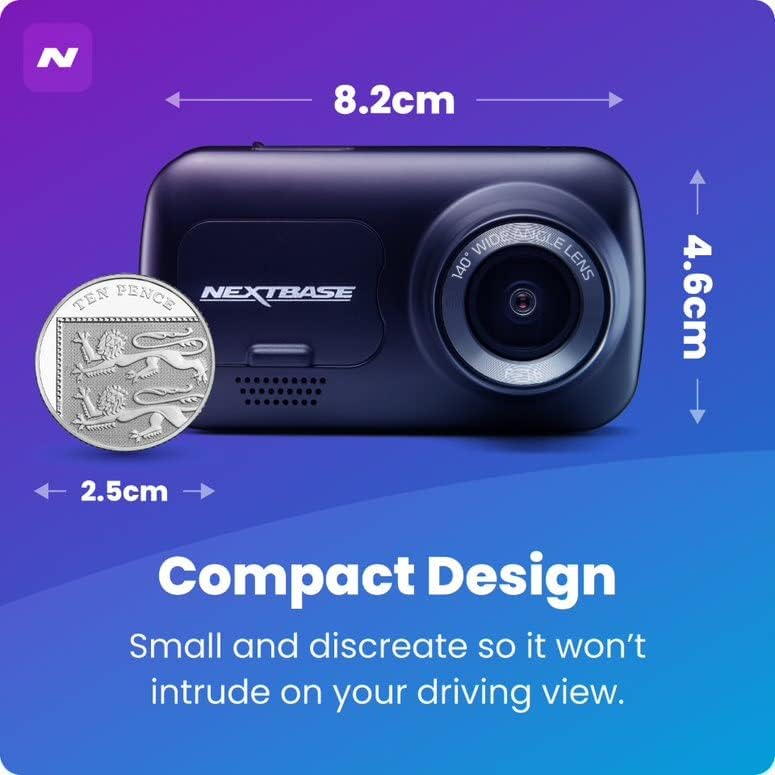
Image: A visual representation of the Nextbase 222x Dash Cam's compact design, showing its approximate dimensions.
Jamstvo i podrška
Specific warranty details for your Nextbase 222x Dash Cam are typically provided with your purchase documentation or can be found on the official Nextbase webMolimo sačuvajte dokaz o kupnji za potrebe jamstva.
For technical support, firmware updates, or further assistance, please visit the official Nextbase support page or contact their customer service directly. Contact information is usually available on the manufacturer's webmjesto.
Note: This manual does not contain specific warranty periods or direct contact information as these may vary by region and are subject to change. Always refer to the manufacturer's official resources for the most current information.
Ask a question about this manual
Ask about setup, troubleshooting, compatibility, parts, safety, or missing instructions. Manuals+ will review the question and use this page’s manual context to help answer it.