
1. Uvod
This manual provides detailed instructions for the setup, operation, maintenance, and troubleshooting of your Sharkoon Light² 200 Gaming Mouse. Please read this manual thoroughly before using the device to ensure optimal performance and longevity.
2. Sadržaj paketa
Provjerite jesu li svi artikli prisutni u paketu:
- Sharkoon Light² 200 Gaming Mouse
- Interchangeable Solid Top Cover (7g)
- Set of Replacement PTFE Glide Feet
- Priručnik s uputama
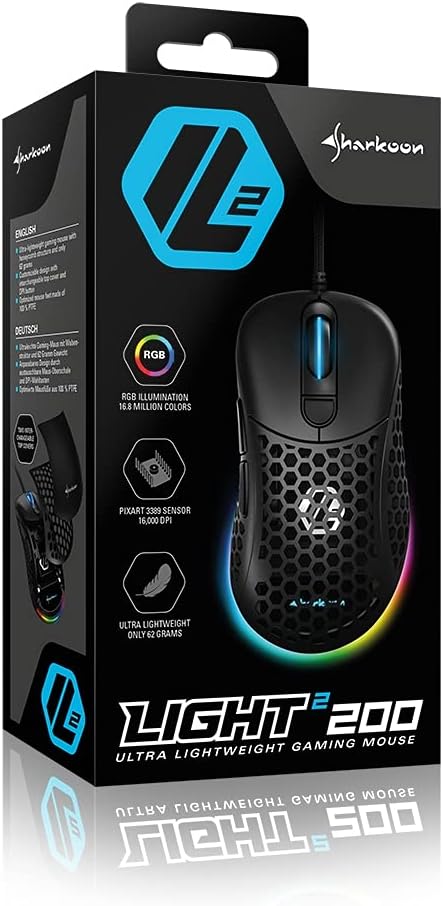
Image: The retail packaging for the Sharkoon Light² 200 Gaming Mouse, showing the mouse and its key features.
3. Postavljanje
3.1 Spajanje miša
- Unpack the Sharkoon Light² 200 Gaming Mouse from its packaging.
- Uključite USB priključak kabela miša u dostupni USB priključak na računalu.
- Operativni sustav će automatski prepoznati i instalirati potrebne upravljačke programe.

Image: The Sharkoon Light² 200 Gaming Mouse with its USB cable, ready for connection to a computer.
3.2 Instalacija softvera
For full customization and access to all features, download and install the Sharkoon gaming software from the official Sharkoon website. The software allows for DPI adjustments, button programming, and RGB lighting control.
- Visit the official Sharkoon webmjesto.
- Navigate to the support or downloads section for the Light² 200 Gaming Mouse.
- Download the latest version of the gaming software.
- Slijedite upute na zaslonu kako biste dovršili instalaciju.
4. Upravljanje mišem
4.1 Osnovne funkcije
The Light² 200 features standard mouse buttons and a scroll wheel:
- Lijevi klik: Primarni gumb za radnju.
- Desni klik: Sekundarni gumb za radnju, obično za kontekstne izbornike.
- Kotačić za pomicanje: For vertical scrolling. Can also be pressed for a middle-click function.
- Bočni gumbi: Two buttons located on the left side, typically for 'forward' and 'back' navigation.
- Gumb DPI: Located behind the scroll wheel, used to cycle through DPI settings.

Slika: Bočno view of the Sharkoon Light² 200 Gaming Mouse, highlighting the two programmable side buttons and the honeycomb structure.
4.2 Podešavanje DPI
The optical PixArt sensor supports up to 16,000 DPI. You can adjust the DPI sensitivity using the dedicated DPI button behind the scroll wheel or through the Sharkoon gaming software. The RGB lighting on the scroll wheel and rear of the mouse indicates the current DPI profile.
4.3 Programabilni gumbi
The Light² 200 features six programmable buttons. Use the Sharkoon gaming software to assign custom functions, macros, or key bindings to these buttons for an optimized gaming experience.
4.4 Prilagodba RGB osvjetljenja
The mouse features adjustable RGB illumination on the scroll wheel and the back end. The gaming software allows you to customize colors, effects, and brightness to match your preferences or gaming setup.
4.5 Modular Design: Changing the Top Cover
The Light² 200 has a modular design, allowing you to change the top surface. The default honeycomb top cover can be replaced with a closed 7-gram alternative for a different feel or aesthetic.
- Gently lift the rear edge of the honeycomb top cover to detach it. It is held by magnets.
- Align the replacement solid top cover with the mouse body and gently press it down until the magnets secure it in place.

Image: The Sharkoon Light² 200 Gaming Mouse with its honeycomb top cover removed, revealing the internal structure and magnetic attachment points.
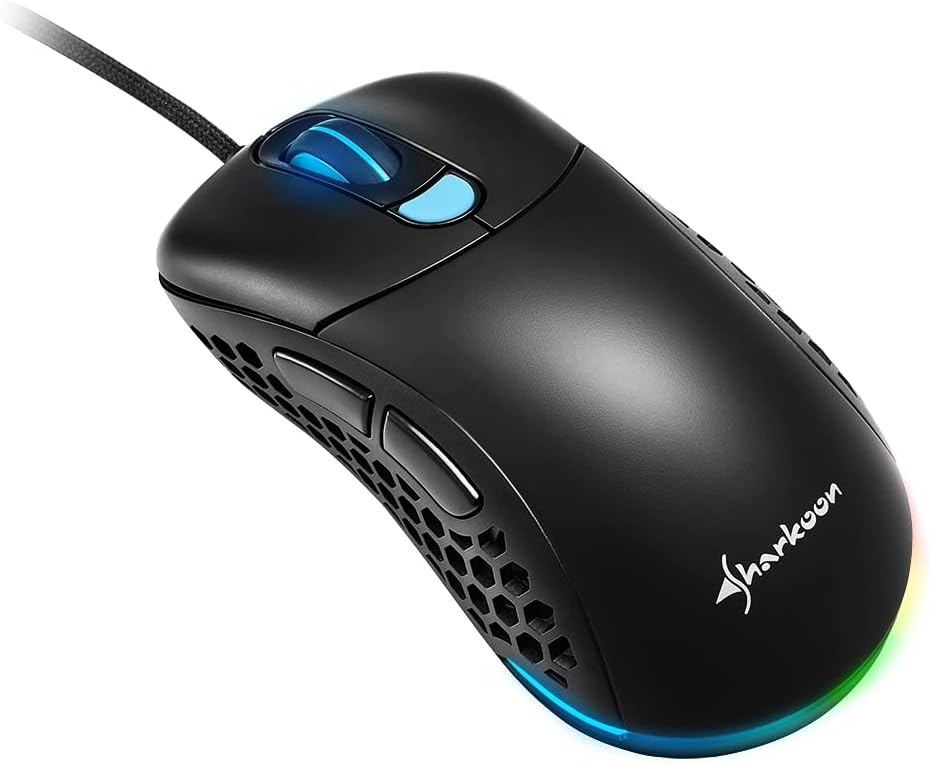
Image: The Sharkoon Light² 200 Gaming Mouse with the alternative solid top cover installed, providing a different aesthetic and feel.
5. Održavanje
5.1 Čišćenje miša
Za održavanje optimalnih performansi, redovito čistite miš:
- Odspojite miš s računala.
- Za brisanje površine miša koristite meku, suhu krpu.
- Za tvrdokornu prljavštinu, lagano dampkrpu obrišite vodom ili blagom otopinom za čišćenje. Izbjegavajte jake kemikalije.
- Use compressed air to clear dust from the honeycomb structure and around buttons.
- Clean the optical sensor area with a cotton swab lightly damps izopropilnim alkoholom.
5.2 Replacing PTFE Glide Feet
The PTFE glide feet ensure smooth movement. If they become worn, replace them using the included spare set:
- Carefully peel off the old PTFE feet using a thin, non-abrasive tool.
- Clean the surface where the feet were attached to ensure no residue remains.
- Peel the new PTFE feet from their backing and carefully apply them to the corresponding areas on the mouse's underside.
- Čvrsto pritisnite kako biste osigurali ispravno prianjanje.

Image: The underside of the Sharkoon Light² 200 Gaming Mouse, showing the optical sensor, the DPI switch, and the four white PTFE glide feet.
6. Rješavanje problema
- Miš ne reagira:
- Ensure the USB cable is securely connected to a working USB port.
- Try connecting the mouse to a different USB port or another computer to rule out port or system issues.
- Ponovno pokrenite računalo. - Postavke DPI-ja se ne mijenjaju:
- Ensure the Sharkoon gaming software is installed and running.
- Check if the DPI button is functioning correctly. - RGB rasvjeta ne radi ili je neispravna:
- Verify that the Sharkoon gaming software is installed and that lighting settings are configured correctly.
- Ensure the mouse is properly connected. - Mouse movement is erratic or imprecise:
- Očistite optički senzor na donjoj strani miša.
- Ensure you are using the mouse on a suitable surface (e.g., a mouse pad).
- Check for any physical obstructions around the sensor. - Gumbi ne reagiraju:
- Check button assignments in the Sharkoon gaming software.
- Ensure no physical debris is obstructing the button mechanism.
7. Specifikacije
| Značajka | Detalj |
|---|---|
| Naziv modela | Svjetlo² 200 |
| Broj modela artikla | 4044951029013 |
| Dimenzije proizvoda | 4.72 x 2.6 x 1.65 inča (120 x 66 x 42 mm) |
| Težina artikla | 2.19 unci (62 grama) |
| Tehnologija detekcije pokreta | Optical (PixArt Sensor) |
| Max DPI | 16,000 DPI |
| Programabilni gumbi | 6 |
| Tehnologija povezivanja | USB |
| Posebna značajka | RGB LED Lights, Modular Design |
| Proizvođač | Sharkoon tehnologije |
8. Jamstvo i podrška
8.1 Informacije o jamstvu
Sharkoon products are covered by a manufacturer's warranty against defects in materials and workmanship. The specific warranty period and terms may vary by region. Please retain your proof of purchase for warranty claims.
8.2 Tehnička podrška
For technical assistance, driver downloads, or further information, please visit the official Sharkoon webstranica:
- Webstranica: www.sharkoon.com
You may also find FAQs and troubleshooting guides on their support pages.