
Uvod
Hvala na kupnjiasing the Litex All Weather 5-Blade Ceiling Fan with Light Kit. This manual provides essential information for the safe installation, operation, and maintenance of your new ceiling fan. Please read all instructions carefully before beginning installation and retain this manual for future reference.
Važne sigurnosne informacije
UPOZORENJE: Kako biste smanjili rizik od požara, strujnog udara ili tjelesnih ozljeda, uvijek slijedite ove osnovne mjere opreza:
- Prije ugradnje ventilatora pročitajte sve upute.
- Ensure all electrical connections comply with local codes, ordinances, and the National Electrical Code (NEC).
- Isključite napajanje na glavnom prekidaču ili kutiji s osiguračima prije početka instalacije ili bilo kakvog održavanja.
- Ventilator mora biti montiran na konstrukcijski čvrstu kutiju s utičnicom ili potporni sustav koji može podnijeti najmanje 15.9 kg.
- Ne koristite ventilator s oštećenim lopaticama ili kućištem.
- Izbjegavajte postavljanje predmeta na putanju lopatica ventilatora.
- This fan is suitable for wet locations. Ensure all wiring connections are properly sealed to prevent water intrusion.
Što je u kutiji
Prije početka instalacije provjerite jesu li sve komponente prisutne. Ako neki dijelovi nedostaju ili su oštećeni, obratite se korisničkoj podršci.
- Sklop kućišta motora
- Lopatice ventilatora (5)
- Nosači oštrica
- Downrod i Canopy
- Light Kit Assembly (LED, E26 Medium base)
- Sjenilo za staklo
- Daljinski upravljač i prijemnik
- Paket hardvera (vijci, podloške, matice)
- Upute za uporabu (ovaj dokument)
Postavljanje i instalacija
Instalacija zahtijeva osnovno znanje o elektricitetu. Ako niste sigurni, obratite se kvalificiranom električaru.
Korak 1: Montaža ventilatora
Attach the mounting bracket to the ceiling outlet box. Ensure the outlet box is securely fastened to the building structure and can support the fan's weight (approximately 18.04 lbs).
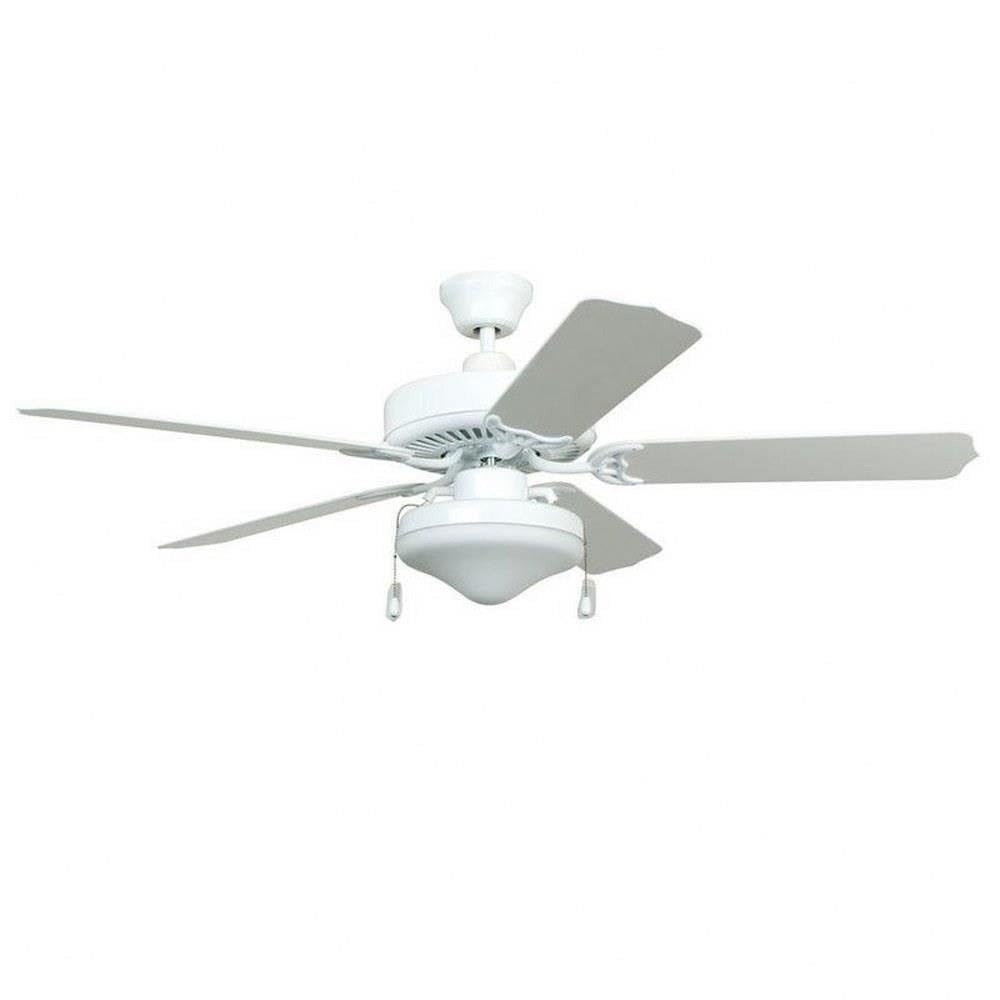
Slika: prednja strana view of the Litex All Weather 5-Blade Ceiling Fan with light kit, showcasing its white finish and five blades. This image illustrates the fan's overall appearance when fully assembled and mounted.
Korak 2: Ožičenje
Connect the fan's electrical wires to the household wiring according to the wiring diagram provided in the separate wiring guide (if applicable) or the instructions below. This fan operates on 120 Volts. Ensure all connections are secure and insulated with wire nuts.
- Spojite crna wire from the fan to the crna (hot) wire from the ceiling.
- Spojite bijela wire from the fan to the bijela (neutral) wire from the ceiling.
- Spojite zelena or goli bakar wire from the fan to the zelena or goli bakar (ground) wire from the ceiling.
Step 3: Attaching Blades
Secure each of the five fan blades to the blade brackets using the provided screws. Then, attach the blade assemblies to the motor housing. Ensure all screws are tightened securely.

Slika: Kutna view of the Litex All Weather 5-Blade Ceiling Fan, highlighting the white ABS resin blades and the integrated light kit. This perspective helps visualize the blade attachment points and the light fixture's design.
Step 4: Installing the Light Kit
Connect the light kit wires to the corresponding wires from the fan motor. Secure the light kit assembly to the bottom of the motor housing. Install the LED bulbs (E26 Medium base) and then attach the glass shade by twisting or securing it into place.

Slika: Krupni plan view of the light kit and pull chains on the Litex All Weather 5-Blade Ceiling Fan. This image details the design of the glass shade and the functional pull chains for manual control, though the fan primarily uses a remote.
Korak 5: Uparivanje daljinskog upravljača
Install batteries into the remote control. Restore power to the fan at the circuit breaker. Within 30 seconds of restoring power, press and hold the 'FAN' button on the remote control for 5 seconds until the fan light blinks, indicating successful pairing.
Upute za rad
Your Litex ceiling fan is controlled by the included remote control.
Rad ventilatora
- Ventilator UKLJUČEN/ISKLJUČEN: Press the 'FAN' button to turn the fan on or off.
- Kontrola brzine: Use the speed buttons (e.g., 1, 2, 3) to adjust the fan speed.
- Kontrola smjera: A slide switch on the fan motor housing controls the blade rotation direction (summer/winter mode). For summer, blades should rotate counter-clockwise to create a downdraft. For winter, blades should rotate clockwise to create an updraft. Change direction only when the fan is off.
Lagana operacija
- Svjetlo UKLJUČENO/ISKLJUČENO: Press the 'LIGHT' button to turn the light on or off.
- Zatamnjenje: If your remote supports dimming, press and hold the 'LIGHT' button to cycle through brightness levels.
Održavanje
Redovito održavanje osigurava optimalne performanse i dugotrajnost vašeg ventilatora.
Čišćenje
- UPOZORENJE: Isključite napajanje prije čišćenja.
- Wipe the fan housing and blades with a soft, damp krpom. Nemojte koristiti abrazivna sredstva za čišćenje ili otapala jer mogu oštetiti završnu obradu.
- Clean the glass shade with a mild glass cleaner and a soft cloth.
- This fan is wet-rated, but avoid direct high-pressure water spray on electrical components.
Zamjena žarulje
This fan uses LED bulbs with an E26 Medium base. While LEDs have a long lifespan, if replacement is needed:
- UPOZORENJE: Isključite napajanje prije zamjene žarulja.
- Pustite da se žarulje potpuno ohlade prije dodirivanja.
- Pažljivo uklonite stakleni poklopac.
- Unscrew the old bulb and screw in a new E26 Medium base LED bulb of appropriate wattage.
- Ponovno pričvrstite stakleno sjenilo.
Rješavanje problema
Ako imate problema s ventilatorom, pogledajte sljedeće uobičajene probleme i rješenja:
| Problem | Mogući uzrok | Otopina |
|---|---|---|
| Ventilator se ne pokreće | Nema napajanja ventilatora | Provjerite osigurač/prekidač strujnog kruga. Provjerite je li zidni prekidač UKLJUČEN. |
| Ventilator stvara buku | Labavi vijci ili montaža | Tighten all screws on blade brackets and mounting hardware. |
| Svjetlo ne radi | Žarulja je labava ili neispravna | Check bulb connection. Replace bulb if necessary. |
| Daljinski upravljač ne radi | Baterije su prazne ili nisu uparene | Replace remote batteries. Re-pair remote control (see Setup section). |
Tehnički podaci
| Značajka | Detalj |
|---|---|
| Marka | Litex |
| Broj modela | WOD52WW5L |
| Raspon oštrice | 52 inča |
| Broj oštrica | 5 |
| Materijal oštrice | ABS smola |
| Završna boja | Bijela |
| Izvor svjetlosti | LED |
| Baza žarulje | E26 Srednje |
| Voltage | 120 volti |
| Wattage | 60 vata |
| Metoda kontrole | Daljinski upravljač |
| Unutarnja/vanjska upotreba | Vanjski (za mokre uvjete) |
| Vrsta montaže | Semi Flush Mount / Ceiling Mount |
| Dimenzije predmeta (D x Š x V) | 52 cm x 52 cm x 17.75 cm |
| Težina artikla | 18.04 funti |
| Obavezna montaža | Da |
| Certifikacija | Na popisu UL |
Informacije o jamstvu
This Litex ceiling fan is covered by a 1-godišnje jamstvo proizvođača from the date of purchase. This warranty covers defects in materials and workmanship under normal use. Please retain your proof of purchase for warranty claims. For specific warranty terms and conditions, refer to the documentation included with your product or contact Litex customer support.
Korisnička podrška
If you have any questions, require assistance with installation, or need to report a missing or damaged part, please contact Litex customer support. Refer to the contact information provided in your product packaging or visit the official Litex webmjesto za detalje podrške.