1. Uvod
The BOYA BY-M1S is a professional omnidirectional lavalier condenser microphone designed for high-quality audio recording. It is compatible with a wide range of devices, including smartphones, DSLR cameras, camcorders, audio recorders, and personal computers. This manual provides detailed instructions for setting up, operating, and maintaining your BY-M1S microphone.
2. Značajke proizvoda
- Omnidirectional Capsule: Captures broadcast-quality sound from a 360-degree range.
- Plug and Play: No batteries or drivers required for most smartphone applications.
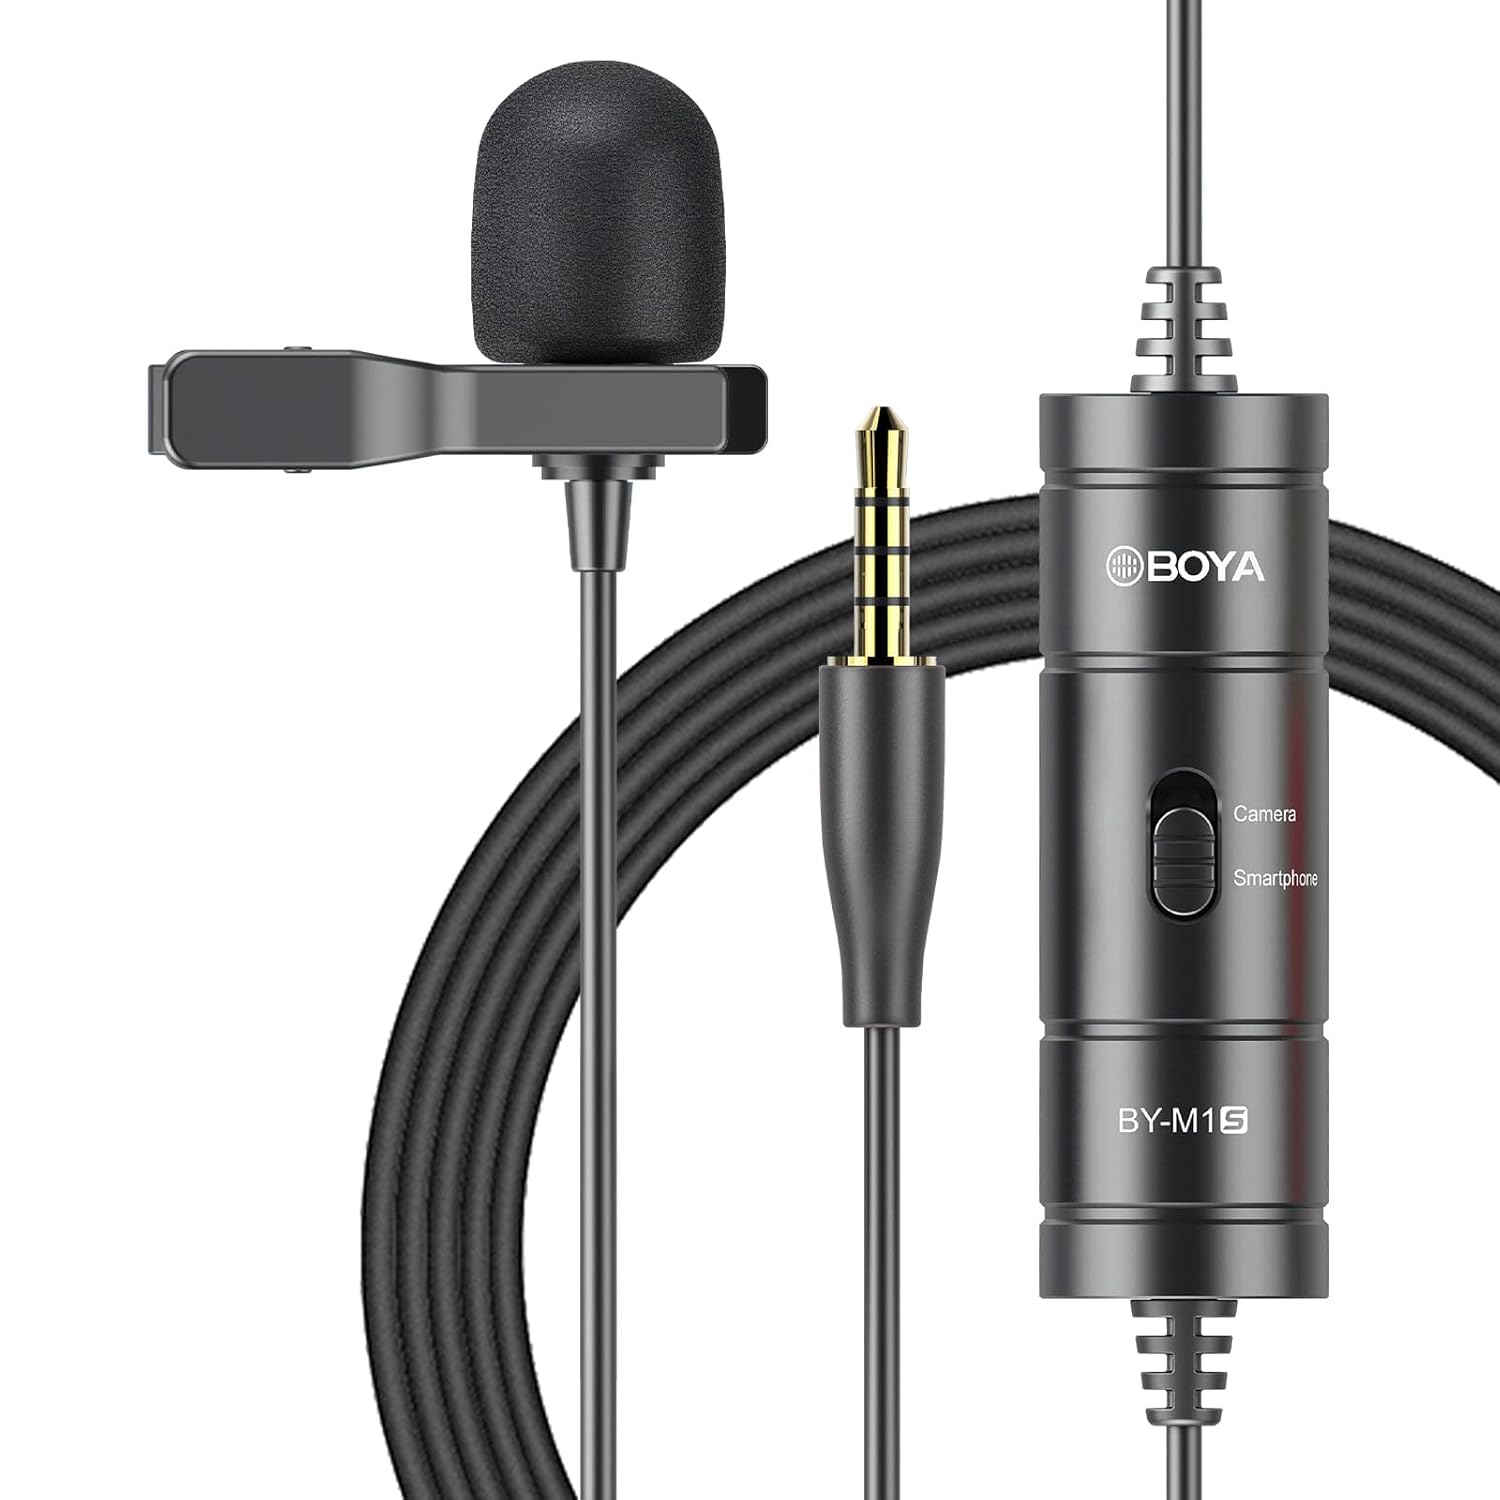
- Dugi kabel: Features a 6-meter (20-foot) cable for extended reach.
- Široka kompatibilnost: Supports smartphones, DSLR cameras, camcorders, audio recorders, tablets, and laptops.
- Device Mode Switch: Easily switch between "Smartphone" and "Camera" modes.
- Uključeni dodaci: Comes with a metal clip for secure attachment and a foam windscreen to reduce wind noise.

3. Sadržaj paketa
The BOYA BY-M1S package includes the following items:
- BY-M1S Lavalier Microphone
- Spojnica za rever
- Vjetrobran od pjene
- Carrying Pouch (may vary by region)
4. Upute za postavljanje
4.1 Pričvršćivanje mikrofona
- Attach the metal clip to the microphone body.
- Securely clip the microphone to your clothing, approximately 15-20 cm (6-8 inches) from your mouth, for optimal sound capture.
- Place the foam windscreen over the microphone capsule to reduce plosives and wind noise.

4.2 Povezivanje s uređajima
The BY-M1S features a 3.5mm TRRS connector for broad compatibility.
- Za pametne telefone/tablete:
Plug the 3.5mm connector directly into your device's headphone/microphone jack. Ensure the switch on the microphone's control module is set to "Smartphone" mode. For iOS devices without a 3.5mm jack, a 3.5mm to Lightning adapter (not included) is required.
- For DSLR Cameras/Camcorders/Audio Recorders/PCs:
Plug the 3.5mm connector into the microphone input jack of your device. Set the switch on the microphone's control module to "Camera" mode. For PCs with separate headphone and microphone jacks, you may need a 3.5mm TRRS to TRS adapter (not included).

5. Upute za rad
5.1 Odabir načina
The control module on the microphone cable features a switch to select the appropriate operating mode:
- Smartphone Mode: Use this setting when connecting to smartphones, tablets, or other devices that use a TRRS input.
- Način kamere: Use this setting when connecting to DSLR cameras, camcorders, audio recorders, or other devices that use a TRS input.
Always ensure the switch is set to the correct mode for your recording device to prevent audio issues.
5.2 Recording Tips
- Položaj mikrofona: For clear audio, position the microphone approximately 6-8 inches (15-20 cm) from the sound source.
- Okruženje: Record in a quiet environment to minimize background noise. The omnidirectional pattern picks up sound from all directions, including ambient noise.
- Uprava za kabele: Use the included cable tie to manage the extra-long cable and prevent tangles or accidental disconnections.
- Praćenje: If your recording device allows, monitor your audio with headphones during recording to ensure optimal sound levels and quality.
6. Održavanje
- Čišćenje: Za čišćenje tijela i kabela mikrofona koristite meku, suhu krpu. Nemojte koristiti tekuća sredstva za čišćenje ili otapala.
- Skladištenje: Store the microphone in its carrying pouch when not in use to protect it from dust and physical damage. Avoid extreme temperatures and humidity.
- Održavanje kabela: Do not sharply bend or pull the cable. Coil it loosely for storage.
7. Rješavanje problema
| Problem | Mogući uzrok | Otopina |
|---|---|---|
| Nema zvuka ili je glasnoća niska. |
|
|
| Poor audio quality (e.g., muffled, distorted). |
|
|
| Microphone not recognized by iOS device. |
|
|
8. Specifikacije
| Specifikacija | Detalj |
|---|---|
| Polarni uzorak | Svesmjerno |
| Frekvencijski odziv | 18 KHz |
| Audio Osjetljivost | 30 decibela |
| Signal-to-Noise Ratio | 78 dB |
| Impedancija | 1000 Ohma |
| Duljina kabela | 6 metara (20 stope) |
| Vrsta konektora | 3.5 mm TRRS Jack |
| Izvor napajanja | Battery Powered (no internal battery, powered by device in smartphone mode, or external battery for camera mode if applicable) |
| Težina artikla | 68 gram |
| Dimenzije (D x Š x V) | 12 x 6 x 15 Centimeters (Product Dimensions) |
9. Jamstvo i podrška
BOYA pruža jednogodišnje jamstvo for the BY-M1S microphone. This warranty covers manufacturing defects and ensures product quality.
For technical support, warranty claims, or any questions regarding your BOYA BY-M1S microphone, please contact BOYA customer service through their official website or the retailer where the product was purchased. Please have your purchase receipt and product model number (BY-M1S) available when contacting support.