Gioteck SC3
Gioteck SC3 Wireless Pro Controller User Manual
For Nintendo Switch, PC, and Mobile Devices
Uvod
This manual provides detailed instructions for the setup, operation, and maintenance of your Gioteck SC3 Wireless Pro Controller. Designed for use with Nintendo Switch, PC, and mobile devices, this controller features programmable back buttons, customizable RGB lighting, and changeable magnetic thumb sticks for an enhanced gaming experience.
1. Postavljanje
1.1 Sadržaj paketa
- Gioteck SC3 Wireless Pro Controller
- USB kabel za punjenje
- Additional Magnetic Thumb Sticks (if included)
- Korisnički priručnik (ovaj dokument)
1.2 Punjenje kontrolera
Before initial use, fully charge the controller. Connect the supplied USB charging cable to the controller's charging port and the other end to a USB power source (e.g., Nintendo Switch dock, PC USB port, or USB wall adapter).
- LED indikator će pokazati status punjenja.
- Potpuno punjenje obično traje otprilike 2-3 sata.
Slika: Donji dio view of the Gioteck SC3 controller, highlighting the USB-C charging port located between the two textured grips.
1.3 Uparivanje s Nintendo Switchom
- Iz Nintendo Switch HOME izbornika odaberite Kontrolori, onda Promjena zahvata/redoslijeda.
- On the SC3 controller, press and hold the Gumb za uparivanje (usually a small button on the top or back) for a few seconds until the LED indicators begin to flash rapidly.
- Once the controller is recognized by the Switch, the player LED(s) on the controller will illuminate solid, indicating successful pairing.
- Pritisnite tipku Gumb potvrditi.
Note: For subsequent uses, the controller should automatically reconnect to the last paired Switch console when powered on.
1.4 Connecting to PC/Mobile (Bluetooth)
- Ensure Bluetooth is enabled on your PC or mobile device.
- On the SC3 controller, press and hold the Gumb za uparivanje for a few seconds until the LED indicators flash rapidly.
- On your PC/mobile device, navigate to Bluetooth settings and search for new devices.
- Select "Gioteck SC3" or similar from the list of available devices to pair.
- The controller's LED will become solid upon successful connection.
1.5 Installing Magnetic Thumb Sticks
The SC3 controller features changeable magnetic thumb sticks. To replace them:
- Gently pull the existing thumb stick straight up to remove it.
- Align the desired magnetic thumb stick with the base and gently push it down until it snaps into place.

Slika: prednja strana view of the Gioteck SC3 controller, showcasing the magnetic thumb sticks and button layout.
2. Upute za rad
2.1 Raspored gumba
The SC3 controller features a traditional button layout. Refer to the image below for button identification.

Slika: Kutni prednji dio view of the Gioteck SC3 controller, displaying the full button layout including face buttons, D-pad, analog sticks, and shoulder buttons.
- Lijeva/desna analogna palica: Za kretanje i kontrolu kamere.
- D-pad: Usmjereni ulaz.
- Tipke A/B/X/Y: Akcijski gumbi.
- Tipke L/R/ZL/ZR: Gumbi za rame i okidač.
- Gumbi +/-: Start/Select equivalents.
- tipka za početak: Returns to the console's home menu.
- Tipka za snimanje: Snima snimke zaslona.
2.2 Programabilni gumbi za povratak
The SC3 controller includes programmable back buttons (M1, M2, M3, M4) for custom assignments.

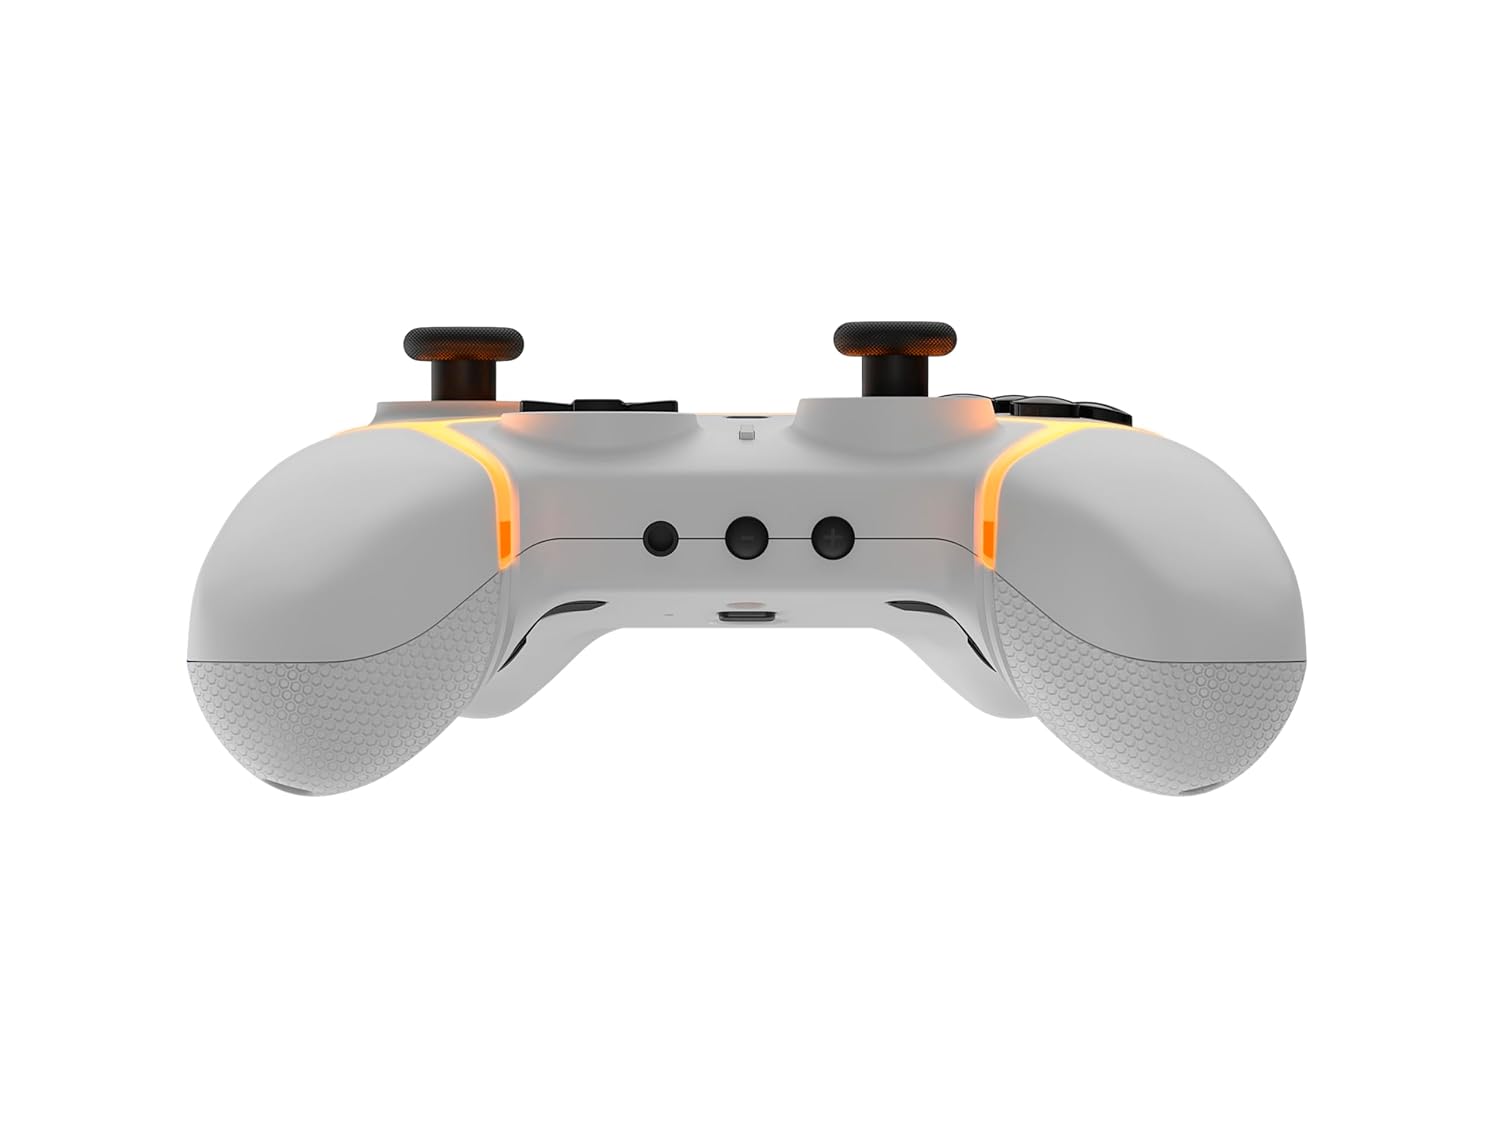
Slika: Stražnja strana view of the Gioteck SC3 controller, clearly showing the four programmable back buttons (M1, M2, M3, M4) and textured grips.
Koraci programiranja:
- Pritisnite i držite Programska tipka (refer to diagram if available, usually a small button on the back) until the LED indicator flashes.
- Pritisnite tipku Gumb Natrag (M1, M2, M3, or M4) you wish to program. The LED will flash slowly.
- Pritisnite tipku Gumb za unos (e.g., A, B, X, Y, L, R, ZL, ZR, D-pad direction) you want to assign to the back button.
- Pritisnite tipku Programska tipka again to save the assignment. The LED will stop flashing.
- Repeat for other back buttons as desired.
To clear a programmed button, follow steps 1-2, then press the Program Button again without pressing an input button.
2.3 Prilagodba RGB osvjetljenja
The controller features customizable RGB lighting. Specific instructions for changing colors or effects are typically found in the product's quick start guide or by pressing a dedicated button combination (e.g., Function + R3).
Consult the quick start guide included with your controller for precise button combinations to adjust RGB lighting.
2.4 Kontrole pokreta
The SC3 controller supports motion controls, allowing for immersive gameplay in compatible Nintendo Switch titles. No special setup is usually required; motion controls activate automatically when supported by the game.
2.5 Audio Headset Jack
A 3.5mm audio headset jack is located on the controller for connecting compatible headsets. It includes dedicated mute and volume control buttons.
- Pojačavanje/stišavanje glasnoće: Prilagodite audio izlaz.
- Gumb za isključivanje zvuka: Mute/unmute microphone input.

Slika: Vrh view of the Gioteck SC3 controller, highlighting the 3.5mm audio jack, volume controls, and mute button.
3. Održavanje
3.1 Čišćenje
Za čišćenje kontrolera koristite meku, suhu krpu. Za tvrdokornu prljavštinu, laganoampisperite krpu vodom. Izbjegavajte korištenje jakih kemikalija, abrazivnih sredstava za čišćenje ili otapala jer mogu oštetiti završnu obradu i unutarnje komponente kontrolera.
- Do not immerse the controller in water or any other liquid.
- Ensure all ports are dry before charging or connecting devices.
3.2 Skladištenje
Kontroler čuvajte na hladnom i suhom mjestu, dalje od izravne sunčeve svjetlosti i ekstremnih temperatura. Izbjegavajte stavljanje teških predmeta na kontroler kako biste spriječili oštećenja.
3.3 Njega baterija
The controller contains a rechargeable battery. To prolong battery life:
- Izbjegavajte često potpuno pražnjenje baterije.
- Charge the controller regularly, even if not in use for extended periods (e.g., once every 3-6 months).
- Do not expose the controller to temperatures above 60°C (140°F).
4. Rješavanje problema
4.1 Kontroler se ne povezuje/ne uparuje
- Provjerite bateriju: Provjerite je li kontroler dovoljno napunjen.
- Popravak: Follow the pairing instructions in Section 1.3 or 1.4.
- smetnje: Move closer to the console/device and away from potential sources of wireless interference (e.g., Wi-Fi routers, other Bluetooth devices).
- Resetiraj kontroler: Locate a small reset button (often a pinhole) on the back of the controller. Use a paperclip to press and hold it for a few seconds. Then attempt to re-pair.
- Update Console/Device Software: Ensure your Nintendo Switch, PC, or mobile device's operating system is up to date.
4.2 Buttons/Sticks Not Responding
- Ponovna sinkronizacija: Odspojite i ponovno spojite upravljač.
- Čist: Pazite da se oko gumba ili palica ne nakupe ostaci.
- Test in another game/menu: Determine if the issue is specific to a game or system-wide.
- Resetiraj kontroler: Izvršite hard reset kao što je gore opisano.
4.3 Motion Controls Not Working
- Kompatibilnost igara: Verify that the game you are playing supports motion controls.
- Ponovo kalibriraj: On Nintendo Switch, you can recalibrate motion controls in the system settings.
- Resetiraj kontroler: Izvršite hard reset.
5. Specifikacije
| Model: | Gioteck SC3 Wireless Pro Controller |
| Kompatibilnost: | Nintendo Switch (Original, Lite, OLED), PC, Mobile Devices |
| Povezivost: | Bluetooth bežični |
| Dimenzije (cca): | 2.87 x 5.35 x 6.34 inča (7.29 x 13.59 x 16.1 cm) |
| Težina (približno): | 10.6 unci (300 grama) |
| Audio priključak: | 3.5mm with mute and volume controls |
| Posebne karakteristike: | Programmable back buttons, Magnetic thumb sticks, RGB lighting, Motion controls |
6. Informacije o jamstvu
The Gioteck SC3 Wireless Pro Controller comes with a manufacturer's warranty. For specific details regarding warranty coverage, duration, and claims process, please refer to the warranty card included with your product or visit the official Gioteck webmjesto.
Molimo sačuvajte dokaz o kupnji u svrhu jamstva.
7. Korisnička podrška
If you encounter any issues or have questions not covered in this manual, please contact Gioteck customer support. Contact information can typically be found on the product packaging or the official Gioteck webmjesto.
Gioteck Official Webstranica: www.gioteck.com
Ask a question about this manual
Ask about setup, troubleshooting, compatibility, parts, safety, or missing instructions. Manuals+ will review the question and use this page’s manual context to help answer it.