
Alula RE667W-R-Pro
Alula RE667W-R-Pro Slimline Pro korisnički priručnik za dodirnu ploču
Model: RE667W-R-Pro
Uvod
The Alula Slimline Touchpad PRO provides modern and intuitive control for your smart security system. Featuring a 7-inch full-color touchscreen, this device can be wall-mounted or placed on a tabletop, offering complete control of your security system from anywhere within your premises. It allows you to arm and disarm the system, view cameras, control smart devices, and initiate scenes. Its interface mirrors the Alula Smart Security app, ensuring ease of use and a familiar experience.

Figure 1: Alula Slimline Touchpad Pro main interface.
Sadržaj paketa
- Alula Slimline Touchpad PRO
- Zidni nosač
- Stolni stalak
- 110V Plug-in Transformer
- Punjač
Postavljanje i instalacija
The Slimline Touchpad PRO offers flexible installation options, including wall mounting or tabletop placement. Ensure the device is placed within Wi-Fi range for optimal performance.
Montaža zidnog nosača
- Choose a suitable location on a wall, preferably near a power outlet.
- Secure the wall mount bracket to the wall using appropriate screws (not included).
- Connect the 12V direct wire or use the 110V plug-in transformer to power the device.
- Carefully attach the touchpad to the mounted bracket, ensuring it clicks securely into place.
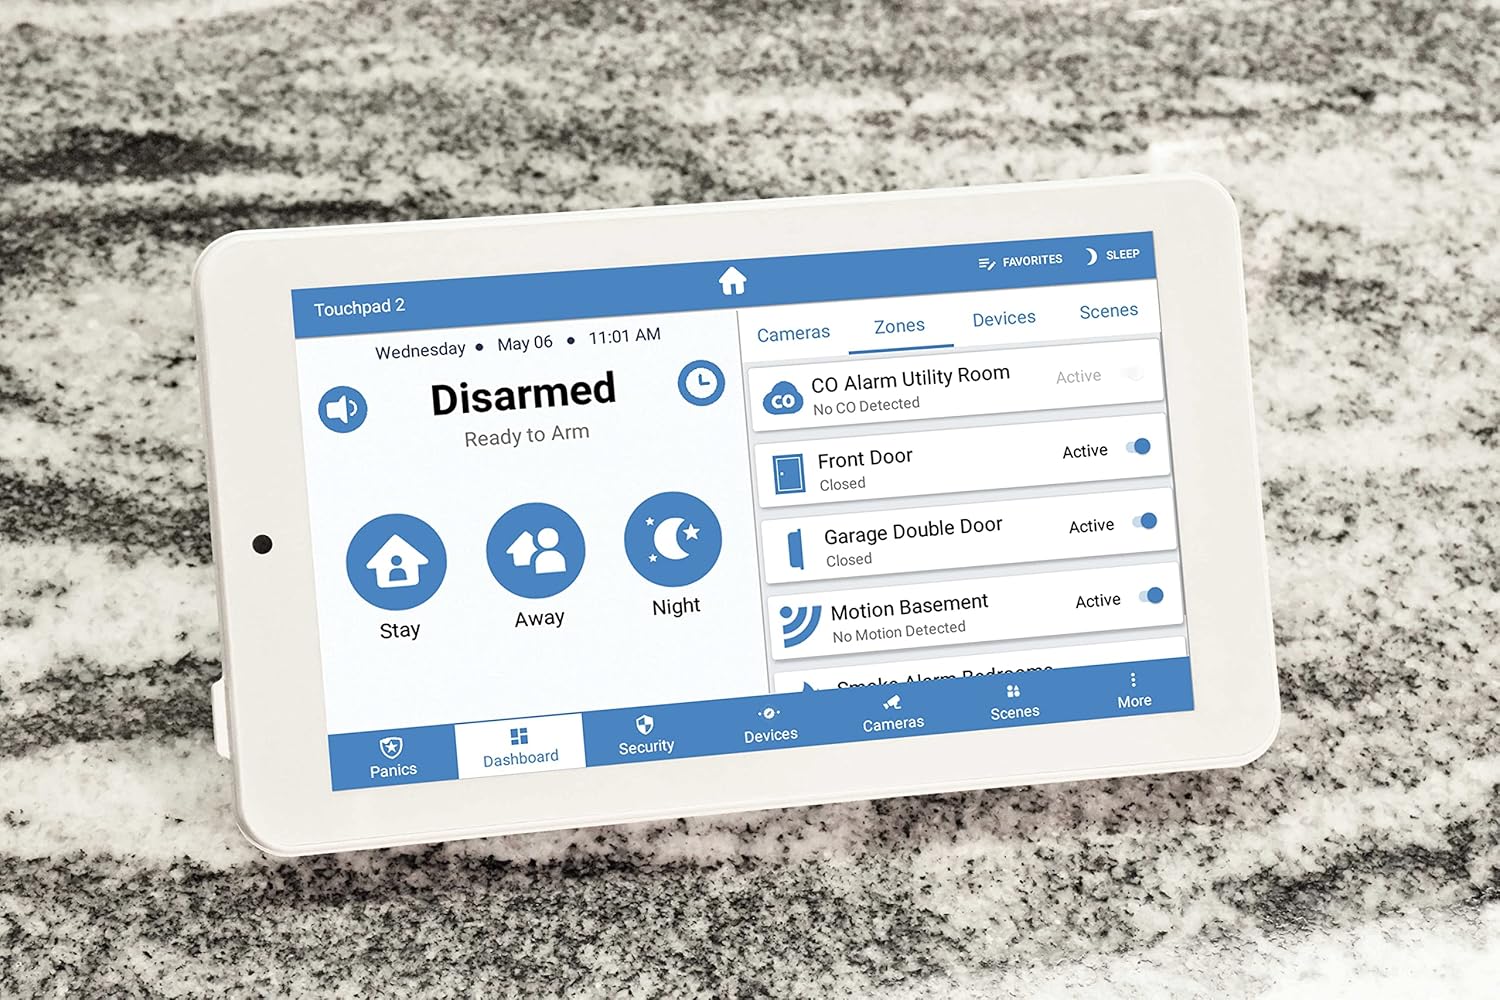
Figure 2: Touchpad in tabletop configuration, showing device and zone management.
Instalacija postolja za stol
- Attach the tabletop stand to the back of the touchpad.
- Place the touchpad on a flat, stable surface.
- Connect the 110V plug-in transformer to the touchpad and plug it into a power outlet.
Initial Power-Up and Wi-Fi Connection
- Once powered, the touchpad will boot up.
- Follow the on-screen prompts to connect to your home Wi-Fi network.
- Unesite lozinku za Wi-Fi kada se to od vas zatraži.
- The touchpad will then attempt to connect to your Alula smart security system.
Upute za rad
The Slimline Touchpad PRO provides comprehensive control over your Alula smart security system.
Naoružavanje i razoružavanje
- Držač za ruku: Tap the "Stay" icon to arm the system with interior motion sensors bypassed. Ideal for when you are home.
- Ruka daleko: Tap the "Away" icon to arm all sensors. Ideal for when you leave the premises.
- Noć ruku: Tap the "Night" icon for a customized arming mode, typically similar to "Stay" but with specific zones armed.
- Razoružati: Tap the "Disarmed" area and enter your user code to disarm the system.
Controlling Smart Devices and Scenes
- Navigate to the "Devices" or "Scenes" tab on the bottom menu.
- From the "Devices" tab, you can control connected smart home devices such as lights, locks, and thermostats.
- From the "Scenes" tab, you can activate pre-configured scenes that control multiple devices simultaneously (e.g., "Good Morning" scene).

Figure 3: Touchpad displaying a scenic background in disarmed state.
Dvosmjerna audio komunikacija
The touchpad supports two-way audio, allowing communication with monitoring stations or other connected devices if configured within your system.
Održavanje
To ensure the longevity and optimal performance of your Alula Slimline Touchpad PRO, follow these maintenance guidelines:
- Čišćenje: Use a soft, dry, lint-free cloth to clean the touchscreen. For stubborn smudges, slightly dampisperite krpu vodom. Izbjegavajte abrazivna sredstva za čišćenje, otapala ili aerosolne sprejeve.
- Ažuriranja softvera: Ensure your touchpad's software is kept up-to-date. Updates are typically pushed automatically via your Wi-Fi connection.
- Napajanje: Always use the original Alula power adapter. Do not use third-party adapters.
- Plasman: Avoid placing the touchpad in direct sunlight, near heat sources, or in areas with extreme humidity.
Rješavanje problema
| Problem | Mogući uzrok | Otopina |
|---|---|---|
| Touchpad not powering on. | Nema napajanja, neispravan adapter ili labava veza. |
|
| Ne mogu se spojiti na Wi-Fi. | Netočna lozinka, izvan dometa ili problem s usmjerivačem. |
|
| Zaslon osjetljiv na dodir ne reagira. | Privremeni softverski kvar ili fizičko oštećenje. |
|
| System not arming/disarming. | Incorrect user code, system fault, or communication issue. |
|
Tehnički podaci
| Značajka | Detalj |
|---|---|
| Broj modela | RE667W-R-Pro |
| Veličina zaslona | 7 inča |
| Rezolucija | 1024 x 600 px |
| Boja | Bijela |
| Izvor napajanja | 110V (with included transformer) or 12V direct wire |
| Povezivost | Bežično (Wi-Fi) |
| Metoda kontrole | Dodir |
| Audio | Dvosmjerni audio |
| Dimenzije (D x Š x V) | 9 x 6 x 4 inča |
| Vrsta instalacije | Zidni nosač, stolni |
| Kompatibilni uređaji | Smartphone (via Alula Smart Security app) |
| UPC | 810044990607 |
Jamstvo i podrška
For warranty information and technical support, please refer to the official Alula website or contact your authorized Alula dealer. Keep your purchase receipt as proof of purchase.
Alula Support: alula.com/support
Ask a question about this manual
Ask about setup, troubleshooting, compatibility, parts, safety, or missing instructions. Manuals+ will review the question and use this page’s manual context to help answer it.