
1. Uvod
Thank you for choosing the Crivit Auriol Radio-Controlled Projection Alarm Clock. This device combines a precise radio-controlled clock with a clear LCD display, dual alarms, and a convenient projection feature. This manual will guide you through the setup, operation, and maintenance of your new alarm clock.

Ispred view of the alarm clock displaying time, date, and temperature.
2. Sigurnosne upute
- Pažljivo pročitajte sve upute prije uporabe i sačuvajte ih za buduću upotrebu.
- Ne izlažite uređaj ekstremnim temperaturama, izravnoj sunčevoj svjetlosti ili visokoj vlažnosti.
- Izbjegavajte ispuštanje ili izlaganje uređaja jakim udarcima.
- Ne pokušavajte sami rastavljati ili popravljati uređaj. Obratite se kvalificiranom servisnom osoblju.
- Baterije držite izvan dohvata djece. Istrošene baterije zbrinite u skladu s lokalnim propisima.
- Use only the provided AC adapter or one with identical specifications.
3. Sadržaj paketa
Molimo provjerite paket za sljedeće stavke:
- Crivit Auriol Radio-Controlled Projection Alarm Clock (Model 373928)
- AC adapter za napajanje
- Baterije (unaprijed instalirane ili odvojene)
- Korisnički priručnik (ovaj dokument)

Included AC power adapter.
4. Značajke proizvoda
- Radio-Controlled Time: Automatic time synchronization for precise timekeeping.
- Funkcija projekcije: Projects time, alarm times, or ambient temperature onto a wall or ceiling.
- Pivoting Projection Arm: Adjustable projection angle with easy focus adjustment.
- LCD zaslon: Clear screen showing time, day, month, week number/day of the week, and indoor temperature.
- Dvostruki alarmi: Two independent alarm settings with snooze function.
- Senzor dodira: Activates short-term projection and screen backlight.
- Mogućnosti napajanja: Operates via AC adapter or batteries.
- USB-A priključak za punjenje: Convenient 5V, 800mA output for charging external devices.
- Podesiva svjetlina: Customizable display brightness.
5. Identifikacija komponente
Ispred View:
Ispred view s LCD zaslonom.
- LCD zaslon: Shows time, date, temperature, alarm status, and radio control signal.
- Touch Sensor Area: Located above the display, for temporary backlight and projection.
- Projection Indicator: Icon indicating projection is active.
- Indikatori alarma: Icons for Alarm 1 and Alarm 2.
- Gumb za rotaciju: Adjusts projection orientation.
Strana View (Projection Arm):
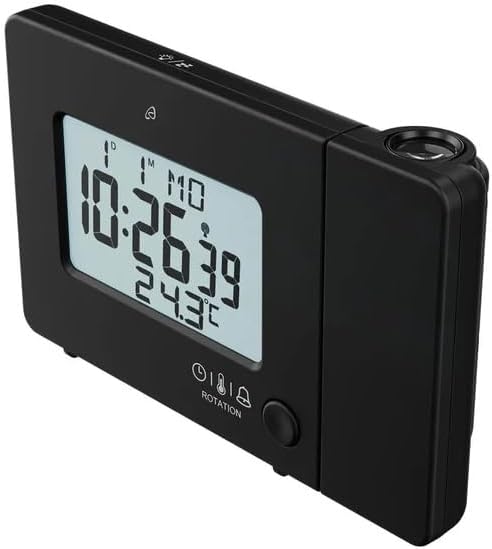
Strana view with projection arm extended.
- Projekcijska ruka: Pivots to direct the projection.
- Fokusni kotač: Podešava jasnoću projicirane slike.
- Objektiv za projekciju: Emits the time/temperature display.
Stražnji View:

Stražnji view with control buttons and ports.
- -/WEEK Button: Decreases values, sets week display.
- +/ZONE Button: Increases values, sets time zone.
- Gumb °C/°F: Toggles temperature unit.
- LANG Button: Selects display language for day of the week.
- Gumb 12/24: Toggles 12/24 hour format.
- Gumb MODE: Cycles through settings modes (Time, Alarm 1, Alarm 2).
- Gumb SET: Enters setting mode for current display.
- Gumb RESET: Resets the device to factory defaults (use a pointed object).
- Odjeljak za baterije: For backup batteries.
- DC IN priključak: Za spajanje AC adaptera za napajanje.
- USB-A izlazni priključak: Za punjenje vanjskih uređaja.
6. Postavljanje
6.1. Uključivanje
The alarm clock can be powered by either the included AC adapter or batteries for backup.
- Ugradnja baterije: Open the battery compartment on the rear of the unit. Insert the included batteries, observing the correct polarity (+/-). Batteries primarily serve as backup in case of power outage.
- Priključak AC adaptera: Connect the small plug of the AC adapter into the DC IN port on the back of the alarm clock. Plug the AC adapter into a standard wall outlet. The display will light up.
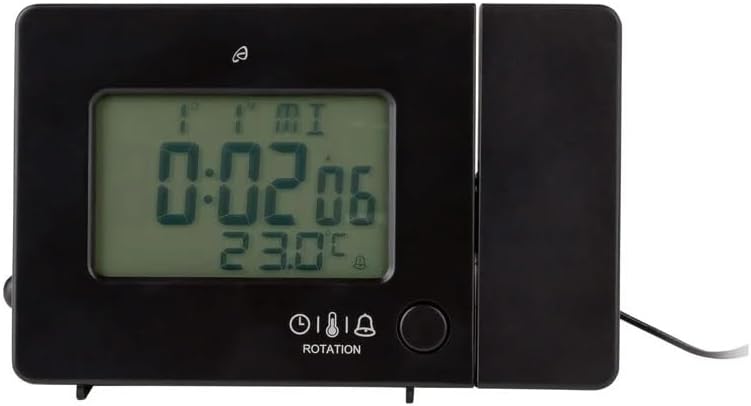
Alarm clock connected to power.
6.2. Initial Setup and Radio Control Synchronization
Upon first power-up or after a reset, the clock will automatically attempt to synchronize with the radio-controlled time signal (DCF77). This process can take several minutes to an hour, depending on your location and signal strength. During synchronization, a radio tower icon will flash on the display.
- Za bolji prijem signala, sat postavite blizu prozora.
- Izbjegavajte postavljanje u blizinu elektroničkih uređaja koji mogu uzrokovati smetnje.
- Once synchronized, the radio tower icon will appear solid on the display.
If the radio signal is not received, you may need to set the time manually (see Section 7.1).
6.3. Basic Settings (if not automatically set or for adjustment)
Pritisnite tipku SET button to enter setting mode. Use the -/WEEK i +/ZONE buttons to adjust values, and SET za potvrdu i prelazak na sljedeću postavku.
- vremenska zona: Adjust if you are not in the standard time zone for the radio signal.
- 12/24 satni format: Pritisnite tipku 12/24 za prebacivanje između 12-satnog (s AM/PM) i 24-satnog formata.
- Jedinica temperature: Pritisnite tipku ° C / ° F gumb za prebacivanje između Celzija i Fahrenheita.
- Jezik prikaza: Pritisnite tipku JEZIK button to select the language for the day of the week display (5 languages available).
7. Upute za rad
7.1. Ručno postavljanje vremena
If the radio-controlled time signal is weak or unavailable, you can set the time manually:
- Pritisnite i držite SET gumb dok znamenke sati ne zatrepere.
- Koristite -/WEEK i +/ZONE tipke za podešavanje sata.
- Pritisnite SET to confirm and move to minutes, then year, month, and day.
- Pritisnite SET again to exit manual time setting.
7.2. Postavljanje alarma (Alarm 1 i Alarm 2)
Sat ima dva neovisna alarma.
- Pritisnite tipku NAČIN RADA button once to display Alarm 1 time, or twice for Alarm 2 time. The corresponding alarm icon (e.g., A1) will flash.
- Dok je prikazano vrijeme alarma, pritisnite i držite SET gumb dok znamenke sati ne zatrepere.
- Koristite -/WEEK i +/ZONE tipke za podešavanje sata.
- Pritisnite SET to confirm and move to minutes. Adjust minutes using -/WEEK i +/ZONE.
- Pritisnite SET again to confirm and exit alarm setting.
- Za aktiviranje/deaktiviranje alarma pritisnite NAČIN RADA button to display the desired alarm, then press the +/ZONE button. The alarm icon (bell) will appear/disappear on the display.
7.3. Funkcija odgode alarma
Kada se oglasi alarm, dodirnite Područje osjetnika dodira ili pritisnite SNOOZE / SVJETLO button (if available, otherwise use the touch sensor) to activate the snooze function. The alarm will pause for approximately 5 minutes and then sound again. To stop the alarm completely, press any other button.
7.4. Funkcija projekcije
The alarm clock can project the time, alarm times, or ambient temperature onto a wall or ceiling.
- Aktiviraj projekciju: The projection is continuously active when powered by the AC adapter. If running on batteries, touch the Područje osjetnika dodira for short-term projection.
- Podešavanje kuta projekcije: Pivot the projection arm to direct the image to your desired location.
- Podešavanje fokusa: Koristite Fokusni kotač on the projection arm to sharpen the projected image.
- Change Projected Content: Pritisnite tipku NAČIN RADA button repeatedly to cycle through projecting Time, Alarm 1, Alarm 2, or Temperature.
- Zakreni projekciju: Pritisnite tipku ROTACIJA button to rotate the projected image by 90-degree increments (4 orientations available).

Time projected onto a surface.
7.5. Pozadinsko osvjetljenje zaslona
When powered by the AC adapter, the display backlight is continuously on. When running on batteries, touch the Područje osjetnika dodira za aktiviranje pozadinskog osvjetljenja na nekoliko sekundi.
7.6. USB Charging Output
The USB-A port on the back of the unit provides a 5V, 800mA output for charging small electronic devices like smartphones or tablets. Connect your device's USB charging cable to this port.
8. Održavanje
- Čišćenje: Obrišite uređaj mekom, suhom krpom. Nemojte koristiti abrazivna sredstva za čišćenje ili otapala.
- Zamjena baterije: If using batteries for backup, replace them annually or when the display becomes dim during power outages. Ensure correct polarity.
- Skladištenje: Ako uređaj skladištite dulje vrijeme, izvadite baterije kako biste spriječili curenje.
9. Rješavanje problema
| Problem | Mogući uzrok | Otopina |
|---|---|---|
| Zaslon je prazan ili taman. | No power, dead batteries, or AC adapter not connected. | Ensure AC adapter is securely connected. Replace batteries if using for backup. |
| Radio-kontrolirano vrijeme se ne sinkronizira. | Weak signal, interference, or incorrect time zone. | Move the clock to a window or open area. Avoid electronic devices. Manually set time if necessary. Check time zone setting. |
| Projekcija je mutna. | Fokus nije podešen. | Podesite Fokusni kotač on the projection arm. |
| Alarm se ne oglašava. | Alarm nije aktiviran ili je nepravilno postavljen. | Ensure the alarm icon is visible on the display. Recheck alarm time settings. |
| Punjenje putem USB-a ne radi. | Device not properly connected, or device requires more power than 800mA. | Ensure the USB cable is securely connected. Check if your device's charging requirements exceed 5V/800mA. |
10. Specifikacije

Dimenzije proizvoda.
- Broj modela: 373928
- Dimenzije (D x Š x V): 15 x 3.81 x 9.5 cm (approx. 15l x 9.5H centimeters)
- Materijal: Plastični
- Vrsta zaslona: Digitalni LCD
- Izvor napajanja: AC Adapter (included) or Batteries (included)
- USB izlaz: 5V, 800mA
- Posebne karakteristike: Adjustable brightness, Snooze, Projection, Radio-controlled time
- Vrsta kretanja: Kvarcni
- Vrsta montaže: Stolna ploča
- Unutarnja/vanjska upotreba: Zatvoreni
11. Jamstvo i podrška
This Crivit Auriol Projection Alarm Clock comes with a standard manufacturer's warranty. Please refer to the warranty card included in your package or contact your retailer for specific warranty terms and conditions.
For technical support or inquiries, please contact the customer service department of your retailer or the Crivit support line as indicated on the product packaging or official webmjesto.