
1. Uvod
Hvala na kupnjiasing the CLAYMORE Heady3 CLC-500 Headlight. This versatile headlight is designed for various outdoor activities, offering multiple lighting modes, a motion sensor, and flexible mounting options. Please read this manual carefully before use to ensure proper operation and maintenance.
2. Sigurnosne informacije
- Ne gledajte izravno u svjetlosni snop kako biste izbjegli ozljede oka.
- Keep the device away from water and moisture unless specifically designed for waterproof use (check specifications).
- Do not attempt to disassemble or modify the headlight. This may void the warranty and pose safety risks.
- Koristite samo navedenu jačinu punjenjatage (USB 5V 1A).
- Čuvati izvan dohvata djece.
- Izbjegavajte ekstremne temperature i izravnu sunčevu svjetlost.
3. Sadržaj paketa
Molimo provjerite jesu li svi artikli prisutni:
- CLAYMORE Heady3 CLC-500 Headlight
- USB-C kabel za punjenje
- Traka za glavu
- Korisnički priručnik (ovaj dokument)
4. Proizvod je gotovview
Familiarize yourself with the components of your CLAYMORE Heady3 CLC-500 Headlight.
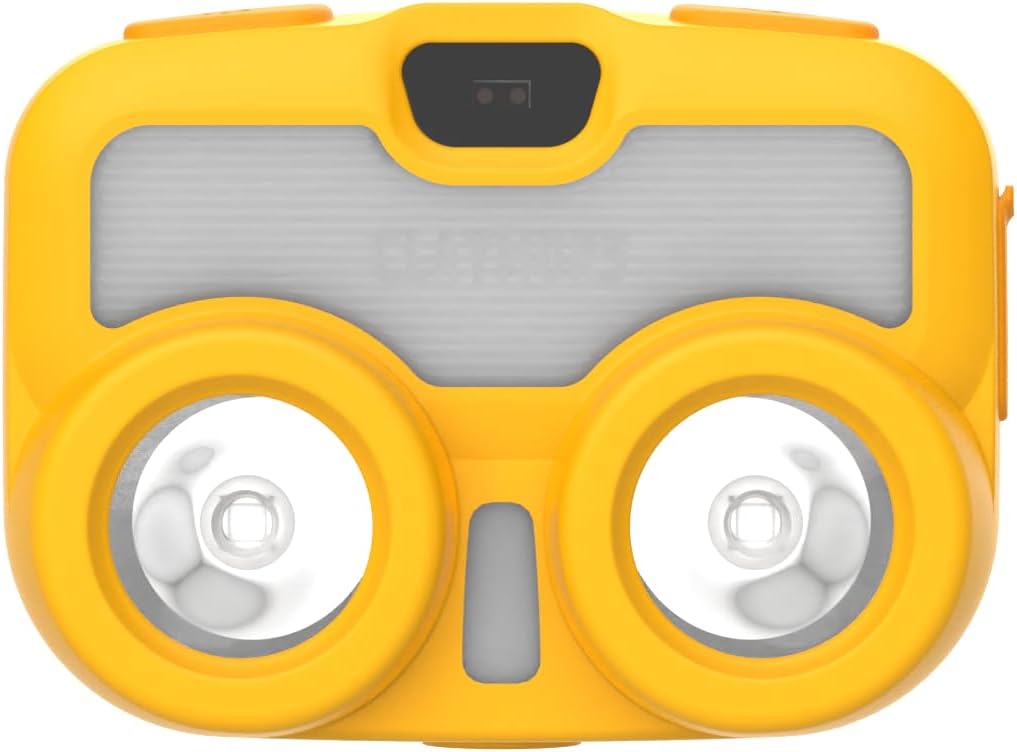
Slika 4.1: Prednja strana View. This image shows the front of the CLAYMORE Heady3 CLC-500 Headlight, highlighting the two main light sources and the central sensor area.

Slika 4.2: Vrh View. This image displays the top side of the headlight, featuring the power button (left), the P-SENSOR label, and the mode/motion sensor button (right).

Slika 4.3: Bočna strana View. This image illustrates the side of the headlight, clearly showing the USB-C charging port with its protective cover.
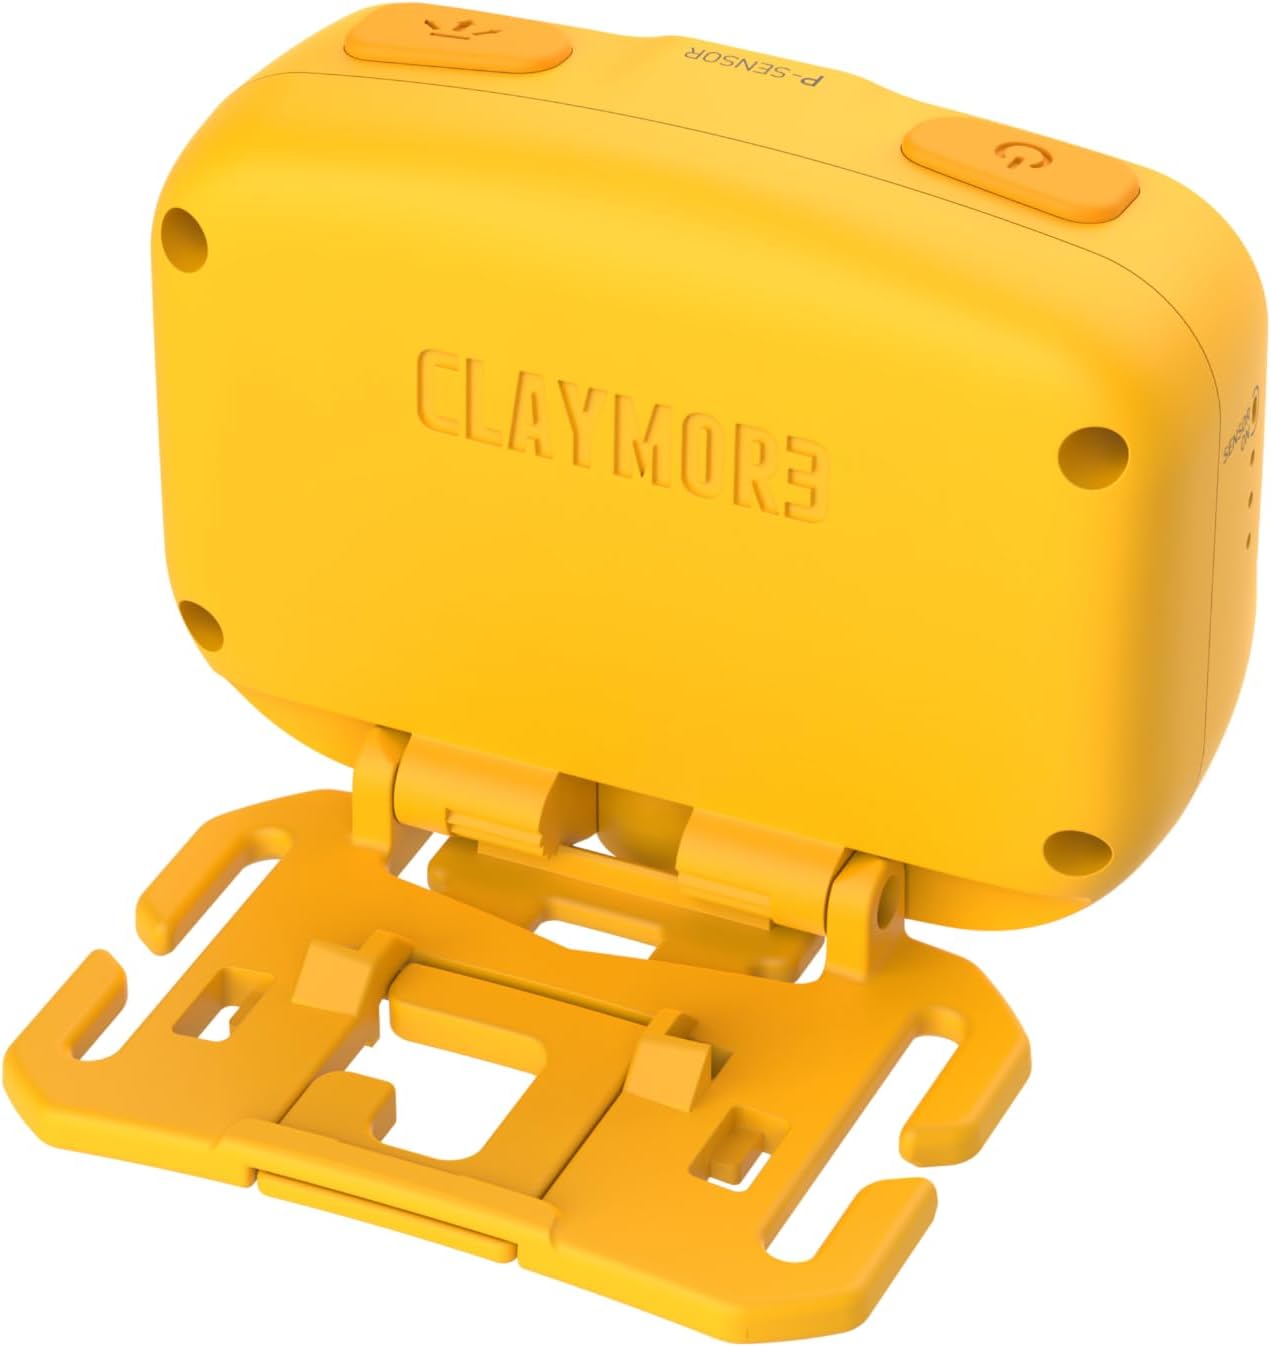
Slika 4.4: Natrag View. This image presents the rear of the headlight, showing the CLAYMORE branding and the integrated mounting bracket for various attachments.
5. Postavljanje
5.1 Charging the Headlight
- Locate the USB-C port on the side of the headlight (refer to Figure 4.3).
- Connect the provided USB-C cable to the headlight and the other end to a USB power source (e.g., wall adapter, power bank, computer USB port). Ensure the power source provides 5V 1A.
- Indikatorska lampica punjenja prikazivat će status punjenja (npr. crveno za punjenje, zeleno za potpuno napunjeno).
- Potpuno punjenje obično traje nekoliko sati.
5.2 Mogućnosti montaže
The CLAYMORE Heady3 offers multiple ways to attach and use the light:
- Traka za glavu: Attach the headlight to the included headband for traditional headlamp koristiti.
- Kuka: Utilize the integrated hook on the mounting bracket to hang the light from tents, branches, or other suitable fixtures.
- Aligatorska kopča: Attach the light to a bag, pocket, or other gear using an alligator clip (may require an additional accessory, not specified as included).
- Otvor za vijak stativa: The headlight features a tripod screw hole for mounting on standard tripods or other compatible accessories, offering stable positioning.
6. Upute za rad
6.1 Uključivanje/isključivanje
- To turn on the headlight, press and hold the power button (left button on top, refer to Figure 4.2).
- To turn off the headlight, press and hold the power button again.
6.2 Promjena načina osvjetljenja
The CLC-500 features 6 lighting modes:
- Cool White (5700K, 6500K): Bright, clear light for general illumination.
- White (4200K): Neutral white light.
- Topla bijela (3000K): Softer, warmer light for comfortable ambiance.
- Crveno svjetlo: Preserves night vision and is less disruptive in dark environments.
- Diffused Light: Provides a wide, even spread of light.
- Fokusirano svjetlo: Concentrated beam for long-distance illumination.
To cycle through the lighting modes, short press the mode button (right button on top, refer to Figure 4.2) while the light is on.
6.3 Podešavanje svjetline (zatamnjenje)
The brightness can be adjusted from 15 lumens to 500 lumens.
- While the light is on in any mode, press and hold the mode button to continuously adjust the brightness. Release the button when the desired brightness level is reached.
6.4 Funkcija senzora pokreta
The motion sensor allows for hands-free operation, enabling you to turn the light on/off or dim it with a wave of your hand.
- To activate the motion sensor, double-press the mode button. An indicator light (if present, not specified) may confirm activation.
- Once activated, wave your hand in front of the sensor (located centrally on the front, refer to Figure 4.1) to toggle the light on/off or to dim it, depending on the specific mode.
- To deactivate the motion sensor, double-press the mode button again.
7. Održavanje
- Čišćenje: Wipe the headlight with a soft, dry cloth. Do not use abrasive cleaners or solvents.
- Njega baterije: To prolong battery life, charge the device regularly, even if not in frequent use. Avoid fully discharging the battery for extended periods. Store in a cool, dry place.
- Skladištenje: When storing for long periods, ensure the battery is partially charged (around 50%) and recharge every 3-6 months.
8. Rješavanje problema
- Svjetlo se ne pali:
- Provjerite je li baterija napunjena. Spojite je na izvor napajanja i provjerite indikator punjenja.
- Pritisnite i držite gumb za napajanje nekoliko sekundi kako biste bili sigurni da se ne radi samo o kratkom pritisku.
- Svjetlo se ne puni:
- Check the USB-C cable for damage and ensure it's properly connected.
- Isprobajte drugi USB izvor napajanja ili zidni adapter.
- Senzor pokreta ne reagira:
- Ensure the motion sensor function is activated (double-press mode button).
- Clean the sensor area on the front of the headlight.
- Ensure there are no obstructions between your hand and the sensor.
9. Specifikacije
| Model | CLC-500 |
| Dimenzije (približno) | 68 x 51 x 37 mm (2.7 x 2.0 x 1.5 inča) |
| Težina (približno) | 82 g (2.9 oz) |
| Svjetlina | 15 - 500 lumena |
| Temperature boje svjetla | Cool: 5700K, 6500K / White: 4200K / Warm: 3000K / Red |
| Ulazni | USB 5V 1A |
| Vrsta baterije | Litij polimer (1 uključen) |
| Materijal | Aluminij |
| Posebne značajke | Senzor pokreta |
10. Jamstvo i podrška
This product comes with a standard manufacturer's warranty. For specific warranty terms and conditions, please refer to the documentation provided at the time of purchase or contact your retailer. For technical support or service inquiries, please contact the manufacturer or your local distributor.