1. Uvod
This manual provides detailed instructions for the installation, operation, and maintenance of the Generic Canbus Box models TY-SS-01, RP5-TY-002, and RP5-TY-102. This device is designed to integrate with Android car radio systems in specific Toyota vehicle models, enabling communication between the vehicle's CAN-bus system and the aftermarket radio. Proper installation ensures functionality such as steering wheel control integration and display of vehicle information on the Android head unit.
2. Sigurnosne informacije
- Always disconnect the vehicle's battery before beginning any electrical installation to prevent short circuits and damage.
- Provjerite jesu li svi spojevi sigurni i pravilno izolirani kako biste izbjegli električne opasnosti.
- Ako niste sigurni u bilo koji korak postupka instalacije, obratite se kvalificiranom stručnjaku.
- Do not modify the Canbus box or wiring harness. Unauthorized modifications can void the warranty and cause damage.
- Verify compatibility with your specific vehicle model and Android head unit before installation.
3. Sadržaj paketa
Provjerite jesu li sve komponente prisutne u vašem paketu:
- 1 x Canbus Box (Model: RP5-TY-102 or similar, depending on variant)
- 1 x Wiring Harness Power Cable
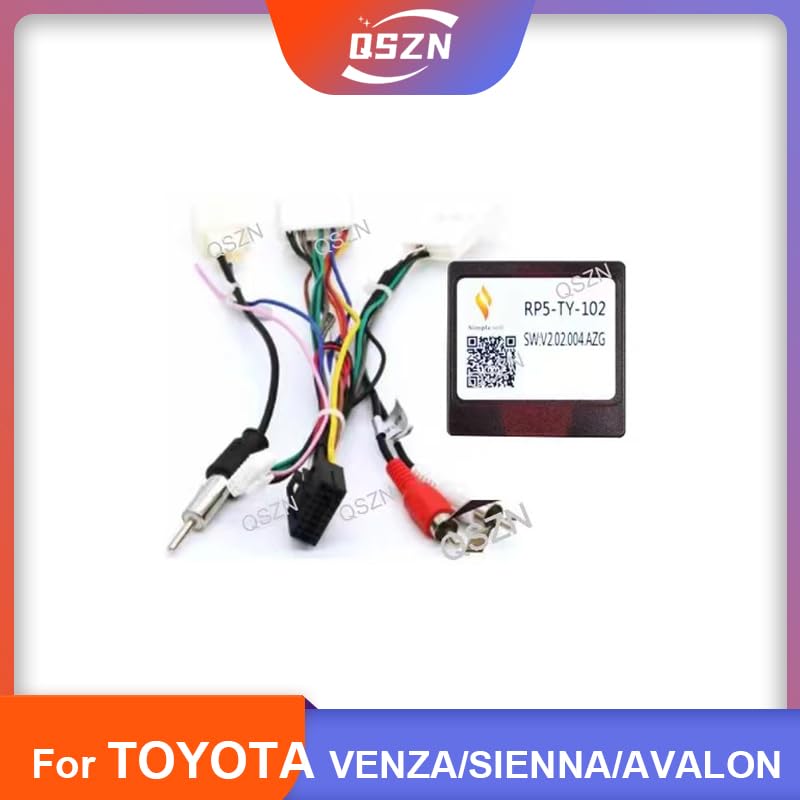
Slika 1: Gotovoview of the Canbus Box and included wiring harness. This image displays the main Canbus module connected to a multi-pin wiring harness, along with RCA cables and other connectors.
4. Kompatibilnost
This Canbus Box and wiring harness are compatible with the following Toyota vehicle models when installing an Android car radio:
- Toyota Sienna (2008 models)
- Toyota Avalon (2012 models)
- Toyota Prado (2002-2009 models)
- Toyota Venza (2011 models)
Note: Vehicle year and model compatibility are crucial. Please verify your vehicle's specifications before proceeding with installation.
5. Postavljanje i instalacija
Follow these general steps for installing the Canbus Box and wiring harness. Specific steps may vary slightly depending on your vehicle's exact configuration and the Android head unit.
5.1 Priprema
- Odspojite bateriju: Ugasite vozilo i odspojite negativni terminal akumulatora automobila.
- Ukloni postojeći radio: Carefully remove the factory car radio from the dashboard. Refer to your vehicle's service manual for specific instructions on dashboard disassembly.
5.2 Connecting the Canbus Box
- Prepoznajte priključke: Locate the factory wiring harness connectors in your vehicle's dashboard.
- Spojite kabelski svežanj: Connect the provided wiring harness power cable to the vehicle's factory harness. Ensure all connections are firm and correctly aligned.
- Connect Canbus Box: Plug the Canbus Box (e.g., RP5-TY-102) into the designated connector on the wiring harness. This connection is typically a multi-pin white connector.
- Connect to Android Radio: Connect the other end of the wiring harness to your Android car radio. This typically involves connecting the main power/speaker harness, RCA cables (for audio/video output), and specific Canbus data wires (if separate).
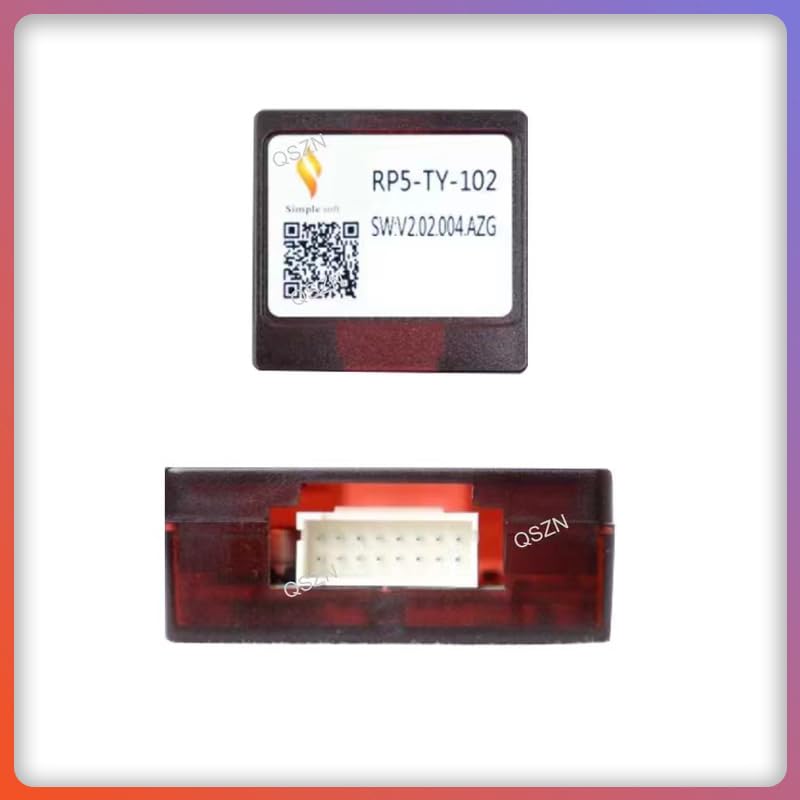
Slika 2: Krupni plan view of the Canbus Box module, showing its model number RP5-TY-102 and a QR code. This module processes vehicle data for the Android head unit.
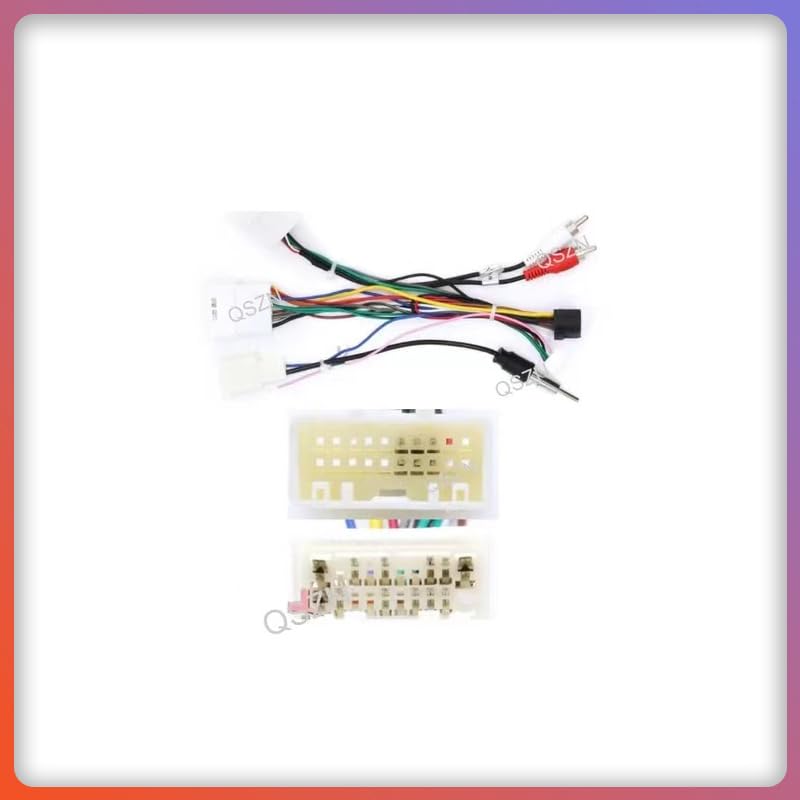
Slika 3: Detaljno view of the wiring harness connectors. This image shows various multi-pin connectors and RCA plugs, illustrating the different connections required for the Android car radio and vehicle system.
5.3 Ispitivanje i ponovno sastavljanje
- Ponovno spojite bateriju: Ponovno spojite negativni pol akumulatora automobila.
- Funkcionalnost testiranja: Turn on the vehicle and the Android radio. Test all functions, including:
- Radio power on/off
- Audio izlaz
- Steering wheel controls (volume, track skip, mode)
- Vehicle information display (if supported by your Android radio and vehicle)
- Sigurne komponente: Once all functions are verified, carefully secure the Canbus box and excess wiring behind the dashboard.
- Ponovno sastavite nadzornu ploču: Reassemble the dashboard components in reverse order of removal.
6. Upute za rad
The Canbus Box operates automatically once correctly installed. Its primary function is to translate vehicle CAN-bus signals into a format that your Android car radio can understand, enabling seamless integration of vehicle features.
- Kontrole na upravljaču: After installation, your Android radio should recognize and respond to the vehicle's steering wheel controls (e.g., volume up/down, track next/previous, mode selection). Configuration may be required within your Android radio's settings.
- Vehicle Data Display: Depending on your Android radio's capabilities and vehicle model, the Canbus box may enable the display of vehicle information such as door status, climate control settings, or parking sensor data on the radio screen.
- Ignition Power: The Canbus box provides ignition-switched power to the Android radio, ensuring it turns on and off with the vehicle's ignition.
7. Održavanje
The Canbus Box is designed for maintenance-free operation. However, consider the following to ensure its longevity:
- Sigurne veze: Periodically check that all wiring connections remain secure and free from corrosion.
- Zaštita okoliša: Ensure the Canbus box is installed in a dry location, away from excessive heat or moisture.
- Ažuriranja softvera: If your Android radio receives software updates, verify that Canbus functionality is not affected. Some Android radios may require re-configuration of Canbus settings after major updates.
8. Rješavanje problema
| Problem | Mogući uzrok | Otopina |
|---|---|---|
| Android radio does not power on. |
|
|
| Kontrole na volanu ne rade. |
|
|
| No vehicle information displayed. |
|
|
If problems persist after attempting these solutions, contact the seller or a professional installer for assistance.
9. Specifikacije
| Značajka | Specifikacija |
|---|---|
| Vrsta proizvoda | Canbus Box with Wiring Harness |
| Canbus Box Model | RP5-TY-102 (or TY-SS-01, RP5-TY-002 depending on variant) |
| Voltage | 12 V |
| Materijal | ABS plastika |
| Boja | Black (Canbus Box) |
| Proizvođač | HUNTAN |
10. Jamstvo i podrška
Specific warranty details for this product are not provided in the available information. For warranty claims, technical support, or further assistance, please contact the seller or the manufacturer directly. Retain your proof of purchase for any warranty-related inquiries.