
vine B0FFBC4MV4
vine Smart Thermostat (Model B0FFBC4MV4) User Manual
Sveobuhvatne upute za instalaciju, rad i održavanje.
1. Uvod
This manual provides detailed instructions for the installation, setup, and operation of your vine Smart Thermostat, Model B0FFBC4MV4. This device is designed to offer efficient temperature control for your home, featuring Wi-Fi connectivity, 7-day programmable scheduling, and compatibility with smart home assistants like Alexa and Google Assistant. Please read this manual thoroughly before installation and use to ensure proper function and safety.
2. Sigurnosne informacije
- Prekid napajanja: Always turn off power to your heating and cooling system at the circuit breaker before installing or servicing the thermostat.
- Zahtjev za C-žicu: A common wire (C-wire) is required for the operation of this thermostat. Ensure your system has a C-wire or install a C-wire power adapter if necessary.
- Voltage Kompatibilnost: This thermostat is designed for 24V AC systems. It is not compatible with 110V-240V AC electric baseboard heat, millivolt systems, or systems that use S terminals for indoor/outdoor sensors. Attempting to install with incompatible systems can cause damage or injury.
- Profesionalna instalacija: If you are unsure about any part of the installation process, consult a qualified HVAC technician or electrician.
- Provjera sustava: After installation, verify that your heating and cooling system operates correctly.
3. Sadržaj paketa
Provjerite jesu li sve dolje navedene stavke uključene u vaš paket:
- vine Smart Thermostat (Model B0FFBC4MV4) x1
- Zidna ploča x1
- Large Trim Plate x1 (for covering marks from previous thermostat)
- Screws Sets x2
- Wiring Labels x1
- Korisnički priručnik x1

Slika 3.1: Package contents for the vine Smart Thermostat. Includes the thermostat unit, wall plate, trim plate, screws, wiring labels, and user manual.
4. Provjera kompatibilnosti
Before installation, it is crucial to confirm your HVAC system's compatibility with the vine Smart Thermostat. This thermostat requires a C-wire (common wire) for operation and is designed for 24V AC systems.
4.1. Vrste sustava
The vine Smart Thermostat is compatible with approximately 90% of 24V AC systems, including:
- Conventional (2 Heat/2 Cool) - Gas, Oil, Electric, Boiler
- Heat Pump (2 stages Heat/Cool + 2 stages Auxiliary/Emergency)
- Heat-only or Cool-only Systems
4.2. Incompatible Systems
Termostat je nije kompatibilan s:
- Electric baseboard heat (110VAC-240VAC)
- Milivoltni sustavi
- Systems that do not support S terminals for indoor and outdoor sensors
4.3. Online Compatibility Tool
For a detailed compatibility check, visit the official vine support page: vineconnected.com/support/thermostat. This tool will guide you through identifying your current wiring and system type.

Slika 4.1: Visual guide to HVAC system compatibility, including wiring details and warnings for incompatible systems.
Isječak 4.1: This video demonstrates how to check the compatibility of your HVAC system with the vine Smart Thermostat, guiding you through identifying your current wiring and system type.
5. Instalacija
Follow these steps carefully to install your vine Smart Thermostat. Ensure you have performed the compatibility check before proceeding.
5.1. Potreban alat
- Phillips odvijač
- Level (optional, for aesthetic alignment)
- Olovka (za označavanje)
5.2. Instalacija korak po korak
- Isključite napajanje: Locate your circuit breaker for your HVAC system and turn off the power. Verify the system is off by checking if your old thermostat screen is blank or unresponsive.
- Uklonite stari termostat: Carefully remove the cover of your old thermostat. Take a picture of the wiring for reference before disconnecting any wires. This will help ensure correct re-connection.
- Žice za označavanje: Use the provided wiring labels to mark each wire according to its terminal on your old thermostat. If you see any jumper wires, remove them; your new thermostat has internal jumpers.
- Uklonite staru zidnu ploču: Odvijte i uklonite staru zidnu ploču.
- Ugradnja nove zidne ploče: Position the new vine wall plate on the wall. If needed, use the large trim plate to cover any marks or holes from the previous thermostat. Secure the new wall plate using the provided screws.
- Spojite žice: Insert each labeled wire into its corresponding terminal on the new vine wall plate. Ensure each wire is securely connected. If your system has two power wires (R/RC and RH), adjust the internal switch on the thermostat unit to the connection position.
- Montaža termostata: Align the four clips on the thermostat unit with the wall plate. Gently push the thermostat onto the wall plate until it clicks into place.
- Vrati snagu: Turn the power back on at your circuit breaker. The thermostat screen should light up.

Slika 5.1: Visual steps for thermostat installation, including power off, wire labeling, and mounting.
Isječak 5.1: This video provides a detailed guide on how to assemble and install the vine Smart Thermostat (Model TJ550), covering wiring and mounting procedures.
6. App and Wi-Fi Setup
After physical installation, connect your vine Smart Thermostat to your home Wi-Fi network and the vine mobile application for remote control and smart features.
6.1. Preuzmite aplikaciju
Download the "Vine Thermostat" or "Smart Life" app from the Apple App Store (iOS) or Google Play Store (Android). You can also scan the QR codes provided in the app setup guide.
6.2. Create an Account and Connect
- Open the app and sign in or create a new account. Note: You must create your own vine account to use third-party services and products. Guest accounts are not supported for full functionality.
- On the thermostat, after initial power-up, you will be prompted to make some basic settings (e.g., heat type, heating/cooling stages). Complete these settings.
- On the thermostat, touch the "Wi-Fi Setup" button.
- In the app, touch the "+" button in the upper right corner to add a device. Select your thermostat model (TJ-550).
- Slijedite upute u aplikaciji za spajanje termostata na vašu 2.4 GHz Wi-Fi mrežu. Important: The vine thermostat DOES NOT support 5GHz Wi-Fi. Ensure your phone is connected to a 2.4GHz network during setup.
- Once connected, you can modify the thermostat's name within the app.
Isječak 6.1: This video demonstrates the step-by-step process of setting up the vine Smart Thermostat app (Model TJ550), including account creation, Wi-Fi connection, and initial device configuration.
7. Upute za rad
Your vine Smart Thermostat offers various features for comfortable and efficient home climate control.
7.1. Basic Temperature Control
On the main screen of the thermostat, use the "+" and "-" buttons to adjust the desired temperature. Tap the "O" button to switch between "Heating" or "Cooling" modes.
Isječak 7.1: This video illustrates how to change the thermostat system mode (Heat, Cool, Off) and fan mode directly on the vine Smart Thermostat device.
7.2. Programmable Schedules (7-day, 8-period)
Utilize the 7-day programmable schedules with up to 8 periods per day to automatically adjust your home's temperature. This feature helps maintain comfort while optimizing energy consumption. Access and configure schedules through the Vine Thermostat App or Smart Life App.

Slika 7.1: The app interface for setting 7-day programmable schedules to optimize energy usage.
7.3. Daljinsko upravljanje putem aplikacije
Control and monitor your thermostat from anywhere using the Vine Thermostat App or Smart Life App. Adjust settings, view current temperatures, and manage schedules remotely.
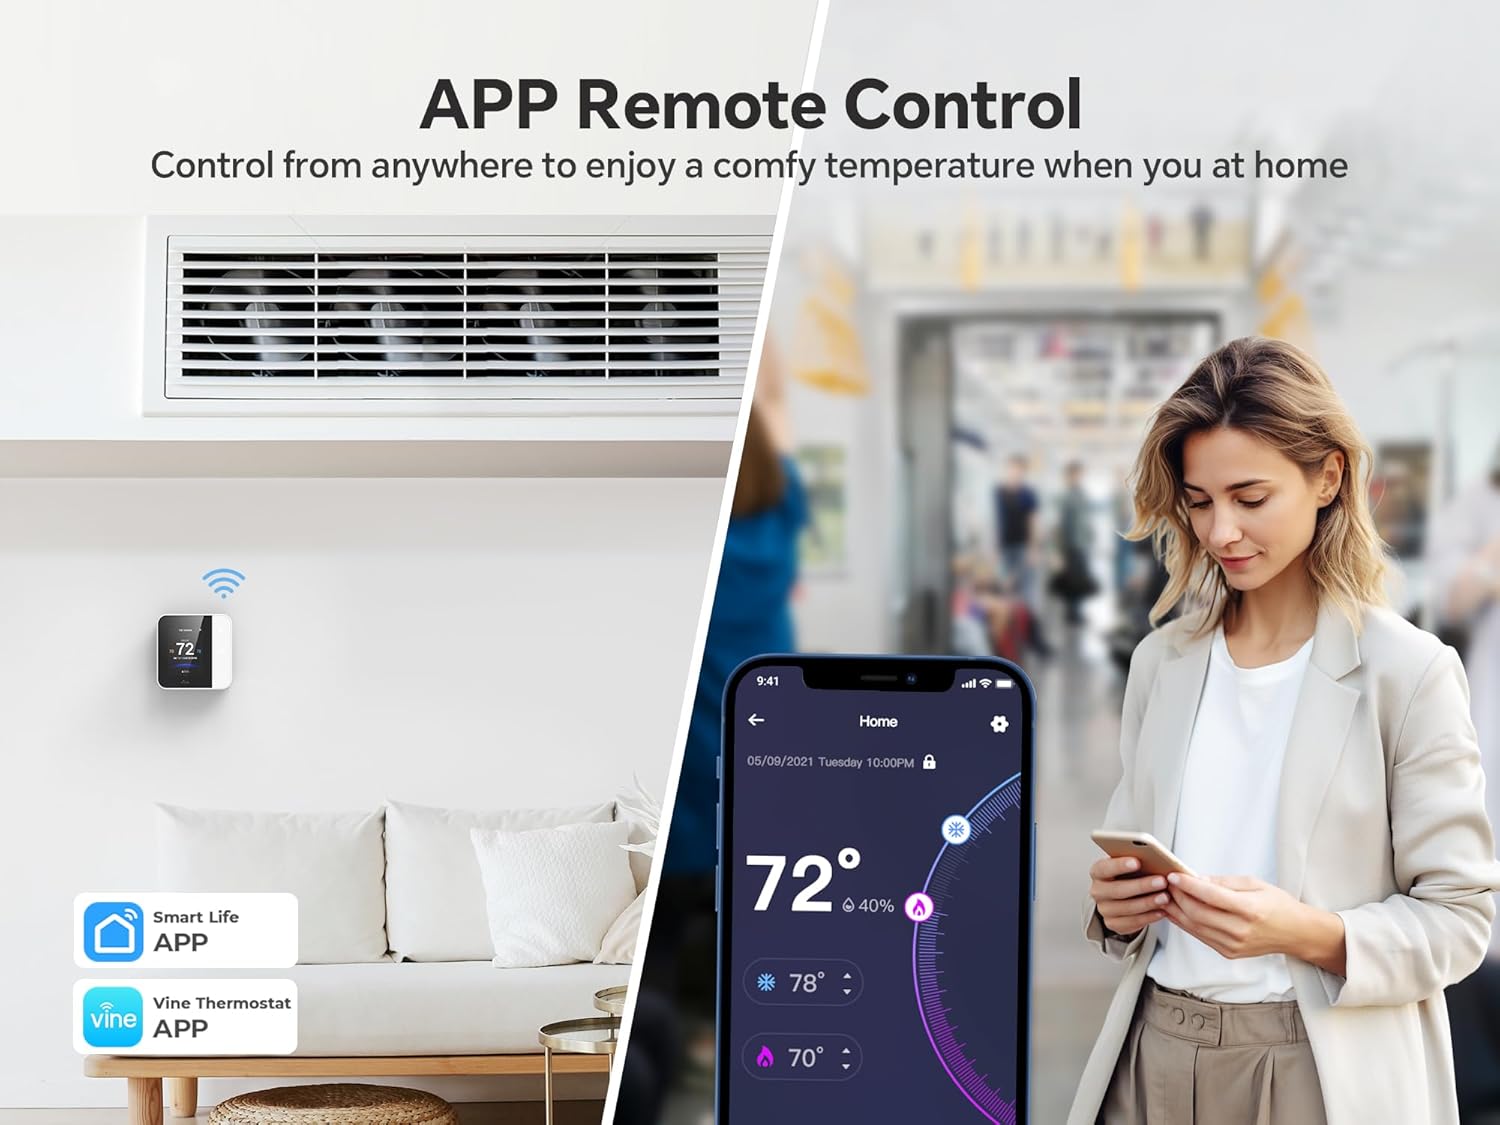
Slika 7.2: Remote control functionality via the Vine Thermostat App, allowing temperature adjustments from any location.
7.4. Glasovno upravljanje
The thermostat is compatible with Amazon Alexa and Google Assistant, enabling hands-free voice control. Simply use voice commands to adjust the temperature or change modes.
- "Alexa, set the room temperature to 72 degrees."
- "Hey Google, turn up the heat."

Slika 7.3: Voice control integration with Amazon Alexa and Google Assistant for convenient temperature management.
7.5. Auto Home/Away with Geofencing
Leverage geofencing technology to automatically adjust the temperature based on your proximity to home. The thermostat can switch to an energy-saving "Away" mode when you leave and return to a comfortable "Home" setting before you arrive.

Slika 7.4: Geofencing feature automatically adjusts thermostat settings as you enter or leave a predefined area.
7.6. Child Lock Functionality
Prevent unintended adjustments by children or others by activating the child lock feature through the mobile application. This locks the thermostat screen, requiring app access for changes.

Slika 7.5: The child lock feature, activated via the app, prevents unauthorized changes directly on the thermostat screen.
8. Održavanje
Regular maintenance ensures optimal performance and longevity of your vine Smart Thermostat.
- Čišćenje: Gently wipe the thermostat screen and body with a soft, damp tkanina. Izbjegavajte korištenje abrazivnih sredstava za čišćenje ili otapala.
- Podsjetnici za promjenu filtra: The thermostat app can provide reminders for HVAC filter changes. Follow your HVAC system manufacturer's recommendations for filter replacement.
- Ažuriranja softvera: Ensure your Vine Thermostat App is updated to the latest version for new features and performance improvements. Firmware updates for the thermostat may also be available through the app.
9. Rješavanje problema
If you encounter issues with your vine Smart Thermostat, refer to the following common problems and solutions:
| Problem | Mogući uzrok | Otopina |
|---|---|---|
| Zaslon termostata je prazan. | Nema napajanja termostata. | Check the circuit breaker for your HVAC system and ensure it is ON. Verify C-wire connection. |
| Ne mogu se spojiti na Wi-Fi. | Incorrect Wi-Fi password, 5GHz network selected, or weak signal. | Ensure you are connecting to a 2.4GHz Wi-Fi network. Double-check the password. Move the router closer or use a Wi-Fi extender. |
| Očitavanje temperature čini se netočnim. | Thermostat location, drafts, or calibration needed. | Ensure the thermostat is not in direct sunlight or near heat sources/drafts. Check app settings for temperature calibration options. |
| HVAC sustav ne reagira na termostat. | Incorrect wiring, power off, or system incompatibility. | Verify all wiring connections are secure and correct. Check power to the HVAC system. Re-confirm system compatibility. |
| Glasovno upravljanje ne radi. | Incorrect linking with Alexa/Google Assistant, or network issues. | Ensure the vine thermostat is correctly linked in your Alexa or Google Home app. Check Wi-Fi connectivity for both the thermostat and smart speaker. |
10. Specifikacije
| Značajka | Detalj |
|---|---|
| Marka | loza |
| Broj modela | B0FFBC4MV4 |
| Dimenzije proizvoda | 0.98"D x 3.54"Š x 3.54"V |
| Težina artikla | 10.5 unci |
| Vrsta kontrolera | Amazon Alexa, Android, Google asistent, iOS |
| Posebne značajke | Auto-Away Mode, Geofence Technology, Lockable, Programmable, Vacation Mode |
| Specifične namjene | Klima uređaj, bojler, peć, toplinska pumpa |
| Vrsta kontrole temperature | Hlađenje, grijanje |
| Tehnologija povezivanja | Wi-Fi (samo 2.4 GHz) |
| Izvor napajanja | Corded Electric (C-wire required) |
| Vrsta zaslona | LCD |
| Metoda kontrole | Aplikacija, dodir, glas |
| Vrsta montaže | Zidni nosač |
11. Jamstvo i podrška
For warranty information, technical support, or any questions regarding your vine Smart Thermostat, please contact vine customer service.
- Proizvođač: loza
- Prodavač: vine_sszn
- Mrežna podrška: Refer to the vineconnected.com webstranica za često postavljana pitanja i dodatne resurse.
- Kontakt: If you have any questions, please feel free to contact us at any time. (Specific contact details like email/phone are not provided in the product data, so a general statement is used).
Ask a question about this manual
Ask about setup, troubleshooting, compatibility, parts, safety, or missing instructions. Manuals+ will review the question and use this page’s manual context to help answer it.