AMZASA AS9027-4AB

AMZASA AS9027-4AB Plug-in Crystal Chandelier Instruction Manual

Model: AS9027-4AB | Brand: AMZASA

Uvod

Hvala na kupnjiasing the AMZASA AS9027-4AB Plug-in Crystal Chandelier. This manual provides essential information for the safe and correct assembly, operation, and maintenance of your new lighting fixture. Please read all instructions carefully before installation and retain this manual for future reference.

Važne sigurnosne informacije

  • Uvijek isključite napajanje prije instalacije, čišćenja ili održavanja.
  • Ovaj proizvod je namijenjen samo za unutarnju upotrebu.
  • Provjerite može li površina za montažu podnijeti težinu uređaja.
  • Use only E12 base bulbs, maximum 40W per bulb (bulbs not included).
  • If using a dimmer switch, ensure bulbs are dimmable and compatible with the switch.
  • Handle glass crystals with care to prevent breakage.
  • Držite ambalažni materijal dalje od djece.
  • Ako niste sigurni u vezi bilo kojeg dijela instalacije, obratite se kvalificiranom električaru.

Sadržaj paketa

Prije početka sastavljanja provjerite jesu li sve komponente prisutne i neoštećene. Ako neki dijelovi nedostaju ili su oštećeni, obratite se korisničkoj podršci.

  • Chandelier Frame with 4 E12 Sockets
  • Glass Crystal Strings (various sizes and shapes, labeled A, B, C, D, E, F)
  • Glass Decorative Saucers
  • Power Cord with In-line ON/OFF Switch
  • Viseći lanac
  • Kuka za strop
  • Isječci za upravljanje kabelima
  • Pribor za montažu (vijci, tiple)
Image showing all components of the AMZASA Plug-in Crystal Chandelier, including the main frame, various crystal strings, glass saucers, power cord with switch, and hanging hardware.

Figure 1: Chandelier Components Overview

Upute za postavljanje i sastavljanje

Follow these steps to assemble and install your AMZASA Plug-in Crystal Chandelier. It is recommended to wear the provided gloves to avoid fingerprints on the crystals. Refer to the assembly video for visual guidance on each step.

Video: AMZASA Plug-in Crystal Chandelier Assembly Guide. This video demonstrates the complete assembly process from unboxing to final installation.

Korak 1: Pripremite komponente

Carefully unbox all components and lay them out on a clean, soft surface. Identify the different crystal types (A, B, C, D, E, F) as shown in the video.

Step 2: Assemble Crystal Saucers (A Crystals)

Attach the 'A' crystals to the small holes around the edge of the glass decorative saucers. Ensure they are securely fastened.

Step 3: Attach Top Crystal Chains (B Crystals)

Connect the 'B' crystal chains between the top center part of the chandelier frame and the light bulb sockets. There are four 'B' chains for the four arms.

Step 4: Attach Arm Crystal Chains (C Crystals)

Attach the 'C' crystal chains to the arms of the chandelier, connecting them from one arm to the central base. Ensure even distribution.

Step 5: Attach Bottom Center Crystals (E Crystals)

Secure the 'E' crystals to the bottom center of the chandelier frame. These are typically shorter, individual crystal drops.

Step 6: Attach Saucer Crystals (F Crystals)

Attach the 'F' crystals to the bottom of the glass decorative saucers that were assembled in Step 2.

Step 7: Attach Hanging Chain

Connect the provided hanging chain to the top loop of the chandelier. Ensure the connection is secure.

Step 8: Install Ceiling Hook and Hang Chandelier

Screw the ceiling hook into a secure ceiling joist or use appropriate anchors for drywall. Hang the chandelier chain from this hook. Adjust the chain length to achieve the desired hanging height.

Image showing the chandelier hanging from a ceiling hook with the power cord routed along the ceiling using clips.

Figure 2: Chandelier Hanging and Cable Management

Step 9: Route Power Cord and Attach Remaining Crystals (D Crystals)

Route the power cord along the ceiling to a power outlet using the provided cable management clips. Once the chandelier is hung, attach the 'D' crystal chains to the arms, connecting them to the central base or other designated points as shown in the video.

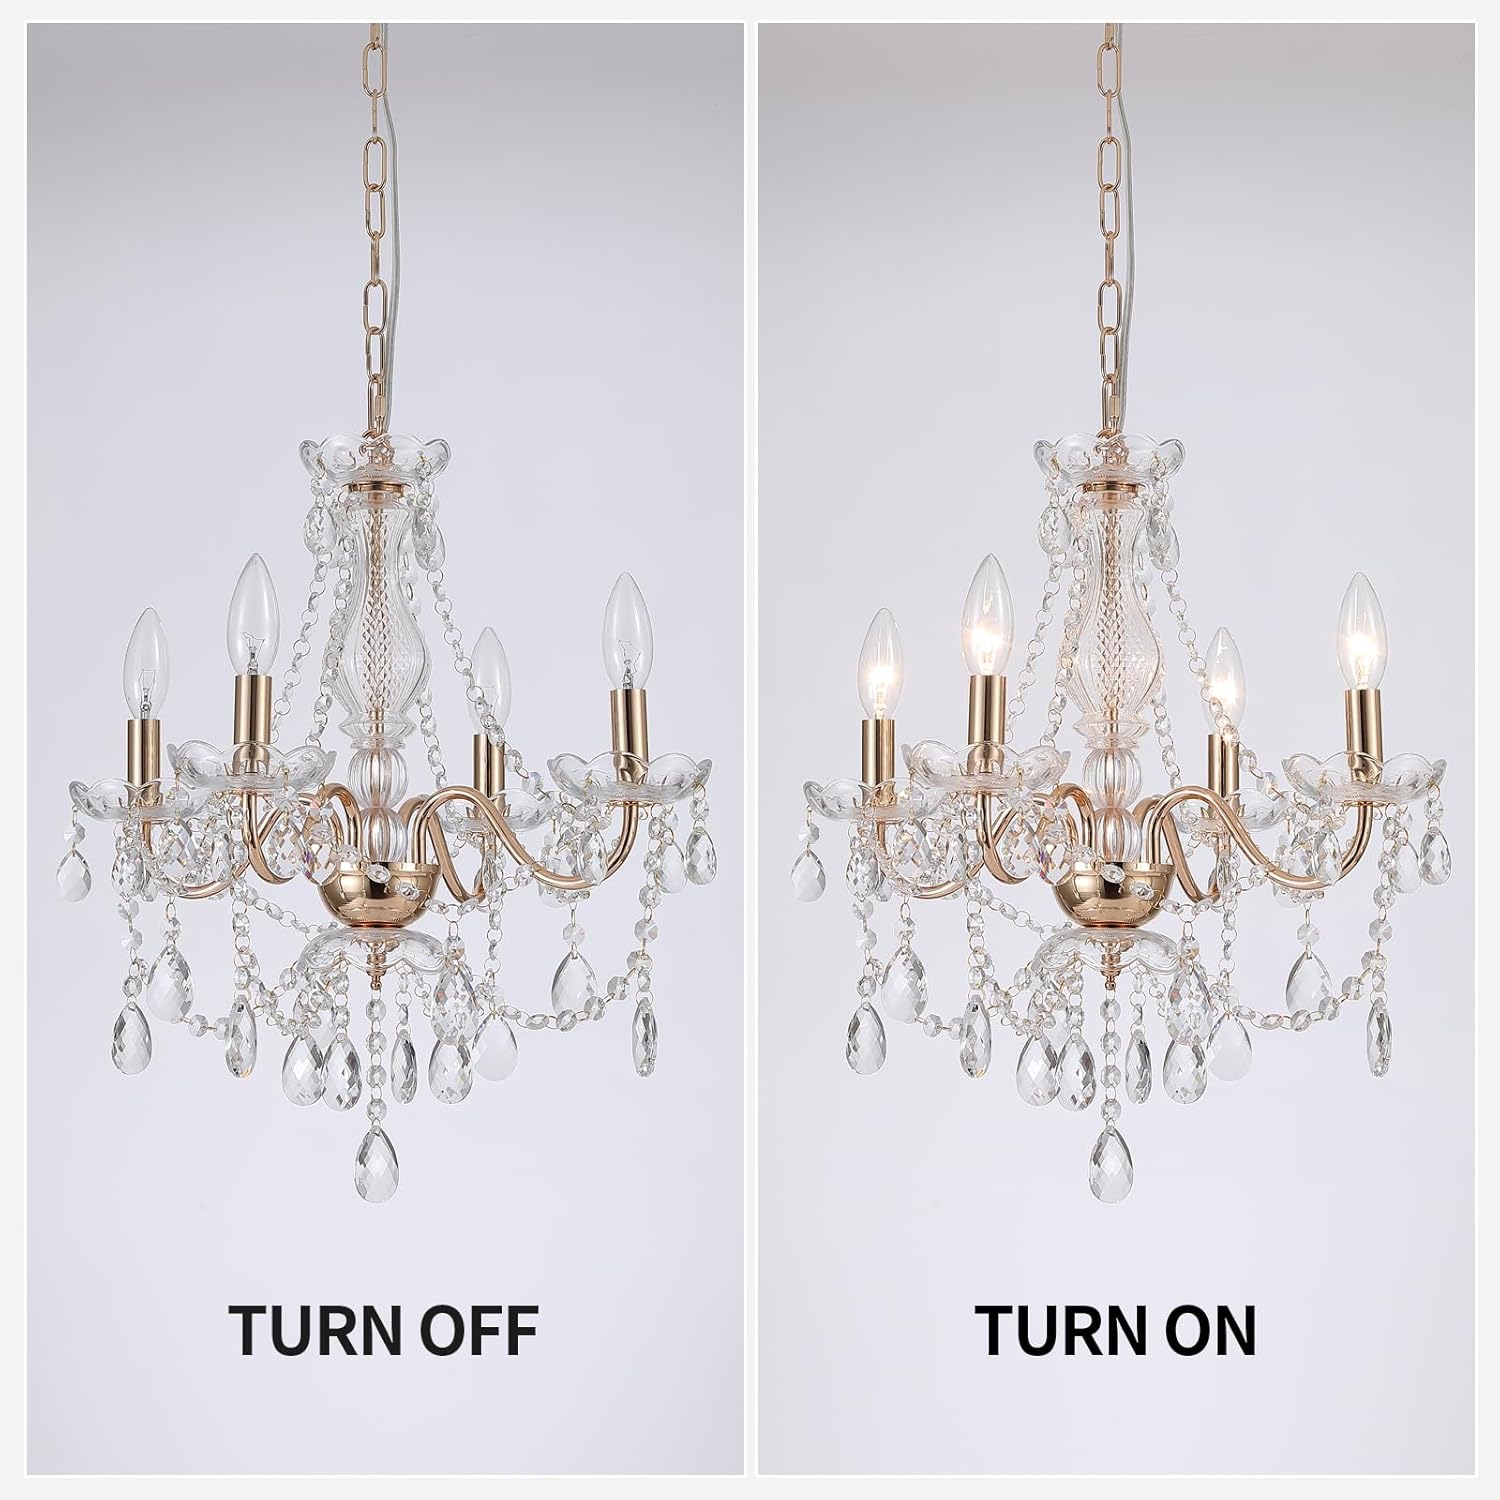
Step 10: Install Light Bulbs

Screw 4 E12 base bulbs (max 40W each, not included) into the chandelier sockets. Ensure bulbs are fully seated.

Upute za rad

  1. Priključak za napajanje: Plug the chandelier's power cord into a standard 110V AC wall outlet.
  2. Uključivanje/isključivanje: Use the in-line ON/OFF switch located on the power cord to control the light.
  3. Funkcionalnost prigušivanja: If you are using dimmable E12 bulbs and have a compatible dimmer switch installed in your wall outlet, the chandelier's brightness can be adjusted. The chandelier itself does not include a dimmer.
Close-up of the in-line ON/OFF switch on the chandelier's power cord.

Figure 3: In-line ON/OFF Switch

Održavanje

  • Čišćenje: To clean the chandelier, first ensure it is unplugged. Use a soft, dry cloth to gently wipe the metal frame and glass crystals. For stubborn dust or smudges on crystals, a slightly damp cloth with mild glass cleaner can be used, followed by a dry cloth. Avoid abrasive cleaners or harsh chemicals.
  • Zamjena žarulje: Ensure the chandelier is unplugged and bulbs are cool before attempting to replace them. Unscrew the old bulb and screw in a new E12 base bulb (max 40W).
  • Njega kristala: Handle crystals with care. If any crystal strings become detached, reattach them using the small metal rings.

Rješavanje problema

ProblemMogući uzrokOtopina
Chandelier does not light up.1. Kabel za napajanje nije priključen.
2. ON/OFF switch is off.
3. Faulty bulb(s).
4. Napajanje outagili je ispalio prekidač.
1. Provjerite je li kabel za napajanje čvrsto uključen u ispravnu utičnicu.
2. Flip the ON/OFF switch to the 'ON' position.
3. Replace bulb(s) with new E12 bulbs.
4. Check your home's circuit breaker and ensure power is restored.
Svjetla trepere.1. Labav spoj žarulje.
2. Incompatible dimmer switch or dimmable bulbs.
1. Ensure all bulbs are screwed in tightly.
2. Verify that both your bulbs and dimmer switch are compatible. If not, replace bulbs or dimmer.
Crystals appear dull or dirty.Dust or smudges on crystals.Clean crystals as described in the Maintenance section.
Chandelier hangs unevenly.Improper installation of ceiling hook or chain.Re-check the installation of the ceiling hook and ensure the chain is securely and evenly attached.

Tehnički podaci

Broj modela:AS9027-4AB
Marka:AMZASA
Dimenzije (D x Š x V):19.9" x 18.1" x 79.7" (Adjustable Height: 59.8" max)
Materijal:Glass, Iron, Crystal
Izvor napajanja:AC (priključak)
Voltage:110 volti
Broj svjetala:4
Max Wattage po žarulji:40 vata
Baza žarulje:E12
Posebne karakteristike:Adjustable Height, Dimmable (with compatible bulbs/switch)
Vrsta instalacije:Plug-in Chandelier
Težina artikla:6.82 funti
Diagram showing the dimensions of the AMZASA Plug-in Crystal Chandelier, including height, width, and adjustable cord length.

Slika 4: Dimenzije proizvoda

Jamstvo i korisnička podrška

AMZASA is committed to providing high-quality products and excellent customer service. If you encounter any issues such as color deviation, missing parts, or difficulties with installation, please contact us directly via email. We aim to provide a response within 24 hours.

Za dodatnu pomoć posjetite AMZASA Store on Amazon.

© 2026 AMZASA. All rights reserved.

Ask a question about this manual

Ask about setup, troubleshooting, compatibility, parts, safety, or missing instructions. Manuals+ will review the question and use this page’s manual context to help answer it.