
1. Uvod
The ThermoPro TP210B is a wireless thermometer system designed to monitor temperatures in refrigerators and freezers. It provides real-time temperature readings from up to two remote sensors to a central receiver unit. This system features a 500 ft (150 m) wireless range, high accuracy, and customizable temperature alerts to help maintain optimal storage conditions for food and other temperature-sensitive items.
Ključne značajke uključuju:
- Prošireni bežični domet: Up to 500 ft (150 m) using updated RF technology for stable connection.
- Pre-Paired for Immediate Use: No complex setup required; units are ready to operate upon powering on.
- Širok raspon mjerenja: Accurate readings from -40°F to 158°F (-40°C to 70°C).
- Smart Temperature Alerts: Customizable high/low temperature alarms on the receiver.
- LCD zaslon s pozadinskim osvjetljenjem: Clear display of current, maximum, and minimum temperatures, visible day or night.
- Rechargeable Transmitter: Transmitter uses a rechargeable lithium battery, suitable for low-temperature environments.
- Fleksibilni položaj: Multiple mounting options for both receiver and transmitters.
2. Sadržaj paketa
- 1 x jedinica za prijemnik
- 2 x Transmitter Units
- 2 x AAA baterije (za prijemnik)
- 1 x USB Charging Cable (for Transmitters)
- 1 x korisnički priručnik
3. Dijagram proizvoda
Familiarize yourself with the components of your ThermoPro TP210B system:

Image: The main receiver unit with its large display and control buttons (MODE, UP, DOWN, HISTORY/CLEAR, LIGHT °F/°C), alongside two smaller transmitter units.
Prijemna jedinica:
- LCD zaslon: Shows temperatures for both channels, Max/Min records, and battery status.
- Gumb MODE: Cycles through settings and alarm modes.
- Gumbi GORE/DOLJE: Adjust values in settings or alarm modes.
- HISTORY/CLEAR Button: Views and clears Max/Min temperature records.
- LIGHT °F/°C Button: Activates backlight and switches temperature units.
- Odjeljak za baterije: Located on the back, for 2x AAA batteries.
Transmitter Units:
- Senzor temperature: Mjeri temperaturu okoline.
- LED indikator: Flashes to indicate data transmission.
- Gumb za napajanje: Uključuje/isključuje odašiljač.
- Priključak za punjenje: USB-C port for recharging the internal lithium battery.
4. Postavljanje
The ThermoPro TP210B units are pre-paired at the factory. Follow these steps for initial setup:
- Instalirajte baterije prijemnika: Open the battery compartment on the back of the receiver unit. Insert 2 AAA batteries, ensuring correct polarity (+/-). Close the compartment.
- Odašiljači naboja: Connect the provided USB charging cable to the charging port on each transmitter unit and to a standard USB power source (e.g., phone charger, computer USB port). The LED indicator will show charging status. Charge fully before first use.
- Odašiljači s uključenim napajanjem: Press and hold the power button on each transmitter unit until the LED indicator flashes.
- Provjerite vezu: The receiver unit should automatically display temperature readings from both transmitters. If not, refer to the Troubleshooting section for re-pairing instructions.

Slika: Krupni plan view illustrating the battery installation for the receiver unit and the USB charging process for a transmitter unit.
5. Upute za rad
5.1 Prikaz prekoview
LCD zaslon prijemnika prikazuje sljedeće informacije:

Image: The receiver's digital display, highlighting the current temperature readings for two channels, along with their respective maximum and minimum recorded temperatures and low battery indicators.
- Channel 1 Temperature: Typically for the refrigerator.
- Channel 2 Temperature: Typically for the freezer.
- Maks./min. zapisi: Highest and lowest temperatures recorded since the last reset.
- Indikator niske baterije: Appears when receiver or transmitter batteries are low.
- Indikator jačine signala: Shows connection status to transmitters.
5.2 Odabir temperaturne jedinice (°F/°C)
To switch between Fahrenheit (°F) and Celsius (°C), press the LIGHT °F/°C button on the receiver unit.
5.3 Postavljanje temperaturnih upozorenja
The system allows you to set custom high and low temperature limits for each channel. An audible and visual alarm will activate if the temperature exceeds these limits.
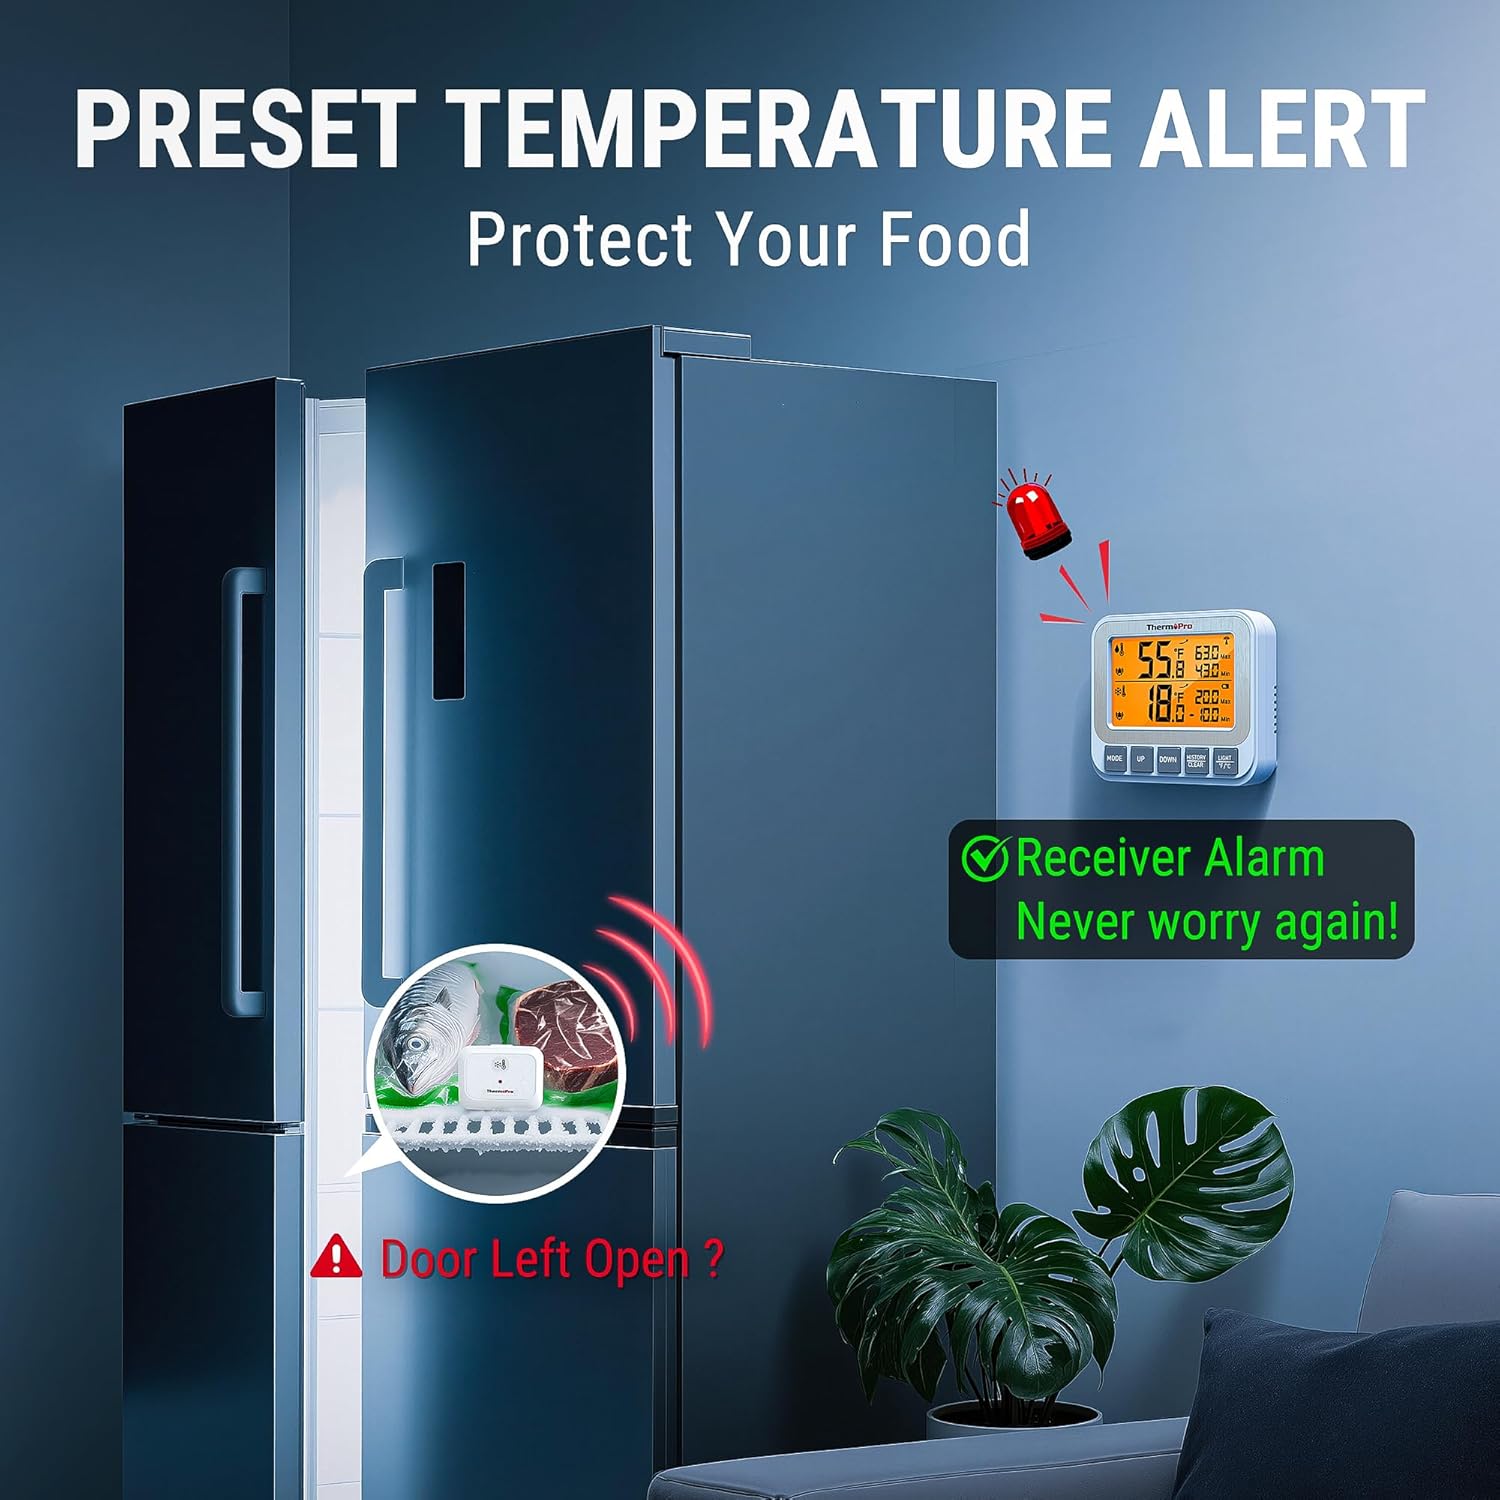
Image: The receiver unit showing an active alarm, with a visual representation of a refrigerator door left open and a transmitter inside, illustrating a scenario where a temperature alert would be triggered.
- Pritisnite tipku NAČIN RADA button once to enter the alarm setting mode for Channel 1 (refrigerator). The high limit will flash.
- Koristite UP or DOLJE buttons to adjust the desired high temperature limit.
- Pritisnite NAČIN RADA again to set the low limit for Channel 1. Adjust with UP or DOLJE.
- Pritisnite NAČIN RADA a third time to enter the alarm setting mode for Channel 2 (freezer). Repeat steps 2 and 3 for Channel 2.
- Pritisnite NAČIN RADA again to exit alarm setting mode. The alarm icon will appear next to the channel if an alarm is active.
5.4 Viewing and Clearing Max/Min Records
The receiver automatically records the maximum and minimum temperatures for each channel since the last reset.
- Pritisnite tipku POVIJEST/IZČISTI gumb jednom za view the maximum recorded temperatures for both channels.
- Pritisnite POVIJEST/IZČISTI opet na view the minimum recorded temperatures for both channels.
- To clear the Max/Min records, press and hold the POVIJEST/IZČISTI tipku na 3 sekunde viewing the records. The display will reset to current temperatures.
5.5 Smjernice za postavljanje
Optimal placement ensures accurate readings and reliable wireless communication.

Image: A visual guide demonstrating the versatility of the ThermoPro TP210B, showing the receiver magnetically attached to a fridge, standing on a table, and hanging from a hook, while transmitters are shown standing on a shelf and clipped to a rack inside a fridge.
- Položaj prijemnika: The receiver can be placed on a countertop using its integrated stand, mounted magnetically to a metal surface (e.g., refrigerator exterior), or hung on a wall using the hanging hole. Position it within 500 ft (150 m) of the transmitters, minimizing obstructions.
- Položaj odašiljača: Place transmitters inside the refrigerator and freezer compartments. They can stand on a shelf or clip onto a rack. Ensure they are not directly exposed to cold air vents or heating elements, which could affect accuracy.

Image: A diagram showing the wireless signal path from transmitters inside a refrigerator and freezer to a receiver unit located in another room, emphasizing the 500-foot range.
6. Održavanje
- Čišćenje: Wipe the units with a damp tkanina. Nemojte uranjati u vodu niti koristiti abrazivna sredstva za čišćenje.
- Battery Replacement (Receiver): When the low battery indicator appears for the receiver, replace the 2 AAA batteries.
- Punjenje odašiljača: When the low battery indicator appears for a transmitter, recharge it using the provided USB cable. A full charge ensures reliable operation, especially in low-temperature environments.
- Skladištenje: If storing the device for an extended period, remove the AAA batteries from the receiver and ensure transmitters are fully charged before storage. Store in a dry, cool place.
7. Rješavanje problema
- No Temperature Readings / Lost Connection:
- Ensure both the receiver and transmitters are powered on.
- Check battery levels for both units. Recharge or replace as needed.
- Move the receiver closer to the transmitters. Walls, metal appliances, and electronic devices can interfere with the wireless signal.
- Ponovno uparivanje: If connection is lost, try re-pairing. Power off all units. Power on the receiver. Then, power on each transmitter one by one. They should automatically reconnect.
- Netočna očitanja:
- Ensure transmitters are not placed directly in front of cold air vents or near heat sources.
- Allow units to stabilize for 30 minutes after placement to get accurate readings.
- Compare readings with another known accurate thermometer if possible.
- Alarm se ne oglašava:
- Verify that the high/low temperature limits are set correctly for each channel.
- Ensure the alarm function is enabled (check for the alarm icon on the display).
8. Specifikacije
| Značajka | Specifikacija |
|---|---|
| Broj modela | TP210B |
| Bežični raspon | Do 500 stopa (150 m) |
| Točnost temperature | ±0.9°F (±0.5°C) od 0°C do 50°C, inače ±1.8°F (±1.0°C) |
| Raspon mjerenja | -40°F do 158°F (-40°C do 70°C) |
| Snaga prijemnika | 2 x AAA baterije (uključene) |
| Snaga odašiljača | Rechargeable Lithium Battery (charging cable included) |
| Prikaz | LCD s pozadinskim osvjetljenjem |
9. Informacije o jamstvu
ThermoPro products are manufactured with high-quality materials and craftsmanship. This product is covered by a limited warranty against defects in materials and workmanship from the date of purchase. Please refer to the official ThermoPro website or contact customer support for specific warranty terms and conditions.
10. Podrška
For any questions, assistance, or troubleshooting not covered in this manual, please contact ThermoPro Customer Service:
- Webstranica: Posjetite službeni ThermoPro webstranica za često postavljana pitanja, registraciju proizvoda i kontakt informacije.
- Email: Pogledajte pakiranje proizvoda ili ThermoPro webweb-mjesto za adresu e-pošte korisničke podrške.
- Telefon: Contact the customer support hotline if available in your region.
Please have your model number (TP210B) and purchase date ready when contacting support.