
1. Uvod
This manual provides detailed instructions for the installation, operation, and maintenance of your JOOAN 4G Solar Security Camera. This outdoor wireless surveillance camera is designed for areas without traditional power or network infrastructure, utilizing 4G cellular connectivity and solar power for continuous operation. Please read this manual thoroughly before use to ensure proper setup and functionality.

Image 1.1: JOOAN 4G Solar Security Camera with its solar panel and a smartphone displaying the camera's live feed, highlighting its 4MP/5MP HD resolution capability.
2. Značajke proizvoda
- 4G povezivost: Operates independently using a SIM card, ideal for remote locations.
- Na solarni pogon: Equipped with a solar panel for continuous charging, reducing the need for external power sources.
- Visoka rezolucija: Snima jasne video zapisetage for effective surveillance.
- Noćni vid u boji: Offers multiple night vision modes including infrared, full-color, and smart color night vision for enhanced visibility in low-light conditions up to 10 meters.
- Lokalna i pohrana u oblaku: Supports up to 256GB SD card storage and optional cloud storage for recorded footage.
- Jednostavna instalacija: Designed for straightforward setup and mounting.
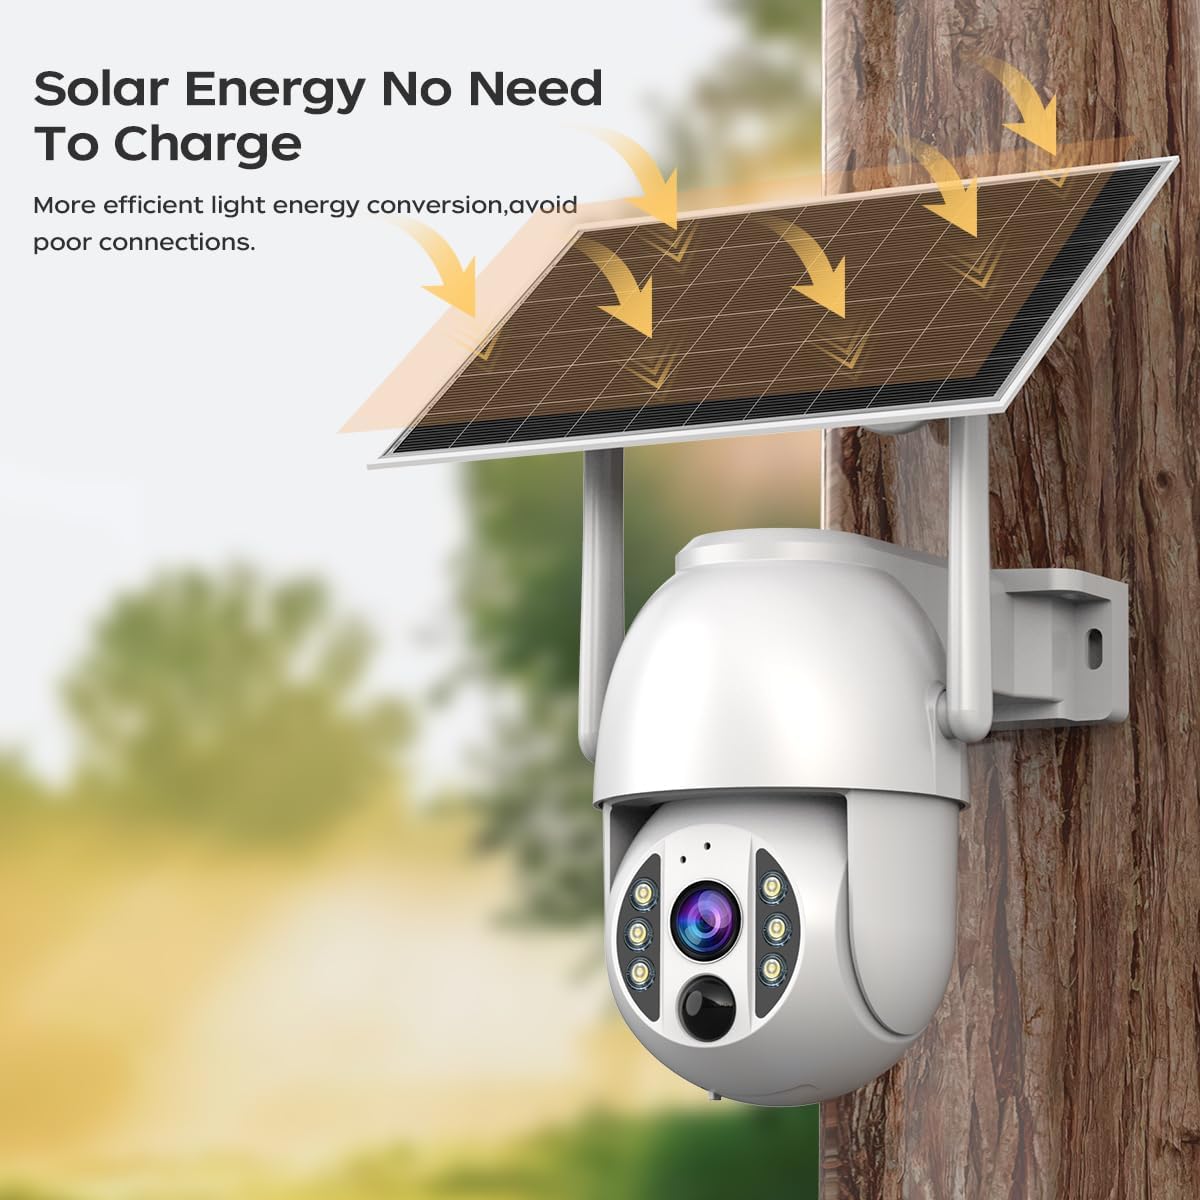
Image 2.1: The JOOAN 4G Solar Security Camera mounted with its solar panel, illustrating its solar energy capability for efficient light energy conversion and avoiding poor connections.
3. Postavljanje i instalacija
3.1. Ugradnja SIM i SD kartice
Before mounting, install a 4G SIM card (not included) and an SD card (up to 256GB, not included) into the designated slots on the camera. Ensure the camera is powered off before inserting or removing cards.

Slika 3.1: Krupni plan view of the JOOAN camera's SD card slot, indicating support for cloud storage and a maximum 256GB SD card.
3.2. Koraci za montažu
- Pozicioniranje i probijanje: Select a suitable location for the camera and solar panel. Mark the drilling points on the wall. Use a drill to create holes at the marked positions.
- Umetnite ekspanzijske vijke: Gently tap the expansion screws into the drilled holes until they are flush with the surface.
- Montirajte kameru: Align the camera bracket with the expansion screws and secure it using the provided screws.
- Kompletna instalacija: Attach the solar panel to the camera bracket or mount it separately in a location with ample sunlight. Ensure all connections are secure.

Image 3.2: Visual guide showing the four installation steps: 1. Positioning and punching, 2. Inserting expansion screws, 3. Mounting the camera with screws, and 4. Completing the installation with the solar panel.
3.3. Povezivanje aplikacije
Download the official JOOAN app from your smartphone's app store. Follow the in-app instructions to add your camera. There are typically two methods:
- Add APP Phone Code: Scan the QR code displayed on your mobile phone APP with the camera lens from a distance of 20-30cm to add the distribution network.
- Add Camera Body Code: Scan the QR code located on the camera body using the mobile phone APP to add the distribution network.

Image 3.3: Illustration of the two connection methods: scanning the APP phone code or scanning the camera body code to establish a network connection.
4. Operacija
4.1. Uključivanje/isključivanje
The camera automatically powers on when sufficient solar power is available or when connected to a power source. To power off, disconnect the power source and allow the battery to deplete, or use the app if a power-off function is available.
4.2. Uživo View i Snimanje
Once connected to the app, you can access the live video feed. The camera supports continuous recording to the SD card or cloud storage (subscription may be required). You can also manually record video or capture screenshots from the live view.
4.3. Detekcija pokreta i upozorenja
Configure motion detection sensitivity and alert settings within the app. The camera will send notifications to your smartphone when motion is detected. Recorded events can be reviewed in the app's playback section.
4.4. Načini noćnog vida
The camera offers three night vision modes, selectable via the app:
- Infracrveni noćni vid: Pruža jasne crno-bijele slike u potpunom mraku.
- Noćni vid u punoj boji: Utilizes built-in spotlights to provide color images in low-light conditions.
- Pametni noćni vid u boji: Automatically switches from infrared to full-color vision upon detection of motion or specific events.

Image 4.1: Comparison of the three night vision modes: Infrared night vision, Full color night vision, and Smart color night vision, demonstrating the camera's ability to pick out details in darkness up to 10 meters away.
5. Održavanje
- Čišćenje leće: Redovito čistite objektiv kamere mekom, suhom krpom kako biste osigurali jasnu kvalitetu slike. Izbjegavajte abrazivna sredstva za čišćenje.
- Čišćenje solarnih panela: Keep the solar panel free from dust, dirt, and debris to maximize charging efficiency. Clean with a damp tkanina po potrebi.
- Ažuriranja firmvera: Check the app periodically for available firmware updates to ensure optimal performance and security.
- Zdravlje baterije: Ensure the solar panel receives adequate sunlight to maintain battery charge. Prolonged periods without sunlight may require temporary charging via a USB power adapter (not included).
6. Rješavanje problema
6.1. Camera Not Connecting to 4G Network
- Provjerite je li SIM kartica ispravno umetnuta i aktivirana s važećim podatkovnim planom.
- Check 4G signal strength at the camera's location.
- Restart the camera by briefly disconnecting and reconnecting its power.
6.2. No Video Feed or Poor Quality
- Verify the camera has sufficient power.
- Check the 4G signal strength.
- Očistite leću fotoaparata.
6.3. Solar Panel Not Charging
- Ensure the solar panel is positioned to receive direct sunlight for several hours daily.
- Clean any dirt or obstructions from the solar panel surface.
- Check the connection cable between the solar panel and the camera.
6.4. SD Card Not Recording
- Ensure the SD card is correctly inserted and formatted within the app.
- Provjerite ima li SD kartica dovoljno slobodnog prostora.
- Provjerite postavke snimanja u aplikaciji.
7. Specifikacije
| Značajka | Detalj |
|---|---|
| Marka | JOOAN |
| Model | B0GCFGYCLX |
| Izvor napajanja | Na solarni pogon |
| Protokol za povezivanje | 4G Cellular (SIM card required), Wi-Fi (for initial setup/local access if applicable) |
| Preporučena upotreba | Nadzor u zatvorenom/vanjskom prostoru |
| Posebna značajka | Jednostavan za instalaciju |
| Skladištenje | Supports up to 256GB SD card, Cloud Storage (subscription may apply) |
8. Jamstvo i podrška
For warranty information and technical support, please refer to the JOOAN official webweb-mjesto ili se izravno obratite njihovoj korisničkoj službi. Sačuvajte račun kao dokaz o kupnji.
Za dodatnu pomoć posjetite: JOOAN Store on Amazon